Patches & Support files - October '97
Windows 95 Service Pack 1
URL: www.microsoft.com/windows/windows95/info/system-updates.htm
Essentially a collection of bug fixes for Windows 95, The Service Pack comes in two versions -- everything on a small one for single users, which we've included here, and a larger one for network managers.
Much of the mass on the larger versions consists of information documents and tools to bulk install the Service Pack on networks in different specialised ways, depending on how Windows 95 is organised on the network -- plus such strictly professional tools as Server Manager, User Manager and Event Viewer for managing a Windows NT network from a Windows 95 workstation.
Installation of the small version is very simple: it's all in a single EXE file and everything is installed automatically. You may not really need it all, but they won't be in the way or take up any room.
OLE 32 bug fix. Corrects file management glitches in Microsoft Word, Microsoft Excel and Microsoft PowerPoint for Windows 95 -- note, however, there has been a subsequent OLE 32 bug fix.
Windows 95 Shell update. This update to the Windows 95 shell32.dll file fixes a problem in which files copied onto themselves can be truncated to a zero-byte file size, and also makes it possible to browse NetWare Directory Service printers from the Add Printer wizard.
Windows 95 Common Dialogue update for Windows 3.1 Legacy Printer Drivers. When 32-bit applications print using Windows 3.1 monolithic drivers or the Windows 3.1 pscript.drv/unidrv.dll driver, the applications sometimes fail. This update fixes that bug.
Vserver update. Fixes a known share-level security problem with file and printer sharing for Microsoft Networks and Samba's SMBCLIENT (a UNIX shareware network client).
NWServer update. Fixes a problem with file and printer sharing for NetWare Networks, which might affect data security for corporate users.
Vredir update. Fixes a problem that affects only Windows 95 users who use Samba UNIX servers.
Windows 95 Password List update. Protects your password file against potential security violations. Warning: This update has a bug itself and there has since been another Password List Update.
Microsoft Plus! update. Obviously only applicable to those with MS Plus!, this provides an updated version of sage.dll to fix a minor problem with System Agent: when version 1.0 System Agent is running, programs that perform floating-point calculations might be slightly off in precision.
Printer Port (lpt.vxd) bug fix. Service Pack 1 will automatically install a version of the parallel port driver (lpt.vxd) that was available previously on the Windows 95 CD in the \DRIVERS\PRINTER\LPT folder. This driver corrects problems seen on some ECP (Extended Capabilities Port) equipped machines.
Update Information Tool. A special applet to determine which Windows 95 upgrades have been installed.
URL: www.microsoft.com/ie/security/authent2.htm
If you are running Windows 95 or Windows NT 4.0, install the new version of Authenticode now. It brings significant improvements to the Internet Explorer security feature and renews important Authenticode information on your computer that expired on June 30.
You need to be running Internet Explorer 3.0, 3.01, 3.02, or Platform Preview 1 of Internet Explorer 4.0 to use the update.
This will help eliminate those annoying prompts when using any ActiveX control in Internet Explorer for Windows 95 or NT.
URL: http://www.microsoft.com/
Microsoft's extensions for Windows 95. Required for many Win95 games.
URL: http://www.quicktime.apple.com
32 bit version of the Quicktime runtime files required for playing Quicktime for Windows .MOV video and audio files.
(v4 for Windows 95)
These files are required by any program written in the Visual Basic programming language. Because over the years there have been several versions of Visual Basic, diffeent programs may require a different version of the runtime file. Version 4 is the latest, though we have included the files for older versions as well. there are Just install/copy them into your Windows directory.
Quicktime for Windows 3.1
URL: http://www.quicktime.apple.com
16-bit version of the Quicktime runtime files required for playing Quicktime for Windows .MOV video and audio files.
Extension to Windows, required for playing Video For Windows .AVI files under Windows 3.1.
(v 2, 3 & 4)
These files are required by any program written in the Visual Basic programming language. Because over the years there have been several versions of Visual Basic, diffeent programs may require a different version of the runtime file. Version 4 is the latest, though we have included the files for older versions as well. there are Just install/copy them into your Windows directory.
OLE32s13
URL: http://www.microsoft.com
Win32s version 1.3 which includes updated OLE drivers and other stuff. See this month's Windows column in PC User magazine for more details.
| User
Level: Accomplished What
you need: Windows NT Workstation 4.0 |
Don't let damaged NT files do you under. Link Harris explains how to make and use an Emergency Repair Disk.
Corrupt system files, a contaminated startup environment or a defective registry -- these horrors can cause NT4 to collapse or prevent booting to the other operating system in a dual-boot scheme. Provided you have an up-to-date Emergency Repair Disk (ERD), however, you can usually salvage your setup without having to reinstall everything from scratch. An ERD is a floppy that contains critical information NT4 needs to know about its own installation and your software, hardware and network configurations.
Creating an ERD
The files destined for the ERD are held in the C:\WINNT\REPAIR FOLDER (directory), where
C:\WINNT is the home folder for your NT4 files. C:\WINNT\REPAIR contains backups of the
registry files as well as other vitals, but these aren't updated automatically when you
make changes -- you have to prod NT4 to do it.

Step 1: Start the Repair Disk Utility rdisk.exe by selecting Run from the
Start menu and typing RDISK. Unless you know that the contents of C:\WINNT\REPAIR are
current, click on Update Repair Info rather than Create Repair Disk.

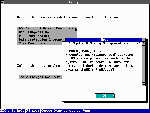
Step 2: When this warning window appears, clicking on Yes updates the
files in C:\WINNT\REPAIR, but doesn't affect the registry or any other NT4 files.

Step 3: After the Repair files have been refreshed on your hard disk, NT4
offers to make a floppy version, called the ERD. (If you can't spot a spare floppy or just
want to defer the job, click No. The updated Repair data will remain in C:\WINNT\REPAIR
until you're ready. Then type RDISK in the Run dialogue box and select Create Repair
Disk.)

Step 4: Be sure to use a 1.44Mb floppy for the ERD. NT4 formats the
floppy before transferring the repair files and, for this application, it can't cope with
a floppy of any other capacity.
Using an ERD
Step 1: Write protect NT4 Setup Disk 2, by moving the slider to uncover
the window. Then make a backup, using either File, Copy Disk from My Computer or diskcopy
from the command prompt. Put the original floppy aside, and use the backup for Steps 2 and
4.
Step 2: Replace the file setupdd.sys on Setup Disk 2 (backup) by copying the updated version from NT4 Service Pack 2 or later (Service Pack 3 is in \PATCHES\NT4SP3 on this month's CD-ROM). That file drives the Emergency Repair process, and the original (supplied on Setup Disk 2) doesn't always replace the NT4 files properly.
Step 3: Insert NT4 Setup Disk 1 in the floppy drive and cold boot your PC, either by pressing the Reset button or turning the mains power off and back on.
Step 4: After you insert Setup Disk 2, select R from the first menu to start the Emergency Repair process, and accept the defaults for the subsequent menu for a full diagnosis.
Step 5: At the next screen, press Enter to detect mass storage. Otherwise, you won't be able to use your CD-ROM drive for Step 7.
Step 6: After removing Setup Disk 3, insert your ERD at the prompt.
Step 7: Insert the NT4 CD-ROM, when the program asks for "the original installation media", to compare the system files on your hard disk with the originals. If your PC immediately hangs with "Checking drive \device\cdrom0\i386\autochk.exe" in the status bar, press Enter to get things moving again.
Step 8: Since the Repair Process removes any Service Pack (SP) updates, reapply the last SP (they're cumulative, so SP2 includes the fixes from SP1, and SP3 includes the fixes from SP1 and SP2).
Microsoft regularly releases enhancements and fixes for Windows NT in the form of service packs. Service Pack 3 has recently been released, focussing on the current curse of Microsoft operating systems: security.
URL: http://www.microsoft.com/NTServerSupport/Content/ServicePacks/Where.htm

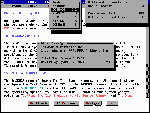
With the Task Manager menu on-screen (two grey boxes at top-right), pressing F3 shows how much RAM remains for swapping tasks (grey box in centre).

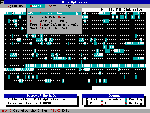
If Windows 95 shares drives with OpenDOS, use Disk Defragmenter from Windows 95 instead of DISKOPT (above) -- and use ScanDisk from Windows 95 rather than the OpenDOS CHKDSK.
| What you need |
| User Level: Accomplished OpenDOS Lite - OpenDOS (with Personal NetWare) - |
Opening Up OpenDOS
Link Harris unlocks the secrets of multitasking and memory management for this free MS-DOS buster.
Following from last month's introduction, we move OpenDOS beyond the bare-bones default installation. In the process we'll reveal the glitches -- as well as the gems.
Snappy setup
Configuring DOS can be tricky, tedious and traumatic -- particularly when you have to
juggle the command reference, a text editor and your objectives. If you shudder at sifting
DOS commands into startup files and shuffling command line switches, you'll love the
OpenDOS Setup program. Its context-sensitive help and nested menus manage your changes,
whether it's something simple like customising the prompt or a heavyweight rethink
regarding a network. Although this gives OpenDOS a good start, you'll probably still have
to tuck into your text editor for fine tuning.
Move into multitasking
Multitasking means running several programs simultaneously. Each program is called a task,
numbered 1, 2, 3... in the order the programs are loaded. The OpenDOS Task Manager (TM)
displays only one of the programs, the foreground task. The others keep on computing in
background, however, even though they're out of sight. For true multitasking, Task Manager
needs at least a 386 with a minimum of 2Mb of RAM. Less powerful PCs have to settle for
task switching, where programs are frozen when shifted to background mode.
To prepare TM to load at bootup, type SETUP at the DOS prompt and select the Task Management menu. Then check Load Multitasking software, either by clicking on that entry or Tabbing to it and pressing Spacebar. It's not necessary to select Configure Task Manager. In fact it's a good idea to go with the default configuration if you haven't used TM before. Then, after you have a feel for the way it interacts with your programs and the way you work, fine-tune TM by rerunning Setup.
That said, it's worth checking out TM's Menu Hot Key (default Esc) and Shift Key(s) (default Ctrl). Pressing the two together, then releasing them both, brings up the TM menu. From there you can tap Insert to create a new task. Translated, this means TM displays a screen with the DOS prompt, where you can launch another program. Also from the TM menu, you can select a task and either switch to it or tap Delete to delete it, which quits that particular program and removes the task from the list. If there's only one task, tapping Delete at the TM menu quits TM as well as the task program.
With TM's Shift key pressed you can switch between tasks using the numeric keypad, without having to go through the TM menu. Tap the task number to move to that task, + to select the next task on the list or - for the previous task. Task hopping with TM's Shift key is far faster than switching between DOS programs run from Windows. If any of your programs use the above key combinations, you can avoid conflicts by changing one or both of TM's special keys before you quit Setup.
After quitting Setup, each time you reboot the prompt
Enable Task Manager (Y/N)?
lets you choose whether to load the TM software. If you use TM most of the time, that prompt's a pain -- particularly since it's so easy to unload TM if you don't want it. To make TM get on with the job without asking, open your autoexec.bat file in Edit or another text editor. Find the line
?"Enable Task Manager (Y/N)?" TASKMGR
and edit it to
TASKMGR
While you're having a squiz, be sure your mouse driver loads before TM -- otherwise you'll render your rodent impotent. The same applies for most of the rest of your autoexec.bat file, which means the line that loads TM should usually come last.
If you only use TM occasionally, scrub its line completely from your autoexec.bat file and start TM when you're in a multitasking mood by typing TASKMGR at the DOS prompt. You should still run Setup to configure TM, however, because that makes several changes to the config.sys, autoexec.bat and taskmgr.ini files. You can also further customise TM from the command line -- to use the numbers on the standard keyboard instead of the numeric keypad, for example -- but these changes only last until you reboot. Type TASKMGR/S? (rather than the usual TASKMGR/?) for a full selection of switches.

The OpenDOS Setup program takes the trauma out of tweaking your startup files. If you don't have a mouse, use the cursor arrow keys to move through the options. Pressing F1 at any stage displays context-sensitive online help.
Troubles with TM
Switching between tasks lowers the data terminal ready (DTR) line, and this will drop any
data flowing through the serial port at the time. This catch-22 means that although your
communications program can upload or download while running as a background task, it's
unreliable to start a file transfer (which must be done in foreground) and then switch the
task to background. Also, many modems interpret a lowered DTR as a cue to hang up the
phone, although you can get around this one by initialising the modem with AT&D0, and
sending +++ATH0 when you want to hang up.
TM is primarily a DOS multitasker. It will multitask with Windows in standard mode, but not Windows in 386 enhanced mode or Windows 95 or NT. However, not all DOS programs are willing to multitask with TM -- Screen Thief, my favourite DOS screen grabber, among them. Finally, although my Pentium multitasks smoothly with TM, it hangs when I try to use task switching mode (TASKMGR/S) instead.
Re-claim conventional memory
DOS applications crave conventional RAM (that below 640Kb). MS-DOS makes room by letting
you push most of DOS into the high memory area (HMA, the first 64Kb of extended memory --
XMS). Also, if there's space, you can nudge many drivers and TSRs into upper memory blocks
(UMBs, snatches of RAM between 640Kb and 1024Kb -- 1Mb).

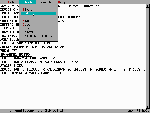
Edit, the OpenDOS text editor, evokes memories of WordStar -- you mark the beginning and end of a block of text to select it.
| Insider tips |
| History repeats . . . Although MS-DOS uses the DOSKEY command for both macros and recalling previous keystrokes, OpenDOS divides those roles between HISTORY, which is installed by default, and DOSKEY. If you don't run DOS macros, free some RAM by REMming out the DOSKEY line in your autoexec.bat file. Be original |
Discover DPMS
OpenDOS strides one step further with DOS Protected Mode
Services (DPMS), which lets you load a number of key drivers and TSRs into XMS, instead of
being restricted to conventional RAM or available UMBs. This is a particular advantage for
those programs that should fit into vacant UMBs -- but won't, because they require much
more RAM for loading than they do after they're resident in memory.
If you have at least a 286, the default OpenDOS installation enables DPMS, by including the line device=c:\opendos\dpms.exe near the top of your config.sys file (where C:\OPENDOS is the directory where your OpenDOS files are kept). To have Setup add a DPMS line, which must come after the one that loads emm386.exe, select DOS System & Memory Management, Memory Manager and be sure Load DPMS software is checked. Although Setup has options for loading dpms.exe into conventional, upper or high memory, none of these affects the entry in config.sys and, when loaded, dpms.exe always occupies about 1Mb of conventional RAM. To view what's hanging about in that first 640Kb, type MEM/B/P at the DOS prompt.
Programs that can use DPMS include server.exe (Personal NetWare server), NWCACHE, NWCDEX, DELWATCH, and the Stacker disk compression software. All except NWCDEX can be configured from Setup. Avoid using Stacker on any drives used by Windows 95 or NT. The same applies to DELWATCH, which goes berserk over long filenames -- use the less weighty DISKMAP, instead, for delete recovery.
Caching in
Although OpenDOS can use the MS-DOS SmartDrive, NWCACHE is smarter in many ways. Both set
up their caches in XMS, but NWCACHE uses less total RAM below 1Mb, and is easier to
shoehorn into UMBs because it can spread itself around. With memory lending enabled,
NWCACHE dynamically adjusts the size of its cache when applications require RAM.
To configure NWCACHE from Setup, select Disk Performance and be sure NWCACHE Disk Cache is checked. Then select Configure, select Allow write delays -- and accept the other defaults. Disk reads are always cached, and Allow write delays is a confusing way of saying disk writes are cached, as well. By default, NWCACHE doesn't display the DOS prompt until all data is flushed from the cache onto disk. Typing NWCACHE/S at the DOS prompt shows which drives are cached. Writes are cached for those drives labelled buffered or delayed, but not cached for drives labelled write through.
Unfortunately there are two subjects where SmartDrive is dux and NWCACHE wears the dunce cap. Not only won't NWCACHE cache CD-ROM drives, it crashes Windows for Workgroups running 32-bit file access. That's because 32-bit file access use its own speedy VCACHE -- which disables SmartDrive, but not NWCACHE, on conflicting drives.
Editing for extra memory
If you're presently accessing your CD-ROM drive with MSCDEX, it's simple to use NWCDEX
instead because, with a couple of minor exceptions, both use the same command line
switches. Open your autoexec.bat file in Edit or another text editor, and replace MSCDEX
and its path (C:\DOS\MSCDEX.EXE, for instance) with C:\OPENDOS\NWCDEX.EXE, and leave all
the switches as they are. Since NWCDEX is network-savvy, it doesn't need the /s required
by MSCDEX, and will ignore that switch if it's present. Type NWCDEX/? at the DOS prompt
for a more complete list of switches than given in the readme.txt file. Finally, be sure
NWCDEX loads before SmartDrive if you want it to cache your CD-ROMs.
The OpenDOS DPMS mainstays mean it's usually no problem to shoo the remaining drivers and TSRs out of conventional RAM and into UMBs. To do this, replace DEVICE with DEVICEHIGH everywhere in config.sys except for the emm386.exe and dpms.exe lines, and replace INSTALL with INSTALLHIGH (an OpenDOS enhancement). In autoexec.bat, use LH at the beginning of all lines that load drivers or TSRs (including NWCDEX, which loads a 7Kb slice into conventional RAM by default). Exceptions here are for NWCACHE and SHARE, which load high automatically, and TASKMGR, which will load high but forces part of DOS into conventional RAM -- leaving you worse off than before. Type MEM/A/P at the DOS prompt for the lowdown of what's loaded into the first 1Mb of RAM and a summary of what's free where. I easily achieved 624Kb free conventional RAM.
Link Harris can be contacted at link@wn.com.au
Previous PC User Offline CD's
Patches and Support files - September '97
Patches and Support files - August '97
Patches and Support files - July '97
Patches and Support files - June '97
Patches and Support files - May '97
Patches and Support files - April '97
Patches and Support files - March '97
Top of page |
WEB: |What's New
| Net Guides | Web Workshop | Net Sites | About PC User |
|