App Store Submission Tips
This series of tips provides you with guidance on the app submission and approval process.
Prevent A Blank Ad Space From Appearing When Ads Are Not Available
If you have dedicated a section of your app for an iAd, it's important to incorporate a banner view delegate that will handle common events, including errors. Having the proper delegate to handle errors maintains the visual experience customers have with ads in your app by preventing a blank banner from being displayed when ads are not available. In addition, if your app displays a blank banner when advertisements are not being displayed, your app will be returned to you by the App Review Team for modification before it can be posted to the App Store.
Read the Working with Banner Views section of the iAd Programming Guide for details on using the bannerView:didFailToReceiveAdWithError: method so that your banner view responds correctly when advertisements are not available. Registered Apple Developers can also watch the WWDC 2010 session video Integrating with iAd, which covers ad banner events in the Application Frameworks section of the presentation.
Creating A Great Presence on the App Store
Everything from the way you describe the functionality of your app to the images you use for your screenshots will impact a customer's initial perception of your app. Here are a few tips that can help you create a great presence for your app on the App Store:
- Write your Application Description with a focus on what makes the functionality or design of your app unique.
- Use engaging screenshots that demonstrate the special capabilities of your application.
- Keep your application icons free of terms like "sale," "lite," or "free."
- Make sure your screenshots and application descriptions do not include objectionable material or irrelevant content.
- Leave out specific information about the price of your app in your Application Description.
- Have your application URL take the user to a functioning website with content about and support for your application.
Consider these tips the next time you upload metadata for your iPad, iPhone, and iPod touch applications.

Don't Forget to Include Network Error Alerts in
Your Code
If your application provides functionality that requires access to a network, it's very important that your code include a customer alert or notification when the network is not available.
The Reachability sample application demonstrates how to use the System Configuration Reachability API to monitor the network state of an iPhone or iPod touch. Use this sample code to learn how to detect the absence of Wi-Fi and Wireless Wide Area Network (WWAN) services so your application knows when it's necessary to produce a network error alert.
Your users will appreciate knowing when an application has no network access — and missing "network alerts" is the third most common reason for applications being returned to developers for modification.
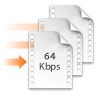
Delivering Video to Your iPhone App
HTTP Live Streaming provides a state-of-the-art standards-based solution for streaming video over wireless networks. A key benefit of HTTP Live Streaming is the ability to dynamically adjust to varying network bandwidth conditions. It can store multiple video clips of different quality on a server, and then deliver the one that matches what the customer is capable of viewing on the network they are
currently accessing.
Your application must use the HTTP Live Streaming protocol if it uses the cellular network to deliver video for any stream with a duration of 10 minutes or more. In addition, applications using HTTP Live Streaming over the cellular network must include a low quality stream of no more than 64 Kbps for your app to resort to when network conditions demand it.
To learn more about using HTTP Streaming, read HTTP Live Streaming Overview in the iPhone Reference Library.
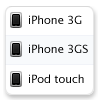
Specify the Devices Your App Runs on Using the Info.plist File
The App Store requires that you provide metadata about your application before submitting it. While most of this metadata is specified using the iPhone Developer Program Portal, the process for selecting device-related dependencies in iTunes Connect is no longer available. Instead, if your app relies on features that are specific to a device, such as the compass on iPhone 3GS, add the UIRequiredDeviceCapabilities key to your app's Info.plist file to indicate the specific hardware feature required.
The UIRequiredDeviceCapabilities key in your app's Info.plist file tells iPhone OS that your app can only be launched on a device with specific features and provides the App Store with a list of device requirements so users don’t download applications that they cannot run.
To learn more about assigning required capabilities for your apps, read the Device Support section of the iPhone Applications Programming Guide.
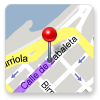
Enhance Your App with Core Location
The Core Location framework allows you to build applications which know where your users are and can deliver information based on their location, such as local weather, nearby restaurants, ATMs, and other location-based information.
If you build your application using Core Location, make sure your app first asks users for permission before you use their location to provide targeted information. Once granted, the information you provide must be beneficial. If your app uses this information primarily to enable mobile advertisers to deliver targeted ads based on user's location, your app will be returned to you by the App Store Review Team for modification before it can be posted to the App Store.
You can learn more about using Core Location by reading the Core Location Framework Reference and downloading the LocateMe sample code available in the iPhone OS Reference Library.
Providing Additional Info for the App Review Process
If your application requires specific settings, user registrations or account information prior to submission to the App Store, be sure to include that info in the field "Demo Account - Full Access" on iTunes Connect. This is a text field visible only to the App Review team, so the information entered in that field will not be viewable on iTunes to the general public. You can also include general instructions or other relevant information about your application which you think would be useful for the review process.

The Importance of App Name and Icon Consistency
It’s important when customers look for your app on their devices that they immediately recognize its icon and name, just as they appeared when the user downloaded your app from the store.
There are various creative ways to design your App Store icon so that it is similar to the icon that will be displayed on a user’s device—one technique for instance is to present a close-up of a specific icon section—but whatever approach you take, make sure the small icon retains a very similar look to the large one.
Similarly, you should create a name for your app that will be consistent with what customers see on the App Store and how it appears on their device. If your app’s name in iTunes Connect is, for instance, “Coraline’s Creative Cajun Cooking,” good choices for short names for devices might be “CreativeCajun,” or “CajunCooking” or “Coraline’s,” which directly evoke the long name, but not “Good Eats,” “Louisiana,” or “Comfort Food,” which do not.
The golden rule is simply that an end user should instantly associate the name and large icon in the iTunes App Store with the name and app icon on their devices.

The Art of Using Keywords Successfully
Improper use of keywords is the fourth most common reason for App Store rejections. When you spend the time to come up with well thought out keywords for the audience you're trying to reach, it increases the likelihood they will find your app on the App Store.
The most common rejections are for keywords which are offensive, objectionable words or phrases; using trademarks, company or product names, unauthorized use of celebrity names and/or likenesses; and irrelevant keywords (i.e., keywords not pertaining to the submitted application). Some examples:
- Suitable keywords: Puzzle, solving, game
These keywords are directly applicable to the description of your application and its functionality. - Unsuitable keywords: Racing, Fart, Bejeweled, EA
These are all grounds for rejection as Racing and Fart are irrelevant and Bejeweled and EA are registered trademarks.
- Suitable keywords: Racing, drive fast, speed, NOS
These keywords provide a description of the user experience and are related to your application's features. - Unsuitable keywords: Free, Nascar, Dale Earnhardt Jr.
Using these keywords will cause your app to be rejected. The application is not free, Nascar is a registered trademark, and Dale Earnhardt Jr. is a well-known public figure. Without explicit rights from public figures you cannot use their names or likenesses.
- Suitable keywords: Learn, master, study, lessons, Spanish, quick reference, Spain, espanol, travel, 3.1
These keywords connect with interested searchers' likely frame of mind, 3.1 is appropriate since it's the minimum iPhone OS version. - Unsuitable keywords: Date, Rosetta Stone, Dutch, French, 3.0, 2.2
Rosetta Stone is a registered trademark, dating has nothing to do with the application, and it does not teach Dutch or French. Since the minimum OS version of this apps is 3.1, users would not be able to install it if they are running iPhone OS 3.0 or earlier.
You can learn more by reading the App Store Quick Reference: Assigning Keywords For Your App
How To Avoid Having Your App Rejected for Core Functionality Issues and Crashing
The two most common reasons for application rejection are issues with core functionality and crashing. Core functionality encompasses the belief that customers rightfully expect all the features described in the marketing text and release notes to work as described, and likewise that all the buttons and menu items within the application will be fully functional (i.e., no grayed out buttons or notifications that a feature will be implemented later). Before you submit your app for approval, make sure that every aspect of your application is fully functional and that the marketing text and release notes correspond to the end user experience.
Also, make sure you thoroughly test your application on iPhone and iPod touch in addition to the iPhone Simulator. A large percentage of applications are rejected due to various types of crashes, including crashes on launch, which would have been found and dealt with if they'd been tested on an actual device. Don't skip that step in the development process.
A Word About the "Easter Egg" Policy
"Easter Eggs," little programs hidden inside other programs, have long been part of the programming universe, most often as jokes or ways to sign otherwise uncredited work for those able to find them. If you want to add an innocuous Easter Egg to your application for that purpose, just use the Demo Account Field to let the review team know the unlocking steps. Apple considers this information confidential and will not reveal those steps or their existence.
On the other hand, not telling the review team about an Easter Egg in your code in order to circumvent the review process is not allowed. When its existence becomes known, as it inevitably will, our first step will be to remove the offending application from the App Store.
Just Right "Lite"
Using a "Lite" version to show how it feels to use what you make and what kinds of things your app can do is definitely a good way to find customers who will pay for the full version of your application. But store shoppers tell us it only works if you follow a few simple rules:
- Make sure the functionality you decide to include is complete. Battles that require weapons only available in the full version, for instance, are annoying and irritating instead of enticing.
- Don't set time limits on your "Lite" version, either for run times or life times. Applications that will only run for a set number of minutes per session, or that expire altogether after some period of time, don't recruit customers so much as leave a bad taste in their mouths.
- Only display the UI for what your "Lite" version will do. Grayed out menu commands, "more track/car choices" you can see but not select, etc. makes your "Lite" version feel more like a commercial than a product, and an annoying and ineffective one at that.
- Do include information about your full application, including an option to buy, in either your application's About section or on the splash screen. Just make sure the option to continue using the "Lite" version is there as well. A good impression lasts forever.
It's important to follow these simple rules not only to create a better user experience, but also because your app will be returned to you by the App Review Team for modification if it is found to have time limits, incomplete functionality, or disabled functionality.
Changing the Status of Your App -
“Developer Rejected” and “Developer Removed From Sale”
Once you have submitted your binary, iTunes Connect allows you to manage and edit many aspects of your application. However, it’s important to understand the impact making changes has on your application, depending on its state.
Developer Rejected
If you need to submit a new binary for your application prior to it being reviewed by the App Store Review Team, you can change the status of your application to Developer Rejected. To do so, log in to iTunes Connect, click on the Manage Your Applications module, then click the Reject Binary button from the application summary view.
Keep in mind that changing the status of your application to Developer Rejected while it is in the review process removes your application from the review queue. The review process will start again from the beginning once you resubmit your binary.
Developer Removed From Sale
If you want to remove your application from sale, log in to iTunes Connect, click on the Manage Your Applications module, then click the Remove From Sale button from the application summary view.
When you change the status of your application to Developer Remove From Sale, you remove the entire application from sale, not just the version that was live when you selected Remove From Sale. If you have an update that is approved, the status of the application will still be in the Developer Removed from Sale state.
Once you are ready to re-post your application for sale on the App Store, you can follow step-by-step instructions available in the Manage Your Applications FAQ section in iTunes Connect.
Read more app submission tips
With In App Purchase, iPhone OS 3.0 Is a Minimum Requirement
When offering In App Purchase, your deployment target must be set to iPhone 3.0. While the Store Kit framework can co-exist with iPhone OS 2.x, the functionality requires iPhone 3.0. The App Store checks applications that use In App purchase and requires that they make iPhone OS 3.0 the minimum OS version.
Naming Your App
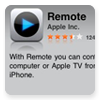
The name you select for your app is perhaps one of the most important aspects to marketing your app and can distinguish your app on the App Store. Here are a few things to keep in mind when naming your app or changing the name of your app.
- Creating a Memorable App Name. A short, concise, and memorable name will leave an impression on potential customers. Let your app name draw attention and use the marketing description to provide the features. Be sure the name you submit in iTunes Connect matches the name within your app. Inconsistent naming of your app can lead to customer confusion and could affect user experience and the quality of reviews submitted for your app.
- Changing the Name of Your App. You can change the name of your existing app only when submitting an update of your app binary. If you submit an app name which is already in use within the same geography in which your app is sold, you will be prompted to enter another name.
Showcase Your App with Engaging Screen Shots
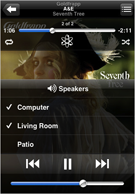
Engaging screen shots can make a significant influence on a user’s perception of your app. This is your opportunity to demonstrate the capabilities, graphics, and usability of your app. When creating screen shots to be posted to the App Store, follow these general guidelines:
- Make sure the content is legible and appropriate.
- Consider cultural sensibilities and restrictions.
- Take screen shots on the target device (not the Simulator). To do this, hold down the Power button and press the Home button. The screen shot is saved to Camera Roll.
- Always remove the status bar from screen shots.
- Donʼt forget to localize screen shots. Set the language for iPhone before taking screen shots by going to Settings » General » International » Language.
Assign the correct type for your in app catalog item
When creating an in app catalog item ensure that you select the correct type: consumables, non-consumables, or subscription. You won’t be able to change this setting once your in app purchase has been created. You can learn more about In App purchase by reading the Getting Started with In App Purchase on iPhone OS 3.0. For step-by-step instructions on In App purchase creation within iTunes Connect, read the In App Purchases section of the iTunes Connect Developer Guide.
Creating App Icons for the Home Screen and
App Store
You have the ability to provide several pieces of artwork that will be visible to customers visiting the App Store. The artwork for the small icon which will be displayed on a user's Home Screen should be similar, if not identical, to the artwork for the large icon that will represent your app on the App Store. If the artwork for these icons are significantly different, your users may get confused. You can find details on preparing your application artwork in the iPhone Developer Program Portal User Guide.

Do not Include Pricing Information in your
Marketing or Icon
If you intend to market your application internationally, do not include pricing information in your application name, marketing text, or icon, as it can lead to user confusion. Let the App Store list the price of your application, as it appropriately sets the price for the intended region.
Be Sure to Provide Network Error Messages
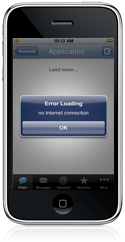
If your application connects to the network, it's important that you provide the appropriate error messages when the network is not present. See the Reachability iPhone program sample which demonstrates the use of the System Configuration Reachability API to detect the absence of WiFi and Wireless Wide Area Network (WWAN) services, so that you can notify your users that a network connection is not available. Your application can then take appropriate action at the first point where network services are required.

Make sure you have the rights to your content
Ensure that you have the rights to all content used within you app, including code, icons, images, music, and the overall concept. If your content is questionable we will require proof of ownership.
Test your app on iPhone or iPod touch
Once your app is ready, make sure to put it through a rigorous testing process to ensure functionality, behavior, and usability are exactly as you expect. The majority of our rejections come from crashing applications or functionality that just doesn’t work. Make sure you test your application directly on iPhone and/or iPod touch. The iPhone Simulator may be an incredible tool during your development, however nothing beats the real hardware for final testing.
 App Store Review Status
Percentage of submissions reviewed within the last 7 days
82%
New Apps
93%
App Updates
Last Updated: Aug 11, 2010
Contact the App Review Team
If you have an urgent fix you want prioritized, or have a question for the App Review Team send an email to appreview@apple.com. Please include the application name and Application Apple ID in your email.
News and Announcements
- August 2010
- July 2010
- June 2010
- May 2010
- April 2010
- March 2010
- February 2010
- January 2010
- December 2009
- November 2009
- October 2009
- September 2009