Unit Testing Applications
Unit tests help you write robust and secure code. Xcode provides an easy-to-use flexible unit-testing environment that you can use to ensure your code works as designed as it goes through changes.
This chapter introduces unit testing and describes how you can take advantage of it in your projects.
For a case study in unit-testing adoption and usage, see:
Xcode is already configured for unit testing. You don’t need to install additional software.
Unit Testing Overview
Unit testing lets you specify behavior that your code must exhibit to ensure that its functionality remains unchanged as you modify it to, for example, make performance improvements or fix bugs. A test case exercises your code in a specific way; if the results vary from the expected results, the test case fails. A test suite is made up of a set of test cases. You can develop one or more test suites to test different aspects of your code.
Unit tests are the basis of test-driven development, which is a style of writing code in which you write test cases before writing the code to be tested. This development approach lets you codify requirements and edge cases for your code before you get down to writing it. After writing the test cases, you develop your algorithms with the aim of passing your test cases. After your code passes the test cases, you have a foundation upon which you can make improvements to your code, with confidence that any changes to the expected behavior (which would result in bugs in your product) are identified the next time you run the tests.
Even when not using test-driven development, unit tests can help reduce the introduction of bugs in your code. You can incorporate unit testing in a working application to ensure that future source-code changes don’t modify the application’s behavior. As you fix bugs, you can add test cases that confirm the bugs are fixed. However, adding unit tests to a project that’s not designed with unit testing in mind may require redesigning or refactoring parts of the code to make them testable.
The Xcode unit-testing environment is based on the open-source SenTestingKit framework. This framework provides a set of classes and command-line tools that let you design test suites and run them on your code.
Xcode offers two types of unit tests: logic tests and application tests.
Logic tests. These tests check the correct functionality of your code in a clean-room environment; that is, your code is not run inside an application. Logic tests let you put together very specific test cases to exercise your code at a very granular level (a single method in class) or as part of a workflow (several methods in one or more classes). You can use logic tests to perform stress-testing of your code to ensure that it behaves correctly in extreme situations that are unlikely in a running application. These tests help you produce robust code that works correctly when used in ways that you did not anticipate. Logic tests are iPhone Simulator SDK-based; however, the application is not run in iPhone Simulator: The code being tested is run during the corresponding target’s build phase.
Application tests. These tests check the functionality of your code in a running application. You can use application tests to ensure that the connections of your user-interface controls (outlets and actions) remain in place, and that your controls and controller objects work correctly with your object model as you work on your application. Because application tests run only on a device, you can also use these tests to perform hardware testing, such as getting the location of the device.
Setting Up Testing
Logic unit tests (introduced in “Unit Testing Overview”) allow you to perform exhaustive, highly tailored testing of your code. To perform logic tests, you build a unit-test bundle using the iPhone Simulator SDK. When you build the unit-test bundle, Xcode runs the test suites that are part of the bundle. You incorporate test suites into a test bundle by adding SenTestCase subclasses to the bundle. These classes contain test-case methods that call the API to exercise and report whether the calls produced the expected results. Xcode reports whether the tests passed or failed in text editor windows and the Build Results window.
Application unit tests let you test your code within an application running on an iOS device, with access to the resources available in the Cocoa Touch framework.
This section describes how to set up a project for each type of unit test.
Setting Up Logic Testing
To set up a logic–unit-test bundle in a project:
Add an iPhone OS unit-test bundle target to the project. Name the target
LogicTests(you can use any name you like for your unit-test bundles, but you should include the suffix Tests to identify them as such).For details about adding targets to a project, see “Creating Targets” in Xcode Build System Guide.
Set the LogicTests target as the active target.
Add a group called Tests to the Group & Files list, and select that group in the list.
Add a unit-test class to the unit-test-bundle target. Each unit-test class in the bundle makes up a test suite.
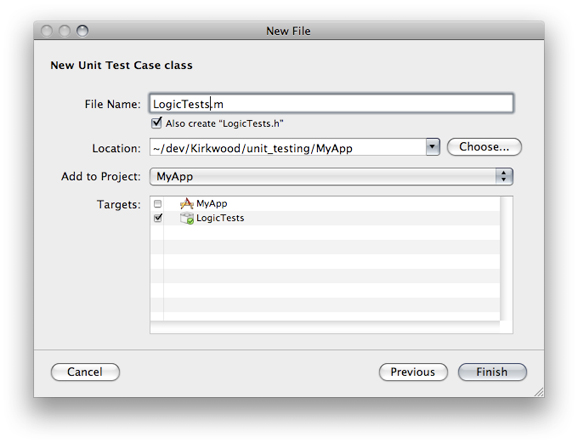
Choose File > New, select the iPhone OS unit-test class template, and click Next.
Name the class
LogicTests(you can use any name here, too).Select the option to create the header file.
Ensure that LogicTests is the only target selected in the target list.
Change
LogicTests.hso that it looks like this:#import <SenTestingKit/SenTestingKit.h>
#import <UIKit/UIKit.h>
@interface LogicTests : SenTestCase {}
@end
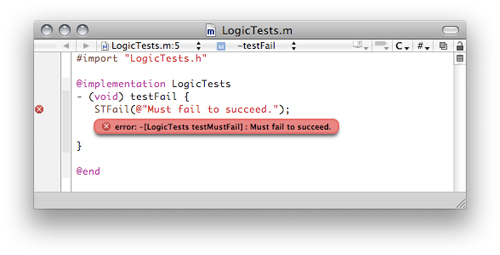
Change
LogicTests.mso that it looks like this:#import "LogicTests.h"
@implementation LogicTests
- (void) testFail {STFail(@"Must fail to succeed.");
}
@end
Set the base SDK for the project to iPhone Simulator 3.0 or later.
For more information about the Base SDK build setting, see “Setting the Base SDK.”
Set the active target to LogicTests and choose Build > Build. If the unit-test bundle is configured correctly, the build fails and Xcode displays an error message in the text editor.
Now make the test case pass by changing the highlighted lines in
LogicTest.m:#import "LogicTests.h"
@implementation LogicTests
- (void) testPass {STAssertTrue(TRUE, @"");
}
@end
At this point you have a correctly configured logic–unit-test bundle. See “Writing Tests” to learn how to add test cases to it.
Setting Up Application Testing
To set up an application–unit-test bundle in a project:
Make a copy of the target that builds the application to test by choosing Duplicate from its shortcut menu, and name it
<application_name>Testing(for example, MyAppTesting). (You can use any name for this target, but you should include the suffix Testing to identify it as a target used to run application unit tests.) The only purpose of this target is to run application unit tests.Add an iPhone OS unit-test bundle target to the project. Name the target
<application_name>Tests(for example, MyAppTests).For details about adding targets to a project, see “Creating Targets” in Xcode Build System Guide.
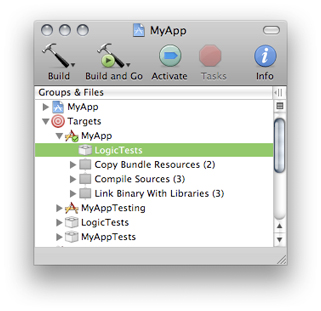
Make the MyAppTesting target dependent on the MyAppTests target by dragging MyAppTests to MyAppTesting.
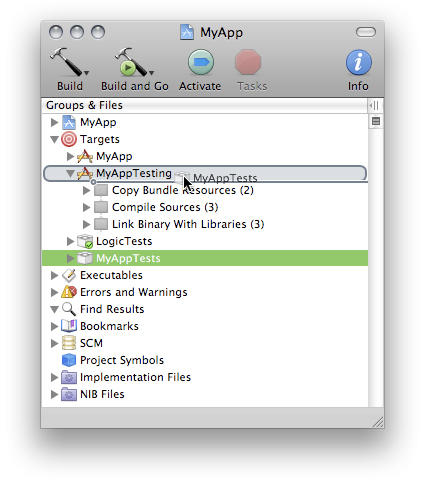
Making the MyAppTesting target dependent on the MyAppTests target ensures that when you build MyAppTesting, MyAppTests gets built first (if you have modified MyAppTests since it was last built).
Embed the MyAppTests bundle into the MyAppTesting bundle by dragging the
MyAppTests.octestproduct to the MyAppTesting target Copy Bundle Resources build phase.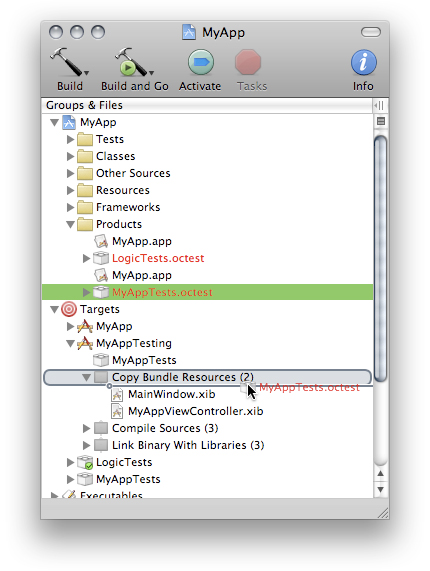
Add a group called Tests to the Groups & Files list (if it doesn’t already exist), and select that group in the list.
Add a unit-test class to the MyAppTests target. Each unit-test class in the bundle makes up a test suite.
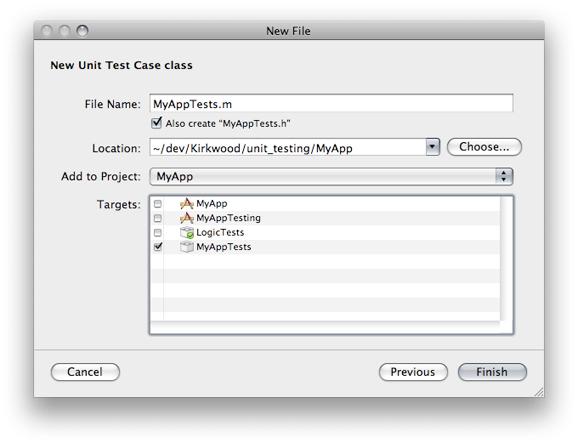
Choose File > New, select the iPhone OS unit-test class template, and click Next.
Name the class
MyAppTests(you can use any name for this class, but it should have the suffix Tests for easy identification).Select the option to create the header file.
Ensure that MyAppTests is the only target selected in the target list.
Change
MyAppTests.hso that it looks like this:#import <SenTestingKit/SenTestingKit.h>
#import <UIKit/UIKit.h>
@interface MyAppTests : SenTestCase {}
@end
Change
MyAppTests.mso that it looks like this:#import "MyAppTests.h"
@implementation MyAppTests
- (void) testFail {STFail(@"Must fail to succeed.");
}
@end
Set the Base SDK for the project to iPhone Device 3.0 or later.
For more information about the Base SDK build setting, see “Setting the Base SDK.”
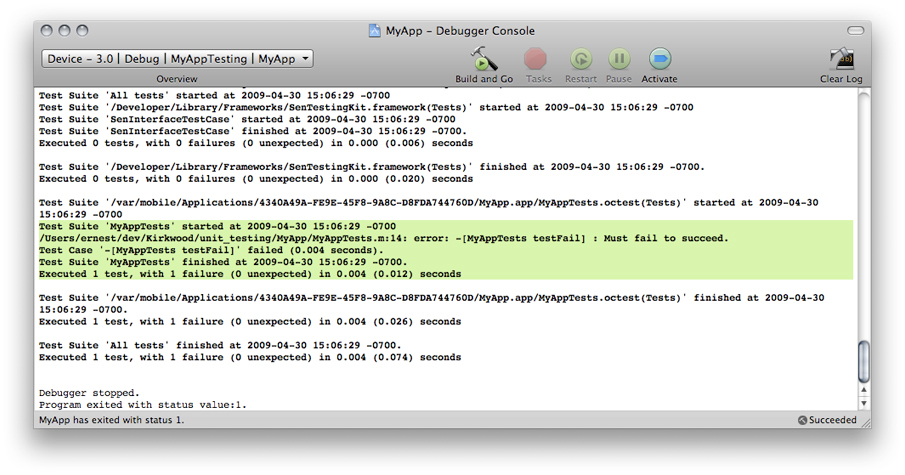
Set the active target to MyAppTesting and choose Build > Build and Run. Xcode builds your application, installs and launches it on your device, and runs the test suite, which fails. You can see the test results in the console. This outcome confirms that application unit testing is set up correctly.
Now make the test suite pass by changing the highlighted lines in
MyAppTests.m:#import "MyAppTests.h"
@implementation LogicTests
- (void) testAppDelegate {id app_delegate = [[UIApplication sharedApplication] delegate];
STAssertNotNil(app_delegate, @"Cannot find the application delegate.");
}
@end
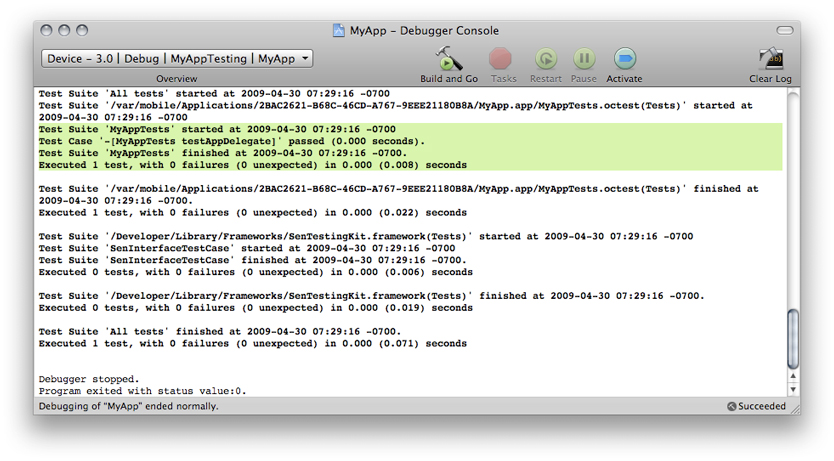
Now that you have a correctly configured application unit-test bundle, see “Writing Tests” to learn how to add test cases to it.
Writing Tests
After configuring a unit-test bundle with a unit-test class (which implements a test suite), you add cases to the suite by adding test-case methods to the class. A test-case method is an instance method of a unit-test class that’s named test..., with no parameters, and whose return type is void. Test-case methods call the API they test and report whether the API performed as expected—for example, whether it returns the anticipated return or whether it raises an exception. Test-case methods use a set of macros to check for the expected conditions and report their findings. “Unit-Test Result Macro Reference” describes these macros.
For a test case to access the subject API, you may have to add the appropriate implementation files to the unit-test bundle and import the corresponding header files into your unit-test class. For an example of a project that uses unit tests, see the iPhoneUnitTests sample-code project.
This is the structure a test-case method:
- (void) test<test_case_name> { |
... // Set up, call test-case subject API. |
ST... // Report pass/fail to testing framework. |
... // Tear down. |
} |
Each test-case method is invoked independently. Therefore, each method must set up and tear down any auxiliary variables, structures, and objects it needs to interact with the subject API. Conveniently, you can add a pair of methods to a unit-test class that are called before and after each test-case method is invoked: setUp and tearDown. Just like test-case methods, the type of both methods is void and they take no arguments.
This is an example of a setUp/tearDown method pair:
- (void) setUp { |
test_subject = [[MyClass new] retain]; |
STAssertNotNil(test_subject, @"Could not create test subject."); |
} |
- (void) tearDown { |
[test_subject release]; |
} |
Note: When there’s a reported failure in a setUp or tearDown call, the failure is ultimately reported in the test-case method that originated the call.
Running Tests
To ensure that changes you make to your code don’t modify its correct behavior, you should run your test suites periodically, especially after making significant changes. This section shows how to run logic and application tests. It also shows how to set up an application target so that Xcode runs logic tests every time you build it.
Running Logic Tests
To run your logic tests, all you need to do is build the appropriate logic-test target. You can build such a target in two ways:
Making the the target active and choosing Build > Build
Choosing Build from the target’s shortcut menu
The Build Results window shows the results of your tests.
You can make Xcode run your logic tests every time you build your application. This way you don’t have to remember to run those tests.
Follow these steps to set up your application target so that building it runs your logic tests:
Drag your logic-test target into your application target. This action makes the application target depend on the logic-test target.
When you build the application target, Xcode builds the logic target first, reporting test failures in the process.
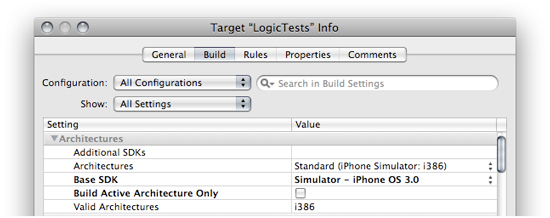
In the LogicTests Info window, display the build pane.
Choose All Configurations from the Configuration pop-up menu.
Choose All Settings from the Show pop-up menu.
In the Architectures group of the build-setting list, set Base SDK to iPhone Simulator 3.0, and deselect Build Active Architecture Only.
Running Application Tests
To run your application tests, you must build, and run or debug the application-testing target. Remember that you can use such targets only to run or debug test cases; you cannot use them to run your application on your device interactively.
The console displays the results of your application tests.
Writing Testable Code
The Xcode integrated support for unit testing makes it possible for you to build test suites to support your development efforts in any way you want. You can use it to detect potential regressions in your code or to validate the behavior of your application. These capabilities can add tremendous value to your projects. In particular, they can improve the stability of your code greatly by ensuring individual APIs behave in the expected ways.
Of course, the level of stability you receive from unit testing is highly dependent on the quality of the test cases you write. These are some guidelines to think about as you write code to ensure that it’s easily testable:
Define API requirements. You should define requirements and outcomes for each method or function that you add to your program. These requirements should include input and output ranges, exceptions thrown and the conditions under which they are raised, and the type of returned values (especially if they are objects). Specifying requirements and making sure that requirements are met in your code help you write robust, secure code.
See the iPhoneUnitTests sample-code project for an example of using exceptions to identify and report incorrect API usage by a client.
Write test cases as you write code. As you write each API, write one or more test cases that ensure the API’s requirements are met. It’s harder to write unit tests for existing code than for code you haven’t written yourself or have written recently.
Check boundary conditions. If the parameter of a method expects values in a specific range, your tests should pass values that include the lowest and highest values of the range. For example, if an integer parameter can have values between 0 and 100, inclusive, three variants of your test may pass the values 0, 50, and 100, respectively.
Use negative tests. Negative tests ensure your code responds to error conditions appropriately. Verify that your code behaves correctly when it receives invalid or unexpected input values. Also verify that it returns error codes or raises exceptions when it should. For example, if an integer parameter can accept values in the range 0 to 100, inclusive, you should create test cases that pass the values -1 and 101 to ensure that the API raises an exception or returns an error code.
Write comprehensive test cases. Comprehensive tests combine different code modules to implement some of the more complex behavior of your API. While simple, isolated tests provide value, stacked tests exercise complex behaviors and tend to catch many more problems. These kinds of test mimic the behavior of your code under more realistic conditions. For example, in addition to adding objects to an array, you could create the array, add several objects to it, remove a few of them using different methods, and then ensure the set and number of remaining objects is correct.
Cover your bug fixes with test cases. Whenever you fix a bug, write one or more tests cases that verify the fix.
Last updated: 2010-07-02