|
|||||
![]() Click to enter
Click to enter ![]() Home
Home ![]() The Final Test
The Final Test ![]() What You'll Need
What You'll Need ![]() Not just a
Pretty Face
Not just a
Pretty Face
Rose Vines creates a two-page Web site in WinWord 97.
In this tutorial, we'll make a two-page Web site. The first page we'll create all by ourselves. The second page we'll sit back and let a Wizard build the foundation for us, then we'll go in and fiddle with it till we're happy.
Our first task is to decide what we're going to put on our Web pages. If you spend a little time doing this before you start the actual job of creation, you'll save yourself lots of time.
Our first page is going to act as a virtual 'welcome
mat'. It will contain a single image and a single-colour
background. The second page will contain the meat of our
(very skimpy) site. There we'll put a little information
about ourselves, our e-mail address and a link to one of
our favourite sites on the Web.
Click to enter
Let's get started on the first page.
To begin with, you need to create a blank Web page:
1. Open the File menu and choose New (don't simply click the New File button on the toolbar, as you need to specify the type of new file you're creating and the toolbar button doesn't give you this option).
2. In the New File dialogue box, click the Web Pages tab and then double-click the Blank Web Page icon to create a blank Web document.
We want to centre a single graphic on the page, so press the Enter key a few times to move the cursor down a few lines, click the Center icon on the toolbar. Open the Insert Menu, choose Picture and then choose From File from the submenu. Word will prompt you to save the document at this time, so click Yes. When the Save As dialogue appears, use the Save In box to choose a location for your document, name your document welcome.html, and click Save.
Note: You'll find it easier to upload your completed Web site to your Internet service provider once you've finished if you store all the files -- HTML documents, graphics and any other files -- in the same folder. I find it easiest to create a folder called Web Sites and then store each Web site in its own separate subfolder within that folder.
After saving your document, Word will open the Insert Picture dialogue. We're going to insert the picture images03.jpg from the Space Theme Set. It's located in the \PROGRAM FILES\MMGALLRY folder on the hard drive. (If you haven't installed space.exe from the PC User Offline CD-ROM, select any other smallish GIF or JPG image from your drive.) In the Insert Picture dialogue:
1. Use the Look In box to open your C: drive. Double-click the PROGRAM FILES folder to open it, double-click the \MMGALLRY subfolder to open it and, finally, double-click the SPACE subfolder to open it and display its contents.
2. Double-click images03.jpg to insert it into your document. Word 97 will automatically copy the images03.jpg file into the folder where you saved welcome.html.
3. Press Enter to move the cursor down one line and type the words "Click to enter".
4. Select the text you've just typed, open the Format Menu and choose Font. In the Font dialogue box, select Times New Roman, 14 point size, dark blue colour, and bold effect. Click OK.
5. We're going to make the picture on our page a hyperlink to another page. Right-click the image you inserted and choose Hyperlink from the pop-up menu to display the Hyperlink dialogue box. (This is a shortcut -- you can also select the graphic, open the Insert Menu and choose Hyperlink to do the same thing.)
6. In the Link To File Or URL box, type main.html, make sure the Use Relative Path For Hyperlink box is checked, and click OK. It doesn't matter that this file does not yet exist; we'll create it later.
7. Finally, click the Background icon (the paint bucket) and choose the black colour.
Notice how the cursor turns into a pointing hand if
you place it over the image, indicating that the image
has a hyperlink attached. Once we've created our second
page, that hyperlink will become active. Right now, if
you click it, all you'll get is an error message.
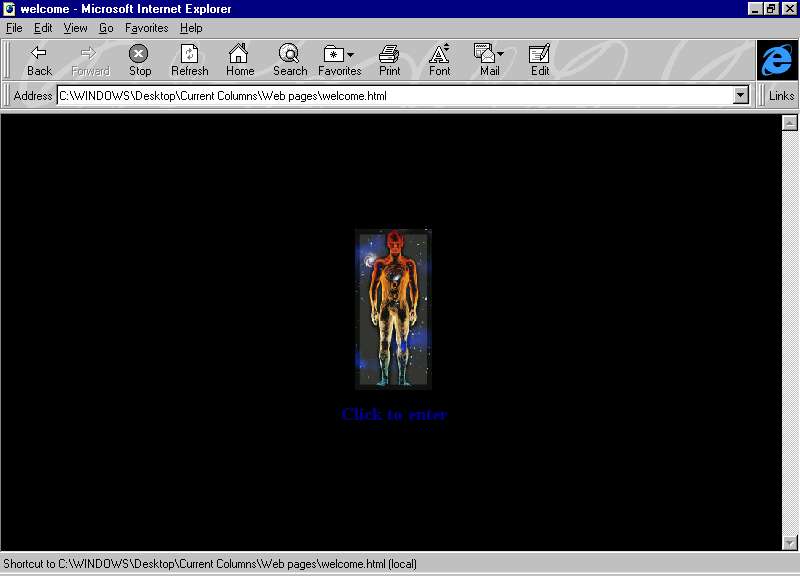
A graphical hyperlink creates an
effective and fast-loading 'front door' to your site.
Home
We made our first page simple because we want it to load quickly and attract surfers' attention. The second page is our main page, with actual content.
We're going to use a WinWord Wizard to build this page for us.
1. From the File Menu choose New, click the Web Pages tab in the New dialogue box, and double-click the Web Page Wizard icon to start the Wizard.
2. Select the Centered Layout from the list, click Next, then choose the Community layout style and click Finish. The Wizard will create a page for you.
3. Select the heading text and replace it with "My Page" (you can substitute your name here if you like).
4. Select the next paragraph and type "Welcome to My Page. Here you'll find some information about me and a link to one of my favourite sites." to replace it.
5. Delete the following line that says "Type some text", and then select and delete the first item in the menu. We only need two items in our page.
6. Select the text "Add a list item" on the next line and type "About me" in its place. Repeat the procedure with the next list item replacing the sample text with "Visit Australian PC User's Web site".
7. Select "Type some text" on the next line and delete it.
8. On the final line of the page, delete the last vertical line and words "Related Page 3".
9. Select the words "Related Page 1" and type "Back to the entrance" in its place. Select "Related Page 2" and replace it with "e-mail me".
You've now rid yourself of all unnecessary items on the page. We're going to add some biographical details which we'll link to the About Me list item, add three other links, and then we'll be done.
We don't want our biographical info messing up the look of our page, so let's put it far enough down the page so that it's out of view (a neater alternative is to put it on a separate page entirely, but we're trying to keep this simple).
So, press the Enter key enough times to move the cursor a number of lines below the original screen. Click the Align Left button, and type a heading "About me". Use the font formatting tools to format this as a heading.
Now, press Enter and type some information about yourself. Interests, family history, employment background, whatever you feel like. Select the text you type and format it in a smaller point size than the heading you created.
When someone clicks the About Me list item we want them to jump straight down to the About Me heading and text. To do that, we need to turn the About Me heading into a 'bookmark'.
1. Select the heading, open the Insert menu and choose Bookmark to display the Bookmark dialogue.
2. Type AboutMe (no spaces) in the Bookmark Name box and click Add.
All that's left to do is create our hyperlinks. Scroll back to the top of the page. We want people to be able to click the words or the graphics in the list for the hyperlink to work, so we're going to add the same hyperlink to the list item and corresponding graphic.
1. Right-click the first squirly dot in the list, and choose Hyperlink from the pop-up menu.
2. In the Insert Hyperlink dialogue, click the Browse button beside the Named Location In File box. You'll see a list of bookmarks in this file. There's only one, of course, called AboutMe. Select it and click OK.
Now do the same thing with the 'About me' text in the list. Select and right-click it, insert a Hyperlink and point the hyperlink to the AboutMe bookmark. You'll see that the text changes colour and is underlined, indicating it's a hyperlink.
We've done these two hyperlinks separately because, if you select the graphic and text all at once, you'll end up with ugly looking underlines between the two.
Let's go through a similar process to add a hyperlink to PC User's Web site. This time the hyperlink is not a bookmark or a file on your hard drive; instead, it's a hyperlink to an address on the World Wide Web.
1. Right-click the second squirly dot in the list and choose Hyperlink from the menu.
2. In the Link To File Or URL box type http://www.pcuser.com.au
3. Select the "Visit the Australian PC User Web site" text, right-click and choose Hyperlink, type http://www.pcuser.com.au in the URL box and click OK.
Two more links and we're done. For the first one, select "Back to the Entrance" and insert a hyperlink for it. This one goes to the URL welcome.html (the first page we created).
The final hyperlink isn't to a page or bookmark. This
one, when clicked, will open the user's e-mail program,
place your e-mail address in the To box and let them
create an e-mail message. The process is almost the same:
select the text, right-click and choose Hyperlink. This
time, click the down arrow beside the Link To File Or URL
box and select mailto from the list. Then type your
e-mail address immediately after the mailto in the URL
box, so the full URL reads mailto:rosevines@msn.com
(substituting your e-mail address for mine, of course!).

Use a WinWord Wizard to do the
hard work in creating a page and then modify it to your
heart's content.
The final test
That's it. Your two-page site is complete. You can test it immediately by clicking the Web Page Preview button in your toolbar. This will load your Web browser and let you try out your site.
If anything doesn't work, return to Word and work on your HTML documents. There's plenty you can do to improve this sample site. We've used two very different backgrounds: you might like to make a more consistent look between the two screens. You might also want to select the "My Page" heading on main.html, turn it into a bookmark called PageTop, then insert a text or graphic hyperlink at the very bottom of the page called "Back to the top" and link it to the PageTop bookmark.
Play around with these pages. I'm sure you'll think of
other improvements. And make sure you have a look at the
HTML source code that Word has created automatically for
you. You've created your Web pages by pointing, clicking,
typing and inserting, but in the background, Word has
created the HTML code needed by the Web. You can see this
code by choosing HTML Source from the View Menu.
What you'll need
On the PC User Offline CD-ROM you'll find several 'theme sets' from Microsoft. These are collections of background wallpapers, sounds, buttons, lines and images. We're going to use items from the Space Theme Set in this tutorial. If you want to follow along exactly, run space.exe to install the theme set in your \PROGRAM FILES\MMGALLRY folder. If you don't want to use the theme set, you can substitute any other graphics you like as you read the tutorial. If you like the look of the themes, you can download additional sets from www.microsoft.com/workshop/design/mmgallry
Apart from some ready-made images, all you need is a
copy of Word 97. It's important that when you install
Word you select the Web Page Authoring (HTML) check box,
otherwise you won't have Word's Web tools available. If
you can't find the tools as you follow along in this
tutorial, grab your Word disk, run the Setup program and
add the Web Page Authoring features.
Not just a pretty face
Here's the source code that lurks behind the welcome.html page.
<HTML>
<HEAD>
<META HTTP-EQUIV="Content-Type"
CONTENT="text/html; charset=windows-1252">
<META NAME="Generator"
CONTENT="Microsoft Word 97">
<TITLE>welcome</TITLE>
<META NAME="Version"
CONTENT="8.0.3326">
<META NAME="Date"
CONTENT="9/26/96">
<META NAME="Template"
CONTENT="C:\PROGRAM FILES\MICROSOFT
OFFICE\OFFICE\HTML.DOT">
</HEAD>
<BODY TEXT="#000000"
LINK="#0000ff" VLINK="#800080"
BGCOLOR="#000000">
<FONT SIZE=2><P> </P>
</FONT><P> </P>
<P> </P>
<P ALIGN="CENTER"><A
HREF="main.html"><IMG
SRC="IMAGES03.JPG" BORDER=0 WIDTH=77
HEIGHT=161></A></P>
<B><FONT SIZE=4
COLOR="#000080"><P
ALIGN="CENTER">Click to enter</P>
</FONT><FONT COLOR="#000080"><P
ALIGN="CENTER"> </P></B></FONT></BODY>
</HTML>

Top of page
|What's New | Software | Net Guides | Web Workshop | Net Sites | About PC User |
All text © 1997 Australian Consolidated Press - PC User Magazine