Configuring Applications
This chapter describes how to set up your application’s properties to customize its runtime environment, configure its entitlements to take advantage of iOS security features, and how to adapt its build process for different SDKs and architectures.
This chapter also shows how to upgrade a target that builds an iPhone application into either a target that builds an application optimized for iPhone and iPad, or two targets, one to build an iPhone application and one to build an iPad application.
To learn how to set up a device for development, see “Managing Devices and Digital Identities.”
Editing Property-List Files
Property-list files are XML files that organize data into named values and lists of values using simple data types. These data types let you create, transport, and store structured data in an accessible and efficient way. Xcode uses two main types of property-list file to store runtime-configuration information for your application:
Information-property list. These files, commonly referred to as info-plist files, contain essential information used by your application and iOS. See “The Information Property List” in iOS Application Programming Guide for information about the application properties defined in info-plist files.
Entitlements. These files define properties that provide your application access to iOS features (such as push notifications) and secure data (such as the user’s keychain).
To learn more about property-list files, see Property List Programming Guide.
To edit a property-list file, perform one of these actions:
To edit it in the editor pane of the Project window, select the file in the Groups & Files list or in the detail view.
To edit it in a dedicated editor window, double-click the file in the Groups & Files list or in the detail view.
For more information about the Groups & Files list, see “Project Window Components” in Xcode Workspace Guide.
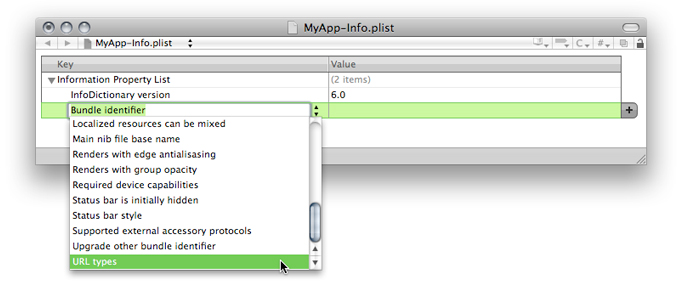
Figure 2-1 shows a property-list editor window with an info-plist file.

Each row in the file specifies a property definition (or key/value pair). Key cells specify property names (and their data types). Value cells specify property values.
These are the property-list editing actions you can perform with the property-list editor:
Add a sibling property. With a row selected and its disclosure triangle closed, click the Add Sibling button (shown in Figure 2-2) or press Return to add a sibling to the property.
After adding the sibling, choose the property type from the property-type menu in the key cell, as shown in Figure 2-3.
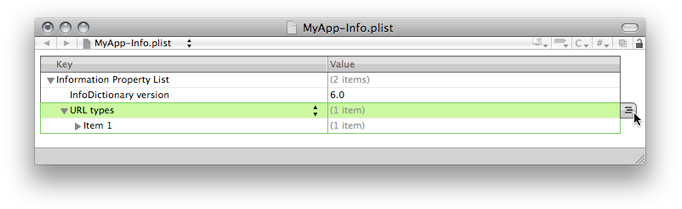
Add a child property. With a row with a multi-value property—a property whose value is a list of values—selected and its disclosure triangle open, click the Add Child button (shown in Figure 2-4) or press Return to add a child to the property.
Delete property. With a row selected, press Delete to delete the row.

To make editing property-list files convenient and to ensure the file’s structure is correct, the property-list editor uses property-list–file schemas to display property names in the Key column, and formatted values (such as check boxes for Boolean values) in the Value column. However, you may want to see the properties’ key names and values in their XML (or “raw”) form. To toggle between viewing the formatted keys and values and their raw form, toggle the Show Raw Keys/Values option of the property-list editor shortcut menu.
Managing Application Entitlements
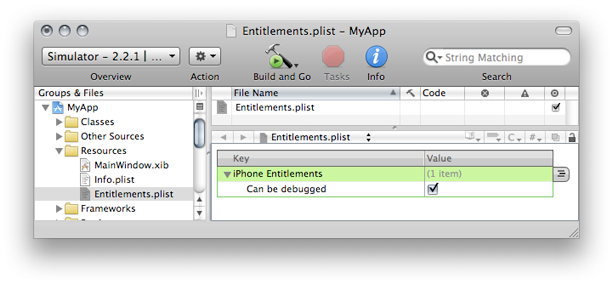
iOS provides access to special resources and capabilities—such as whether your application can be debugged—through properties called entitlements. To specify entitlement information in your application, you add an entitlement property-list file containing entitlement definitions (key/value pairs) to your project. When you build your application, Xcode copies the file to the generated application bundle.
To add an entitlements property-list file to your project:
In the Groups & Files list, select the Resources group.
Choose File > New File.
Choose the iPhone OS > Code Signing > Entitlements template.
Name the file
Entitlements.plist. (You can use any name; just ensure it matches the value of the Code Signing Entitlements build setting, as explained later in this section.)Set the type of the property-list file to iPhone Entitlements.
With the file selected in the text editor, choose View > Property List Type > iPhone Entitlements plist.
Add your entitlement entries to the file.
For each entitlement property you need to define:
Click the Add Child or Add Sibling buttons to the right of the selected row. The Add Child button has three lines depicting a hierarchy, the Add Sibling button has a plus (+) sign on it.
Choose the entitlement property from the pop-up menu that appears.
If the entitlement you need to add doesn’t appear in the menu, choose View > Property List Type > Default for File Type. Then enter the entitlement-key name and type.
Enter the value for the property.
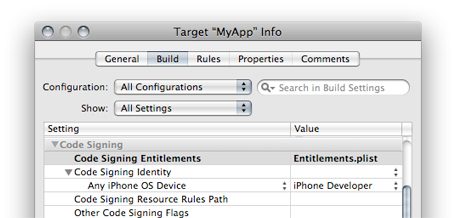
Set the Code Signing Entitlements build setting for the target to the name of the newly added entitlements property-list file.
Conditionalizing Compilation and Linking
The two iOS runtime environments are the simulation environment and the device environment. You use the former to test your application on your Mac, and the latter to test it on a device. These environments are fundamentally different; therefore, when using technology that’s implemented differently in the two environments you need to tweak your code so that some of it runs in iPhone Simulator application but not on a device.
This section shows how to target code to iPhone Simulator or a device and which frameworks (or libraries) to link, depending on whether the active SDK belongs to the iPhone Simulator SDK family or the iPhone Device SDK family.
Compiling Source Code Conditionally for iOS Applications
There may be times when you need to run code on the simulator but not on a device, and the other way around. On those occasions, you can use the preprocessor macros TARGET_OS_IPHONE and TARGET_IPHONE_SIMULATOR to conditionally compile code.
Listing 2-1 shows how to use the TARGET_IPHONE_SIMULATOR macro to determine whether code meant for iOS is being compiled for the simulator or devices.
Listing 2-1 Determining whether you’re compiling for the simulator
// Set hello to "Hello, <device or simulator>"! |
#if TARGET_IPHONE_SIMULATOR |
NSString *hello = @"Hello, iPhone Simulator!"; |
#else |
NSString *hello = @"Hello, iOS device!"; |
#endif |
Listing 2-2 shows how to use the TARGET_OS_IPHONE macro in a source to be shared between Mac OS X and iOS.
Listing 2-2 Determining whether you’re compiling for iOS
#if TARGET_OS_IPHONE |
#import <UIKit/UIKit.h> |
#else |
#import <Cocoa/Cocoa.h> |
#endif |
The TARGET_OS_IPHONE and TARGET_IPHONE_SIMULATOR macros are defined in the TargetConditionals.h header file.
Linking Frameworks Conditionally for iOS Applications
There may be occasions when you need to configure your application target so that it links against one framework to run on the simulator and a different framework to run on a device.
To link a framework only when using a particular SDK, set the Other Linker Flags build setting in all configurations for the SDK you want the definition to apply to -framework <framework_name>.
If you need to, you can add another condition to the Other Linker Flags build setting to specify a different SDK and framework.
See “Editing Conditional Build Settings” in Xcode Project Management Guide for details about defining build settings for particular SDKs.
Upgrading a Target from iPhone to iPad
If you have an iPhone application that you want to upgrade to run on iPad devices you need to upgrade the target that builds your iPhone application into a target that can build both an iPhone and an iPad application, or add a target to your project for building the iPad application.
To upgrade an iPhone target for iPad development, select the target in the Groups & Files list and choose Project > Upgrade Current Target for iPad.
For details about iPad-application development, see iPad Programming Guide.
Last updated: 2010-07-02