|
|
|
Basic photo touchup tutorial |
This tutorial shows you how to correct poor lighting conditions, adjust focus, and crop your photos. The tutorial uses the same sample photo and follows the same steps as the Basic Photo Touchup Instructional Video.
This tutorial covers:
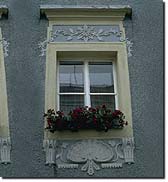
Browse to the directory in which you installed Digital Image Pro, and then select the \Tutorial\window.jpg file.
The default folder location is c:\Program Files\Picture It! 7\Tutorial\.
Click Open.
window.jpg opens in the workspace.
On the File menu, click Save As, and then save a copy of the photo to work on.
In this tutorial you must save the sample photo with a new name before you make any changes. The sample photo is in read-only format; you cannot save any changes to the original. In general, saving a copy of a photo is useful because it preserves the original for other projects.
In this lesson, you learn how to adjust contrast in a photo. Contrast is the difference between the brightest and darkest areas of the photo.
The sample photo is too dark, making the details hard to see. You will correct this using the contrast auto fix tool.
On the Touchup menu, click Contrast Auto Fix.
The contrast of the photo increases, making the photo lighter and the details more visible.

In this lesson, you learn how to adjust tint. Tint is the overall color cast of a photo. Adjust the tint when a photo has a color cast that affects the entire image, such as a colors caused by different types of lighting. Look at areas of the image that should be white. If they are not white, you need to adjust the tint.
In the sample photo, there is a slight blue color cast. You will correct this using the adjust tint tool.
Click Tint auto fix.
The blue tint in the sample photo is corrected, making the colors in the photo more accurate.

In this lesson, you learn how to adjust focus in a photo. Focus is the clarity of an image.
The sample photo is slightly out of focus, making the details of the decorative architecture difficult to see clearly.
Drag the slider to the right until the details of the photo are clear (until the slider reaches about 40).

The clarity of the photo improves, making the details of the decorative architecture more visible.
Note
So that you don't lose any of the effects from the sharpen or blur tool, use it after you have completed all other touchup steps, such as adjusting tint, fixing red eye, and so on.

In this lesson, you learn how to crop a photo. Cropping removes the outer edges of a photo. Crop a photo to emphasize content, remove distractions, or change the dimensions of a photo.
In the sample photo, you will remove the edge of the window on the left of the photo, and make the photo proportional to a 7 x 5 photo.
Starting at the top edge of the photo, about halfway between the two window edges, drag your cursor to the lower-right corner of the photo.
Drag the crop area until it is centered over the window.
The faded area indicates what will be removed from the photo.
Click Done.
Everything outside of the crop area is removed, shifting the emphasis of the photo to the window.
