Create a cutout
Advanced selection tools allow you to copy part of an objectA part of a picture, including shapes, text boxes, or lines that can be edited individually. The order of objects can be changed by using the Stack. to create a new object. This new object can then be pasted into the same pictureGeneral term refers to a single photo or a composite project on the canvas. or into a different picture.

To create a cutout:
-
Make sure the StackThe palette in the workspace that shows the layering order of objects. appears in the workspaceThe gray area that surrounds the canvas..
-
On the Stack, click the object you want to make a cutout from.
-
On the workspace toolbar, click one of the following selection tools:
- The marquee toolA tool that helps you select part of an object in the shape of a rectangle, circle, or other shape. This tool is useful for cropping objects or pictures to a standard shape.

- The freehand toolA tool that enables you to make a selection by drawing on the canvas.

- The Edge FinderA tool that enables you to make a selection by tracing along the edges of an area in the picture.

- The Magic WandA tool that enables you to select areas of similar color simultaneously.

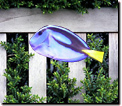
- On the picture, use the selection tool to make a selection.
-
On the Edit menu, click Copy.
 | Optional: Switch the background picture.
- On the Files paletteThe palette in the workspace that holds all currently opened picture files. click a picture.
The new picture is opened on the canvas.
- or -
- On the File menu, click Open.
- Locate the picture you want, and then click OK.
The new picture is opened on the canvas.
|
-
On the Edit menu, click Paste.
The new object is pasted on the canvas, and it shows up as a new object in the Stack.
Note
If you paste the new object into the same picture you copied it from, it will blend in with the background picture until you move it or resize it.
Tip
You can soften the selection with the anti-aliasA selection option in which the pixels along the edge of a selection can be partially selected. In most cases this makes the edge of a selection appear smoother. or featherTo soften the edges of a selected area by smoothing the transition from selected to non-selected pixels. option, which helps the new object blend in with a new background picture.
;toggleimg('imgxsltinstruction133125121120','arrowblueright.gif','arrowbluedown.gif');)