|
Chrome
effect
|
|
|
|
|
 |
|
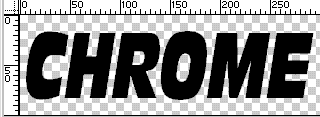 |
Create your type layer, or import your shape that you want to turn into shiny chrome Render type: right click/mac Cmd click the name on the layer and select "render type". This converts your text to an object, so you can apply all the filters to it. |
 |
|
 |
select
a dark gray for your foreground color and a light gray for your background.
 Select the gradient tool (Linear, fore to background) and drag from the top to the bottom of the image. Tip: Hold down the shift key to constrain to 90 degrees. |
 |
|
|
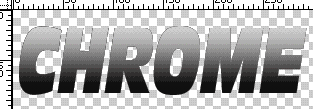
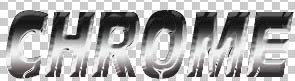
Add a bevel to the
type using the Layer style - Bevel and emboss. Your type should look like
this now. |
 |
|
|
|
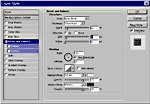
Now we want to remove the layer style, but we want to keep the bevel (Merge the effect into the layer). We do this by adding a new layer and dragging it directly underneath the layer with the effect ("Chrome" layer). See fig. 1. Now select the "Chrome" layer thumbnail and press Cmd/Ctrl+E This merges the selected layer with the one directly under it and "renders all effects" See fig. 2 |
 Fig.
2 Fig.
2 |
|
 |
|
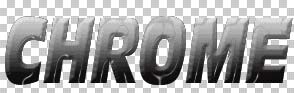 |
Apply the plastic wrap filter. This is found under Effects>Artistic |
 |
|
 |
Making the Chrome Click ok. |
 |
|
 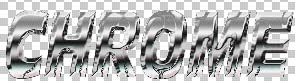 |
The top image shows
the results of the curve applied to the image. The result will be the bottom image. |
 |
|
 |
If you want, Colorize the image with the hue/saturation. This is how it looks after applying a black background color. |
![]()

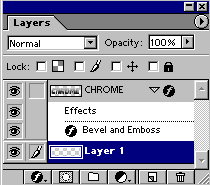 Fig. 1