This actions enables you to create and edit image maps.
Note that maps are not actually applied to the selected faces unless they are Set in the Material Settings Map Tab page.
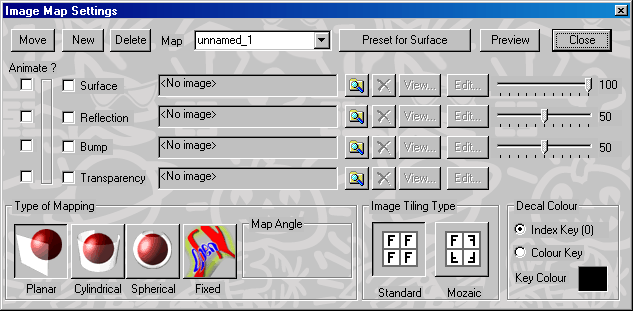
The Image Map Settings dialog will appear after a map has been chosen. Select the type of mapping, maps to be used, and position the map axes. The changes can be previewed in the Camera Window by pressing the Preview button at the top right of the dialog.
Any combination of a Surface Map, Reflection Map, Bump Map, and/or Transparency Map can be defined as the Image Map. The Maps may be still images or an animated sequence of different images. The sliders to the right of the Surface and Reflection Map types specify the percentage of the applied map that is visible relative to the surfaces colors and textures. The slider to the right of the Bump Map type specifies the height of the bump.
The Mapping Type can be Planar, Cylindrical, Spherical, or Fixed-To,
Decal Color - Specifies the transparent color used for Decals. Black or white is used if the Index Key radio button is enabled. The specified color in the Key Color swatch is used if the Color Key radio button is enabled.