

 Chapter 7. Migration to
JFS
As described above, one way to migrate data from HPFS to JFS is to backup
the data, redefine the drive(s) to be formatted to JFS, and then restore the
data. This assumes that the drive letters do not change, and if they do, the
applications using the data can still access it somehow.
A production server usually has a backup device directly attached to the
system or is using a mechanism, such as ADSM, to backup to a centralized
server. Both options can be used to migrate a volume to JFS. Depending on the
size of your hard disks, this might be the only option that is available to
you.
The Backup and Recovery Services feature of OS/2 Warp Server for e-business
can also backup to a remote drive over the LAN assuming the drive is shared
using NET SHARE on the remote server. If you did not originally install this
service, you can restart the Installation program to select the Backup and
Recovery Services component.
Here are the basic steps for completing an in-place migration of data from
HPFS to JFS.
- Backup the HPFS drive using your normal backup method.
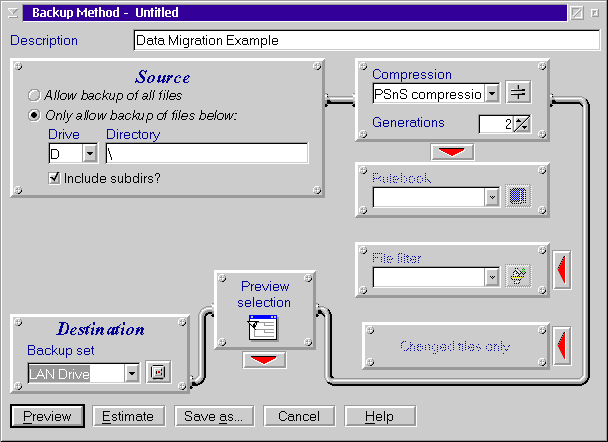
In our example, we used the Backup and Restore function to backup the data on
our D: drive (HPFS) to a hard disk from another system on the LAN as shown in
Figure 134.

Figure 134: OS/2 Warp Server Backup and Restore Method
Definition
- After the backup completes, the administrator should verify the success
by checking the log files generated by the backup program. Once this is done,
proceed to the next step.
- Delete the HPFS drive and redefine it as a JFS volume. In our example,
we deleted the D: drive associated with our HPFS data drive. We redefined
it as an LVM volume with the same drive letter and same
size.
- When formatting the new JFS volume, execute a long
format. In our example, we entered format d: /fs:jfs
/l. Note that we did not need to reboot the system to format the new
drive.
- The next step is to restore the data to the newly-created JFS volume. In
our example, we used the Backup and Restore program to do this copying data
from the LAN drive back to the D: drive.
- Verify the data restored to the new drive. In our example, we verified
that the data (number of files, total file size) was identical compared to the
data backed up in step 1.


 7.2 Adding Disk
Space


 Chapter 7. Migration to
JFS