Inspecting the Nib File
You use the Interface Builder application to create and configure nib files. There are two important concepts to introduce: outlets, and the File’s Owner proxy object.
Interface Builder
Interface Builder is the application you use to create user interfaces. It doesn’t generate source code, instead it allows you to manipulate objects directly and then save those objects in an archive called a nib file.
Terminology: Although an Interface Builder document may have a “.xib” extension, historically the extension was “.nib” (an acronym for “NextStep Interface Builder”) so they are referred to colloquially as “Nib files.”
At runtime, when a nib file is loaded the objects are unarchived and restored to the state they were in when you saved the file—including all the connections between them. To learn more about Interface Builder, read Interface Builder User Guide.
Inspect the Nib File
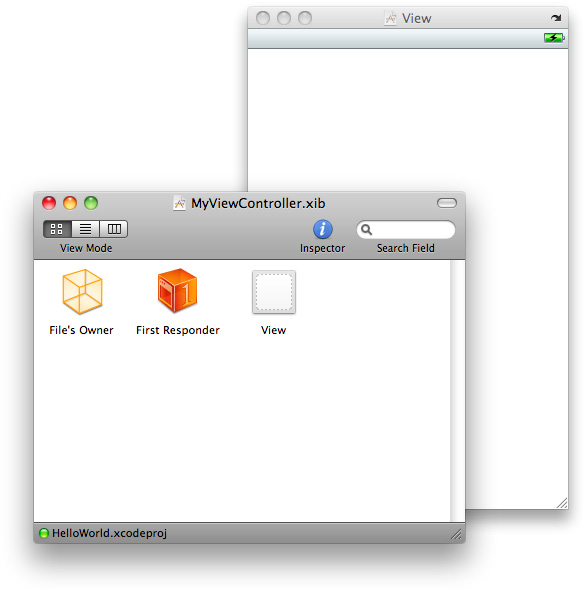
>> In Xcode, double-click the view controller’s XIB file (MyViewController.xib) to open the file in Interface Builder.
The file contains three objects, the File’s Owner proxy, the First Responder proxy, and a view. The view is displayed in a separate window to allow you to edit it.
File’s Owner
In an Interface Builder document, in contrast to the other objects you add to the interface, the File’s Owner object is not created when the nib file is loaded. It represents the object set to be the owner of the user interface—typically the object that loads the interface. This is discussed in more detail in Resource Programming Guide. In your application, the File’s Owner will be the instance of MyViewController.
To allow you to make appropriate connections to and from the File’s Owner, Interface Builder has to know what sort of object File’s Owner is. You tell Interface Builder the class of the object using the Identity Inspector. It was actually set when you created the nib file together with the view controller classes, but it’s useful to look at the inspector now.
>> In the Interface Builder document window, select the File’s Owner icon and then choose Tools > Identity Inspector to display the Identity inspector as shown here:
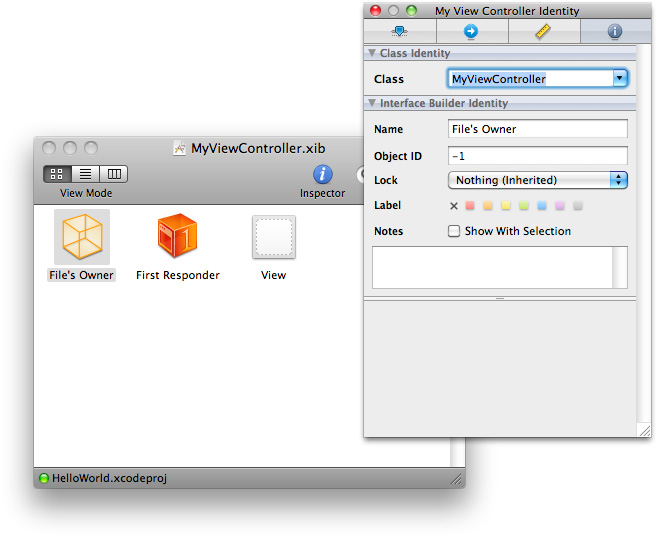
In the Class field of the Class Identity section, you should see MyViewController. It’s important to understand that this is just a promise to Interface Builder that the File’s Owner will be an instance of MyViewController. Setting the class doesn’t ensure that the File’s Owner will be an instance of that class. The File’s Owner is simply whatever object is passed as the owner argument to the loadNibNamed:owner:options: method. (You don’t use this method directly in the tutorial, but the view controller uses it to load the nib file.) If it’s an instance of a different class, the connections you make in the nib file will not be properly established.
The View Outlet
You can look at—and make and break—an object’s connections using an inspector panel.
>> In the Interface Builder document window, Control-click on File’s Owner to display a translucent panel showing File’s Owner’s connections:
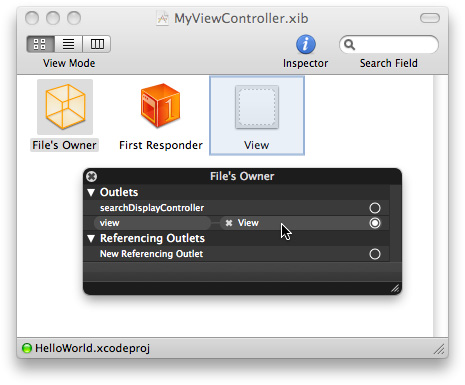
The only connection at the moment is the view controller’s view outlet. An outlet is just an attribute (typically an instance variable) that happens to connect to an item in a nib file. The outlet connection means that when the nib file is loaded and the UIView instance is unarchived, the view controller’s view instance variable is set to that view.
Loading the Nib File
The view controller loads the nib file automatically in its loadView method. Recall that you specified the name of the nib file to load as the first argument to initWithNibName:bundle: (see “Creating the View Controller Instance”). The loadView method is typically called once during a view controller’s lifetime and is used to create its view. When you invoke the view controller’s view method, the controller automatically calls its own loadView method if the view hasn’t been created. (If the view controller purges its view as a result of, for example, receiving a memory warning, then loadView will be invoked again to recreate the view if necessary.)
If you want to create the view controller’s view programmatically, you can override loadView and create the view in your implementation.
If you initialize a view controller using initWithNibName:bundle: but you want to perform additional configuration after the view is loaded, you override the controller’s viewDidLoad method.
You can load nib files yourself using an instance of NSBundle. You can learn more about loading nib files in Resource Programming Guide.
Test the Application
To make sure your application’s working correctly, you could set the background color of the view to something other than white and verify that the new color is displayed after the application launches.
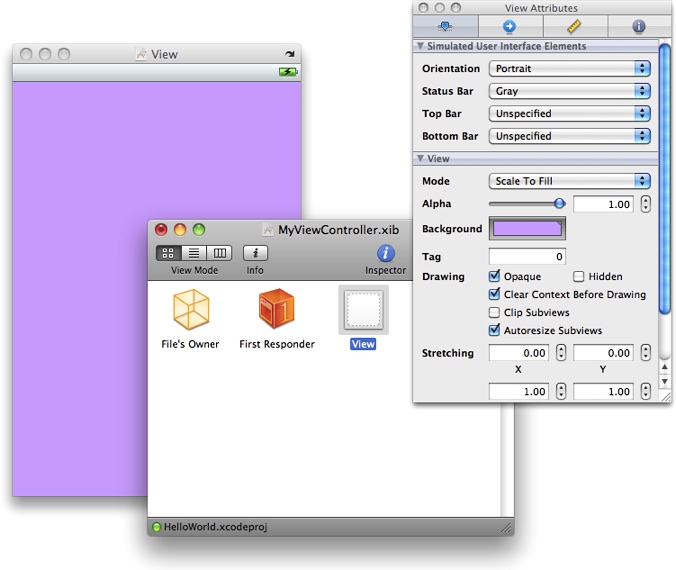
>> In Interface Builder, select the view then choose Tools > Attributes Inspector to display the Attributes inspector.
>> Click the frame of the Background color well to display the Colors panel, then select a different color.
>> Save the nib file.
>> Compile and run the project (click the Build and Go button in the toolbar).
Your application should compile without errors and you should again see an appropriately-colored screen in Simulator.
>> Restore the view’s background color to white and save the nib file.
Recap
In this section you inspected a nib file, learned about outlets, and set the background color of a view. You also learned more about resource loading and how the view controller loads the nib file.
In the next chapter you will add controls to the view.
Last updated: 2010-07-01