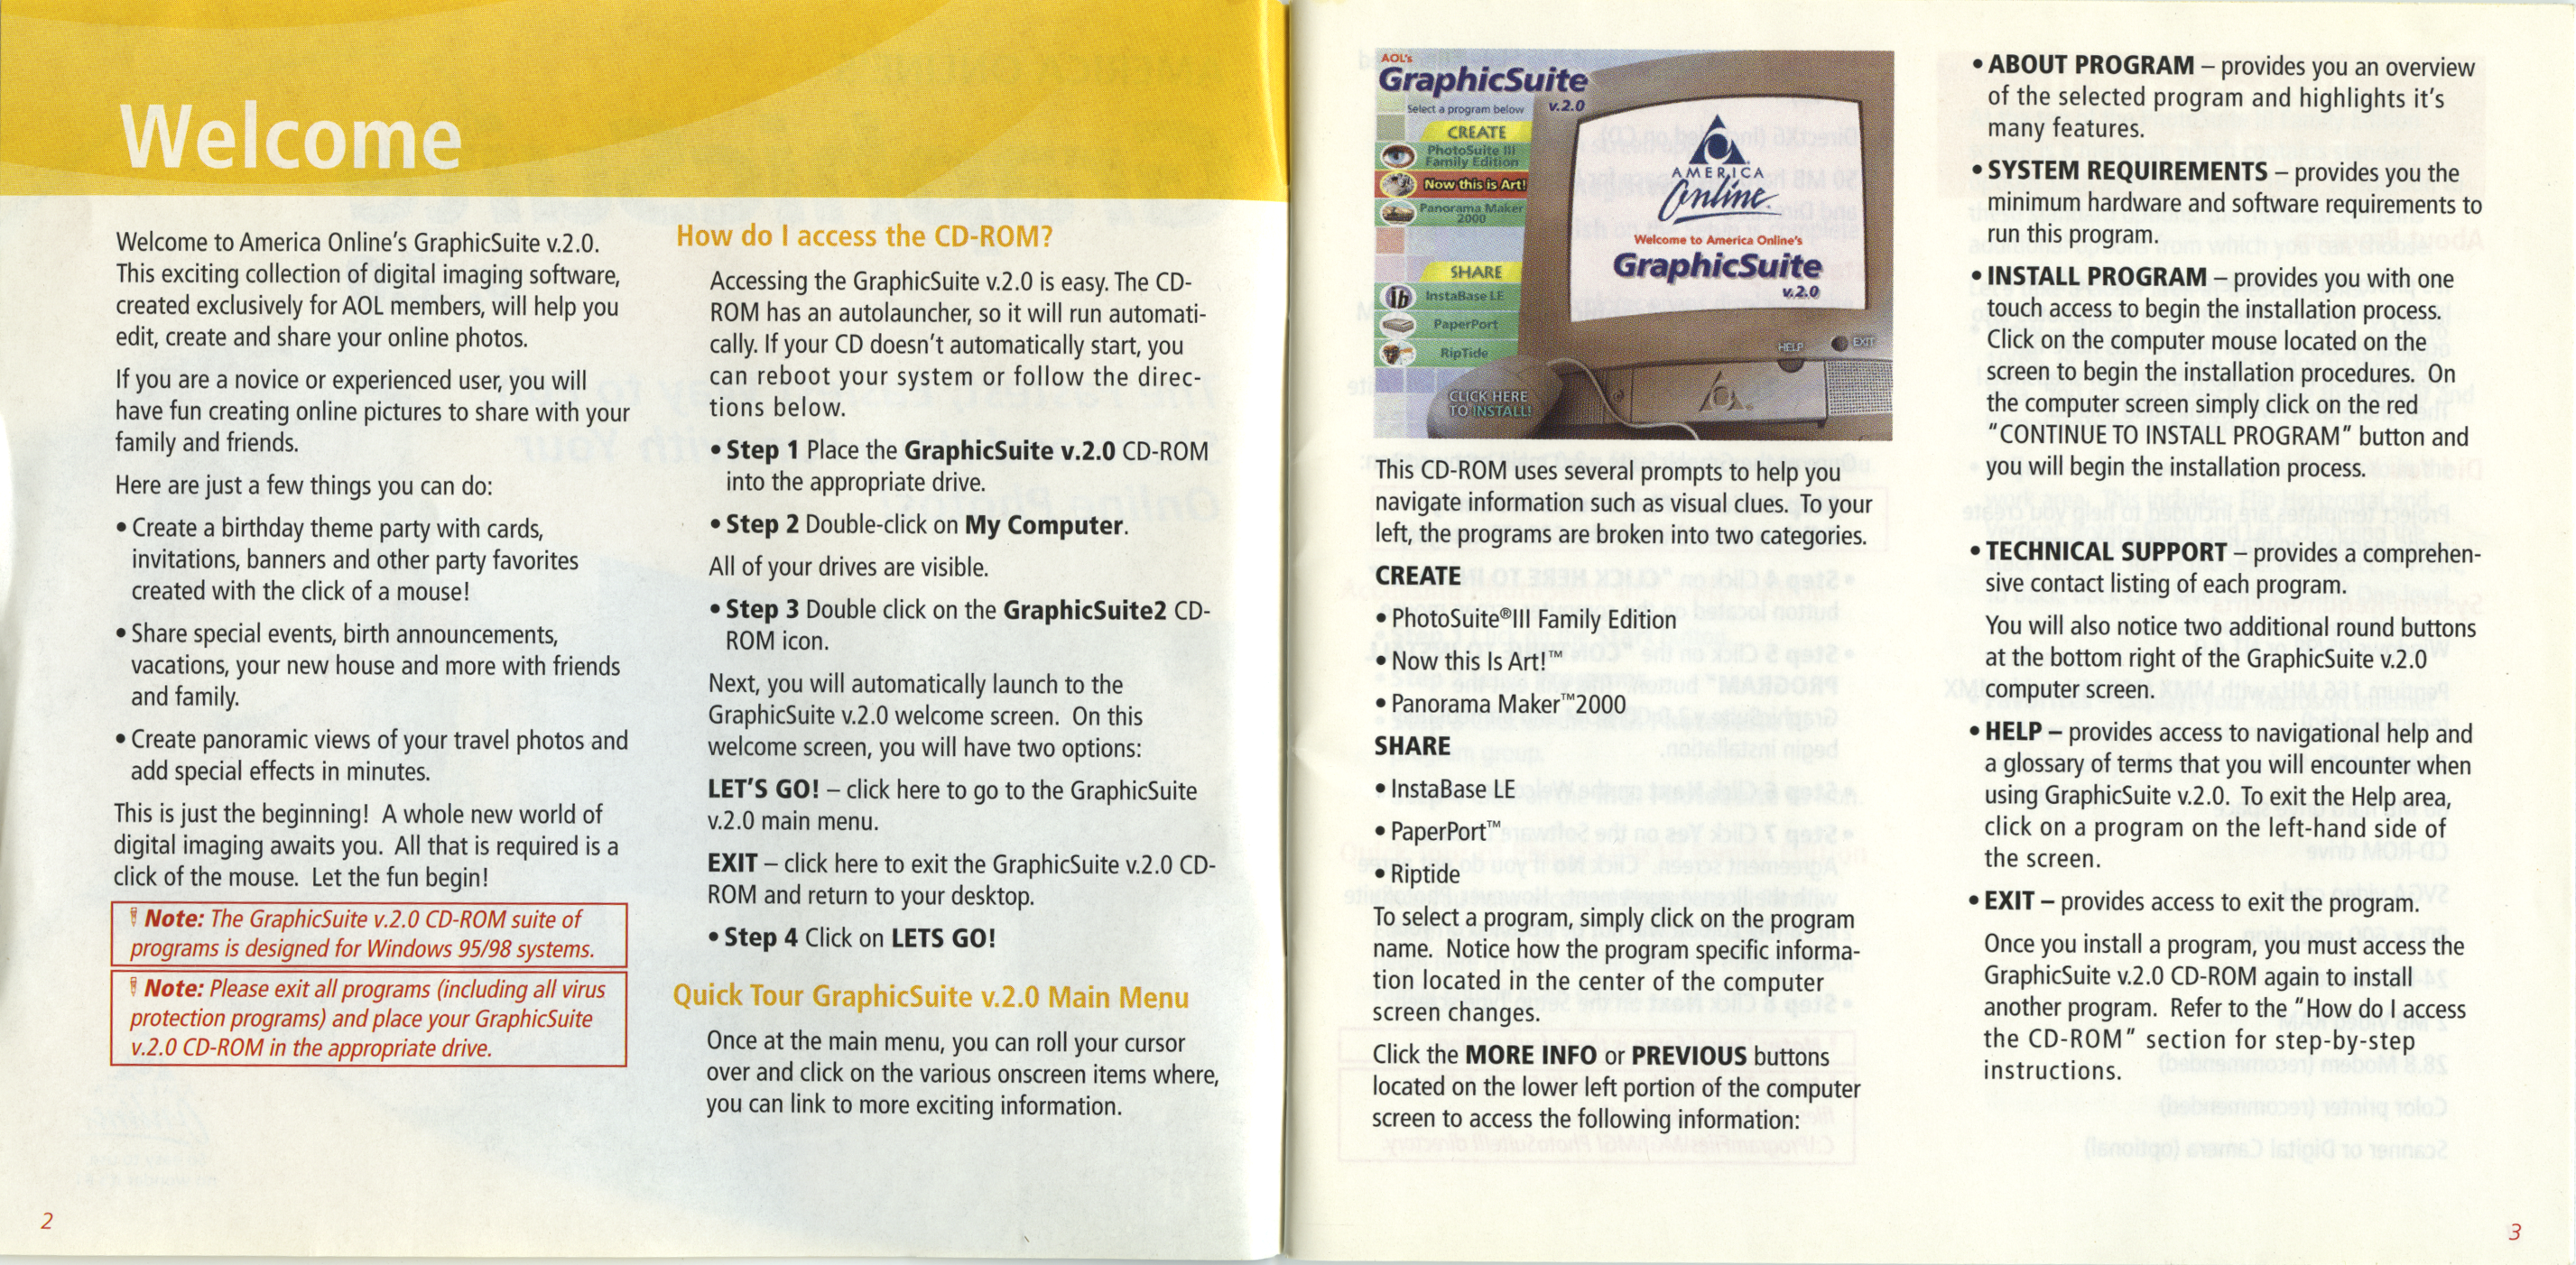
Labels:text | menu | screenshot | publication | printing | document | font OCR: GraphicSuite AOL' · ABOUT PROGRAM - provides you an overview Welcome of the selected program and highlights it's Select a program below v.2.0 CREATE many features. PhotoSuite III Family Edition Now this is Art! AMERICA aonline. SYSTEM REQUIREMENTS - provides you the minimum hardware and software requirements to Panorama Maker 1900 Welcome to America Online's GraphicSuite v.2.0. How do I access the CD-ROM? run this program. Welcome to America Online's This exciting collection of digital imaging software, created exclusively for AOL members, will help you Accessing the GraphicSuite v.2.0 is easy. The CD- GraphicSuite SHARE · INSTALL PROGRAM - provides you with one InstaBase LE v.2.0 touch access to begin the installation process. edit, create and share your online photos. ROM has an autolauncher, so it will run automati- PaperPort cally. If your CD doesn't automatically start, you EXIT Click on the computer mouse located on the RipTide HELP If you are a novice or experienced user, you will can reboot your system or follow the direc- screen to begin the installation procedures. On have fun creating online pictures to share with your tions below. CLICK HERE the computer screen simply click on the red TO INSTALL! family and friends. Step 1 Place the GraphicSuite v.2.0 CD-ROM "CONTINUE TO INSTALL PROGRAM" button and Here are just a few things you can do: into the appropriate drive. This CD-ROM uses several prompts to help you you will begin the installation process. · Step 2 Double-click on My Computer. navigate information such as visual clues. To your · Create a birthday theme party with cards, left, the programs are broken into two categories. invitations, banners and other party favorites All of your drives are visible. · TECHNICAL SUPPORT - provides a comprehen- created with the click of a mouse! CREATE sive contact listing of each program. Share special events, birth announcements, · Step 3 Double click on the GraphicSuite2 CD- ROM icon. · PhotoSuite®III Family Edition You will also notice two additional round buttons vacations, your new house and more with friends . Now this Is Art!™ at the bottom right of the GraphicSuite v.2.0 and family. Next, you will automatically launch to the GraphicSuite v.2.0 welcome screen. On this · Panorama Maker™2000 computer screen. · Create panoramic views of your travel photos and welcome screen, you will have two options: SHARE · HELP - provides access to navigational help and add special effects in minutes. This is just the beginning! A whole new world of LET'S GO! - click here to go to the GraphicSuite a glossary of terms that you will encounter when · InstaBase LE using GraphicSuite v.2.0. To exit the Help area, v.2.0 main menu. digital imaging awaits you. All that is required is a · PaperPort™ click on a program on the left-hand side of click of the mouse. Let the fun begin! EXIT - click here to exit the GraphicSuite v.2.0 CD- the screen. ROM and return to your desktop. · Riptide Note: The GraphicSuite v.2.0 CD-ROM suite of · Step 4 Click on LETS GO! To select a program, simply click on the program EXIT - provides access to exit the program. programs is designed for Windows 95/98 systems. name. Notice how the program specific informa- Once you install a program, you must access the Note: Please exit all programs (including all virus Quick Tour GraphicSuite v.2.0 Main Menu tion located in the center of the computer GraphicSuite v.2.0 CD-ROM again to install protection programs) and place your GraphicSuite screen changes. another program. Refer to the "How do I access v.2.0 CD-ROM in the appropriate drive. Once at the main menu, you can roll your cursor the CD-ROM" section for step-by-step over and click on the various onscreen items where, Click the MORE INFO or PREVIOUS buttons you can link to more exciting information. located on the lower left portion of the computer instructions. screen to access the following information: 2 3