HOW TO CREATE A TREE USING PAINT EFFECTS by Steve Christov

Play Movie [483 k]

MAYA Complete
Paint Effects

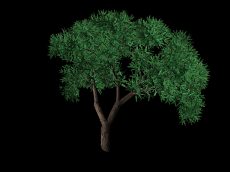
In this lesson you will create a tree in Paint Effects starting from a simple black brush stroke.

While this approach is somewhat drastic it will help you form a good understanding of the attributes that make up Paint Effects and will start you on the road to creating some of your own brush presets.

This article assumes you have Paint Effects loaded into Maya. Please see the Maya help menu on how to install Paint Effects if you have not already done so.

   STEP ONE

Open the Visor by selecting Windows > Visor. Scroll to the bottom and open the section marked Brushes. This will give you access to the Paint Effects preset brushes.

Open the Pens and select the simpleLine brush.

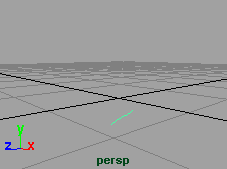
In your perspective window, Paint a small stroke near the origin.

   STEP TWO

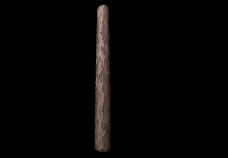
With the stroke still selected, open the Attribute Editor. Open the tab simpleLine1. Your first step is to add tubes to the brush.

Open the tubes section and Click beside Tubes and then Tube Completion.

Open the Tubes > Creation section. Change the Tubes Per Step to 0.1 and the Tube Rand attribute to 0. Also change the Length Min to 0.8, and the Length Max to 0.9.

You will also see some attributes called Tube Width1 and 2. These set the width for the base of the tube and the tip of the tube respectively. Change the Tube Width1 to 0.12 and Tube Width2 to 0.09. There are settings for randomness and bias for multiple tubes across the same stroke but because we are only creating one tube, we can ignore these settings.

Change the number of Segments to 40. This will increase the number of segments that are used to create the tube.

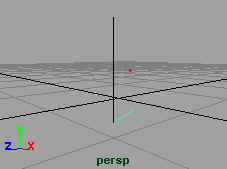
The Elevation attribute dictates the lean on the tube. Where 0 is the tube lying flat against the curve and 1 standing straight up. Since you want the tree to stand straight up, set the Elevation Min to 1.0.

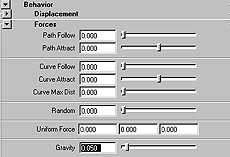
NOTE: If you notice that your tube is still lying flat against the curve despite changing the elevation attribute, you can fix this in the attribute editor. Open Behavior > Forces. Change the Path Follow to 0.0.

   STEP THREE

Now that you have the basic shape of the trunk you are now ready to shade it.

Open the Shading section in the Attribute Editor. Click on the color swatch next to Color1. In the color chooser change the RGB values to 0.64, 0.52, 0.41.

Open the Tube Shading section. Click on the color swatch next to Color2. Set the RGB values to 1.0, 0.85, 0.83.

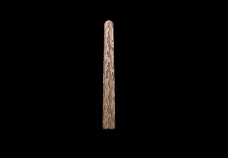
You have now set the colors for the trunk of your tree. If you render now you will see that it will render out in one uniform color. By adding a simple ramp texture to the tube you can simulate bark.

Open the Texturing section. Click on the icon next to Map Color to turn it on. You are going to map a V Ramp to the trunk of the color to give the appearance of bark.

From the drop down menu beside Texture Type, Select V Ramp. Set the following attributes:

  • TexColor2 to RGB 0.54, 0.49, 0.44
  • Repeat U to 6.0
  • Repeat V to 2.2
  • Blur Mult to .26
  • Smear to 0.203
  • Smear V to 0.61

You can preview the progress this far by pressing the hotkey "8" while in the persp window to switch to the paint effects preview render window. In the menu select Stroke Refresh > Rendered. However it will take longer to refresh with each change.

NOTE: When you render, depending on the length of your original stroke, you may have more than one tube attached to your stroke. One way to solve this is to lower the Tubes per Step attribute in the Tubes > Creation section.

   STEP FOUR

In Paint Effects you have the option to Illuminate the tree with simulated or real lights.

Open the Illumination section, Check the box next to Illuminated. Uncheck the box next to Real Lights. We are also going to add some specular qualities to the tree to give it some highlights. Set Specular to 0.15.

 STEP FIVE

Now that we have the trunk, we are ready to add some branches. Open the Tubes Growth section and click next to Branches to add them to the trunk.

Open the Branches section. Increase the Split Max Depth to 7. This increases the number of times the branch will split up.

Increase the Branch Dropout to 0.02.

The next set of values control different attributes for the split on the branch including Randomness, Angle of split, Twist. Feel free to experiment with these values and come up with your own style of tree or you can set the following values:

  • Split Rand to 0.17
  • Split Angle to 26.3
  • Split Twist to 0.32
  • Split Size Decay to 0.67
  • Split Bias to 0.19

   STEP SIX

Click on the box next to Twigs to turn them on. Open the twigs section.

Set the Num Twig Clusters to 8.0 and set the Twig Dropout to 0.439.

Then next attribute set length, width, angle and twist. Again feel free to experiment with the settings to get your own tree or set the following attributes:

  • Twig Length to 0.08
  • Twig Base Width to 0.7
  • Twig Tip Width to 0.15
  • Twig Angle1 to 52.5
  • Twig Angle2 to 54.0
  • Twig Twist to 0.512

Keep in mind that your twigs will decide the placement of leaves. So these settings can have a pretty dramatic effect down the line. For example increasing the number of Twig Clusters will result in more leaves on your final tree.

   STEP SEVEN

You will now add some leaves to the tree to complete the look. Click the box next to Leaves. Set the following attributes:

  • Leaves in Cluster to 5.0
  • Num Leaf Clusters to 4.0
  • Leaf Dropout to 0.154
  • Leaf Length to 0.04
  • Leaf Base Width to 0.035
  • Leaf Tip Width to 0.01
  • Leaf Start to 0.9
  • Leaf Twist to 0.5
  • Leaf Translucence to 0.561
  • Leaf Sat Rand to 0.033
  • Leaf Val Rand to 0.114

Check the box next to Terminal Leaf. This will place a leaf at the end of each twig.

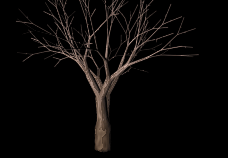
If you render your image at this point you should have a basic looking tree.

Click to view larger image

   STEP EIGHT

You are now ready to add various other attributes to further enhance your tree.

In the Attribute Editor open the Behavior then Forces section. Set the Gravity slider to 0.05. You will notice that the branches and leaves out as if the weight of the leaves was pulling the branches down.

Click to view larger image

   STEP NINE

You are now ready to add some animation to the tree to simulate it swaying in the wind.

Open the Behavior then the Turbulence section. Set the Turbulence Type to Grass Wind. Set Turbulence Interpolation to Smooth over Time and Space.

Set the following values:

  • Turbulence to 0.05
  • Turbulence Frequency to 0.65
  • Turbulence Speed to 0.2

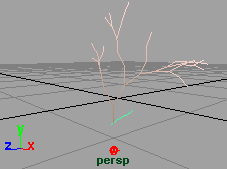
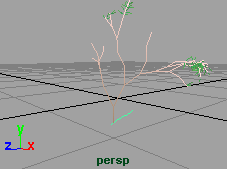
Set the Time Slider to 100. Press Play. Switch to the Perspective window. The wireframe will give you an indication of the general motion of the tree.

Click to view larger image

   STEP TEN

You will now save your brush to the Visor so you can access it in the future. With the tree selected, go to Paint Effects > Get Settings from Selected Stroke. This will apply your tree to the template brush.

Now Select > Paint Effects > Save Brush Preset.

Set the Label and Overlay Label to Mytree.

Save it To Visor and set the Visor Directory to Trees.

Click on Grab Icon and drag around your tree in the render view to make an icon for you brush.

Click Save Brush Preset.

Play Movie [483 k]

CONCLUSION

At this point you should be familiar with not only how to use a Paint Effects brush but also how to create and save some of your very own brush presets.


Your use of this file confirms your agreement to the
Terms and Conditions set out in the Terms and Conditions page.