HOW TO CREATE 3D TEXT FROM VECTOR ART
by Steve Christov

Maya Complete

In this lesson you will learn how to create 3D text using curves imported from an EPS file.

You will use the bevelCaps.mel script. This script will add planar surfaces to the front and back of the selected beveled surfaces. It will also set the planar surfaces to a high quality of tessellation to get good quality results when rendered.

   INSTALLATION

Download the bevelCaps.mel file into your scripts directory (typically $Maya/scripts).

For general instructions on installing MEL scripts, see How to use the CD MEL Scripts

   EPS CREATION

Create your logo or text in an illustration package such as Illustrator.

To import the file into Maya you will need to create outlines of your art. In Illustrator, select Type > Create Outlines.

Save your file as either an Illustrator or Illustrator EPS file.

NOTE: Generally speaking, it is best to make your art as large as possible to avoid potential problems when beveling in Maya.

   STEP ONE

New to Maya 3.0 is the ability to directly import Illustrator or EPS files. Therefore you can easily import your work into Maya.

Select File > Import to open your own EPS file in Maya,

or

Download the supplied text.eps file to import into Maya.

Select all the text and click Edit > Group. Select Modify > Center Pivot.

Position the text at the origin.

   STEP TWO

With the type active, select Surfaces > Bevel - Options

From the options window select Edit > Reset Settings then click the Bevel key.

Press 5 on the keyboard to go to shaded mode. Press 3 to display high resolution. Your type is now beveled but you will notice that some letters seem to bevel inward. This is because the curve direction is aligned in the wrong direction.

TIP: You can adjust the look of the text by changing the bevel attributes such as Width, Depth and Height in the channel box.

   STEP THREE

To fix the bevel, select the original curve of the letter that is beveled inward and select Edit Surfaces > Reverse Surface Direction.

Continue for each letter that is beveled incorrectly. Don't forget to reverse the direction on the inner curve of the letter a if necessary.

   STEP FOUR

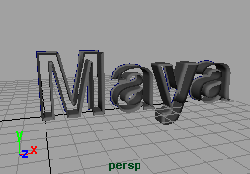
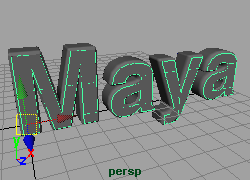
To create the front and back surfaces you will use the bevelCaps script.

Click-drag to select all the text. Type bevelCaps into the command line and press Enter.

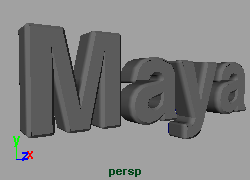
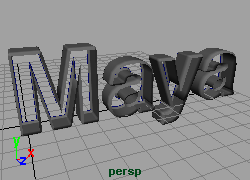
There should now be surfaces on the front and back of the beveled surfaces. If you are happy with the bevel delete the history by selecting the text and clicking Edit > Delete by Type > History. Finally select all the surfaces and click on Edit > Group. Rename the node Text.

NOTE: This script will automatically increase the tessellation on not only the front and back faces, but the bevel as well which will result in nice clean lines when rendering. Also if you want to animate the letters individually you will have to apply the bevelCaps script to each letter individually.

   CONCLUSION

You have now learned how to import Illustrator files and use those curves to create 3D text in Maya. You have also learned how to use a MEL script.

You should note that construction history on the bevels will not update the planar surfaces. You will need to reapply the script. Also, the script creates one planar surface for the front and one for the back. If you have text where the letters are separated, the workaround is to apply the script to each letter separately.

Also keep in mind that this workflow enables you to animate the text in any way you desire, except you cannot bend or deform the text. To achieve those results you will need to use a plugin called ZAXWERKS INVIGORATOR.

Your use of this file confirms your agreement to the
Terms and Conditions set out in the Terms and Conditions page.