HOW TO CREATE CLOTHING USING MAYA CLOTH by Cory Mogk

Play Movie [194kb]

This how to focuses on creating chain mail for the minion.

To create the chain mail you will use Maya cloth. Cloth allows you to model garments which will simulate cloth behavior.

   STEP ONE

Download the project files for your platform:

Set your project to Cloth and open the minionCloth.ma file from the scenes directory.

Panels are the building blocks of any garment. They define the pieces of material. A panel may be defined by any number of curves as long as the end points of each curve are touching and the curves lie in a plane.

In the Cloth menu set select the four curves that make up the front left sleeve and create a panel with Cloth > Create Panel.

Repeat this process to define all the panels.

TIP: You can pick the curves by selecting them in the Outliner.

   STEP TWO

You will now create a garment.

Select a front sleeve panel and turn it into a garment by selecting Cloth > Create Garment.

A garment is a polygonal mesh defined by the panel curves. Adjoining panel curves must be selected and seamed together to complete the garment.

   STEP THREE

Select the two panel curves joining the sleeve garment and front panel and Seam them together by selecting Cloth > Create Seam.

Continue to seam the rest of the garment together in this fashion by selecting a garment curve along with an adjoining panel curve and selecting Cloth > Create Seam.

You may find it helpful to turn all objects off in the pick mask except curves.

NOTE: Do not seam the front of the garment - it will be closed with a constraint.

Assign the chainmail material to the garment.

   STEP FOUR

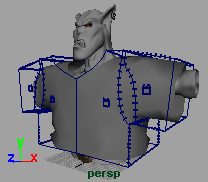
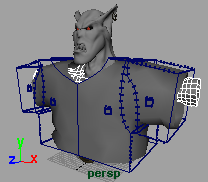
You are now ready to drape the garment over the Minion.

Select minionShoulders and minionTorso and define as a collision object by selecting Cloth > Create Collision Object.

The Minion needs to be defined as a collision object so that the garment will react to his skin. In the channel box set the following values:

Set the Collision Offset to 0.85
Set the Collision Depth to 3.

Collision Offset is how far from the surface the cloth should stay and the Collision Depth is how far into the surface the cloth solver should look for collisions. Look at the Minion's arm in the front view and you will see that it is about 6 units in diameter at the narrowest point. Collision Depth should not be higher than half this value or you may run into strange cloth simulations.

If you find that the garment is penetrating the belt you may make it a
collision object as well.

   STEP FIVE

At this point you can adjust properties for the garment and the solver.

Select the garment and open the Attribute editor. Activate the cpStitcher tab and set the Base Resolution to 60. Set Fit to Surface to ON. Turning Fit to Surface ON will keep the shape of the garment as the resolution of the garment changes.

Activate the cpSolver tab and set the Solver Scale to 10.0. Cloth works in real world units. Since the Minion was not built at real world scale, the Solver Scale helps to match the cloth to the scene.

   STEP SIX

You are now ready to run a cloth simulation.

Set the range on the Timeslider from 1 to 30. Press the Play button to run a simulation. Notice that the front of the shirt opens as it was not seamed together.

NOTE: Make sure that the Playback is set to Free in the Animation Preferences.

   STEP SEVEN

The front of the garment could be kept tightly closed with a seam or it could be kept partially open by using a cloth constraint. A cloth constraint constrains one piece of cloth to itself or another piece of cloth.

Before adding the cloth constraint the scene should be rewound. The cloth cache should be deleted. Each time a simulation is run a cache file is created so that the simulation can be scrubbed through if desired. Rewind the scene to Frame 1. Delete the cache by selecting Simulation > Delete Cache.

Select the curve on the front panel and Shift-Select the garment. Add a cloth constraint with Constraints > Cloth.

When you create a constraint in this manner (by selecting a curve and then a garment) you make a curve assigner. It should be visible in the channel box under inputs. It has a Start and an End Parameter that control the range of the constraint.

Set the Start Param to 0.1 and the End Param to 0.85. Notice that the constraint markers change to show how much of the garment will be constrained.

You can hide the panel curves as well as the panel and seam locators.

   STEP EIGHT

Run another simulation.

This time the garment will stay closed. Interesting effects like taking a coat off can be achieved by animating the Parameter values.

Play Movie [194kb]

   CONCLUSION

You have learned how to create a garment and how to drape it over a character. You have also learned how to apply constraints which allow you to leave the front of the garment open.

Your use of this file confirms your agreement to the
Terms and Conditions set out in the Terms and Conditions page.