Getting Started
Installing FirstClass
For
those users installing the FirstClass Client software for the first time using
the P559 Online Applications CD Version 5
-
Start up your computer
- Do not open
any other applications and place the CD in the CD-ROM drive (which is assumed
to be drive D: in the instructions below)
-
Your PC maybe configured to autorun the P559 CD, if not you will need to
click on the Start button, click on Run, then type in the box labelled Open:
D:\install.exe and click on OK
 Tip - Cancelling Installation Tip - Cancelling Installation
- The Setup
process for the Online Applications CD-ROM will then start; click the 'Continue
to main menu' button on the Welcome screen
-
You will be presented with a number of different options to install,
select the 'Conferencing software' category
-
Click on the Install FirstClass 7.1 button
-
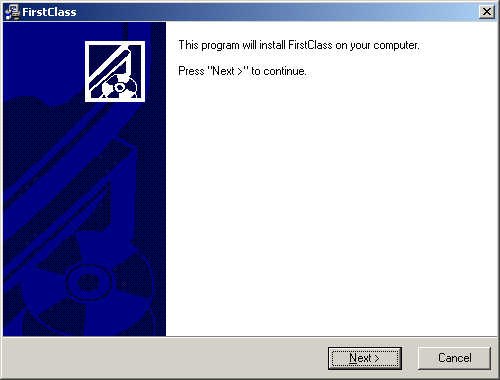
The FirstClass Welcome screen will open as shown in Figure
1 click on Next to continue
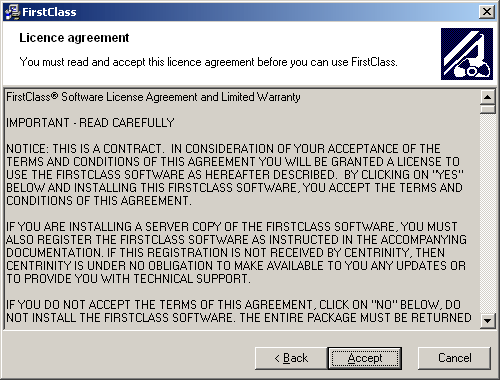
- In
order to install FirstClass, you will need to agree to the license agreement
from the software authors, as shown inFigure 2License
agreement
- To
proceed with the installation click on the Accept button
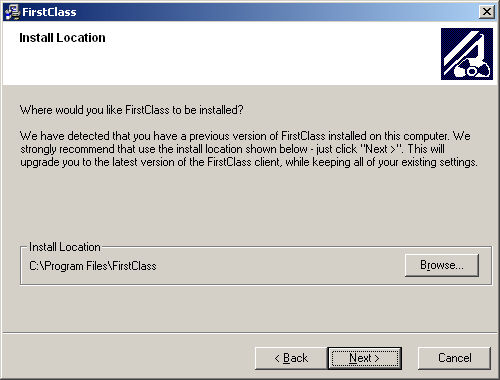
- Next you will be asked to select the directory for the
installation, as Figure 3 the Install Location window
shows We recommend that you
select the default destination folder entry here and click
Next
- Once the application is ready to
install, the Ready to Install dialogue box Figure 4 will
be displayed The set-up application
is ready at this stage to copy the necessary files across to your computer. You
can use the Back button to alter any settings or choose to quit the
installation procedure otherwise, click Install to
continue
Tip - Cancelling Installation
- Once the installation
is complete the FirstClass has been successfully installed window will open as
shown in Figure
5
- Click the Finish button to close the Installation
Wizard
This completes the installation;
you are now ready to set-up your connection to FirstClass.
An icon
(the FirstClass logo)  will appear on your
desktop. will appear on your
desktop.
The FirstClass login screen will automatically open. This
window can be closed by clicking on the
Close button at the top right of the login screen if you want to set up FirstClass
later.
button at the top right of the login screen if you want to set up FirstClass
later.
Once FirstClass is installed the P559 CD installer will
check you if you want to install more software. If you do click on the 'Back to
main menu' link, if not click on 'Exit this installer'.
Back to the top >>
|