Configuring the Search Builder
Tango Search Builder Options and Setup
The Search Builder builds a series of actions that allows you to create Web forms that can be used to search a database, display the results of the search, and view, update, and delete individual records.
The topics covered in this chapter include:
- setting search, record list, and record detail options
- formatting the search form, and record list and record detail pages
- customizing your Web forms and pages, and creating response messages
- tips on modifying how the Search Builder builds actions
- defining joins.
About the Search Builder
Using the Search Builder you can quickly and easily build the actions necessary to:
- display a form allowing users to specify search criteria
- display a list of matching records
- allow viewing of detailed information on a single record
- allow editing and deleting of the records found.
Based on the settings in each of the option groups and the actions generated, the following are examples of what users might see in their Web browsers.
By default, a Begins with search is performed on text columns and an = (equals) search on all others. If desired, you can instead let users select each search operator from a drop-down list.
 Note:
Character data from data
sources is by default stripped of trailing spaces. You can disable
this feature by using the configuration variable stripChars:
assign the variable the value false in local scope for a
particular application file, or, if you want to set the variable for
all data sources, use the config.taf application file to
change the variable's value to false in system scope.
Note:
Character data from data
sources is by default stripped of trailing spaces. You can disable
this feature by using the configuration variable stripChars:
assign the variable the value false in local scope for a
particular application file, or, if you want to set the variable for
all data sources, use the config.taf application file to
change the variable's value to false in system scope.
If desired, you can configure the Search Builder to display Next and Previous buttons for paging through large result sets.
To view detailed information for a record, the user clicks the name of the record in the list, which is hot text, linked to the record detail.
The record detail page displays more information on the selected record and--if you allow it--lets the user edit or delete it.
When you open the Search Builder window it contains three main groups of options you can specify: Search, Record List, and Record Detail.
- Search. Specify the columns you want users to search and define the format of the search form you want users to see in their Web browsers.
- Record List. Specify the columns you want to display in the record list returned to the user after a search and define the format of the Record List Web page.
- Record Detail. Specify the columns you want to include on the single-record display page, which appears after a user clicks a specific record in the record list, and define the format of the Record Detail Web page. You can also set up the Record Detail page to allow users to delete the record and/or edit specified columns.
To switch among option groups, click the appropriate tab in the Search Builder window.
Setting Search Options

You use the search options to define the appearance of the search form, which columns the user can search on, and how the values entered by the user are used to search the database. You can also define fixed criteria in addition to the ones the user enters.
Search Columns List
Drag columns from the Data Sources Workspace to this list to use them in defining the search. Columns in the Search Columns list appear in the format table_name.column_name. The order of the columns in the Search Columns list determines the order of the fields on the resulting search form.
The following table describes the operations you can perform on columns.
Column Options
Use the Column Options section of the Search window to configure each search column. You can specify how each column's entry field appears on the search form and how the value entered by the user is used to search the database.
Field Title
In Field Title, set the title of the value entry field for the column as you want it to appear on the search form.
Operator
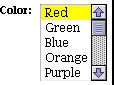
Use this option to set the search operator for the column. For example, if the operator is set to Begins with, Tango searches the database for records that begin with the column's search value. If you select User Enters, the search form displays a drop-down list of the operators available, and the user can select which operator to use.
User Enters Value
Select this option if you want the user to enter a value in an entry field on the search form. The available field types are: Text, Drop-down List, List Box, Check Box, and Radio Buttons.
Field Type
To select a value entry field type for a column, select the column in the Search Columns list and select an item from the Field Type drop-down list.
A Field Properties dialog box appears allowing you to specify values for the field.

The following describes each of the options in the Field Properties dialog box for each field type:
- Text. Use the Text
field type to provide single- or multi-line entry of values.
Default Value is the default value you want to appear on the new record entry form.
Maximum Length is the maximum number of characters the user can enter in the field. This option is not available when Scrolling Field is selected because HTML does not support it.
Width is the width of the field in characters.
Height is the number of lines of text displayed in the field without scrolling. This field is available only when you select Scrolling Field. The height of a non-scrolling field is always "1".
Scrolling Field. Select this option if you want a multi-line text entry field with a scroll bar.
- Drop-down List,
List Box, and Radio Buttons. Each
of these field types lets the user select the search value from a
predefined list.


Use the Field Properties dialog box for these field types to specify the values and choose the default. The same dialog box appears for all three field types.
To add an item to the values list
- Do either of the following:
- In the Search window, click the Field Properties icon.
- In the main window, choose Field Properties from the Attributes menu.
The Field Properties dialog box for the selected column appears.
- Choose New.
- Type a name in the Name field.
- Press the Tab key to copy the name into the Value field, or enter a value for the item if you want it to be different from the name.
- Click OK.
The Name determines what the user sees for this item. The Value determines what is used as the search value. If your database column uses abbreviations or codes for values, you can enter a more user-friendly value into the Name field and the actual value in the Value field. For example, if you are creating a field to search a "state" database column containing abbreviations such as "CA", "NY", and "GA", you can use these values in the list items' Value fields, and the full state names ("California", "New York", and "Georgia") in theName fields.
The following table lists the other operations you can perform on the values list.
- Check Box. The Check Box field type lets the user select between an empty search value (unchecked) and a value you specify (checked).
Checked Value is the value to be used for the search if the check box is selected by the user. If the check box is not selected, an empty value is used.
Initially Checked specifies whether the check box should be checked by default.
Fixed Value
When this option is selected, the search value is hard-coded and no entry field appears on the search form. The value you specify is used for every search.
Using the Value drop-down list, select one of the following options for a fixed value:
- Value Entered. Use the text box provided to enter the search value for the column.
- SQL Expression. The value returned by the SQL expression text entered is used as the search value. The text entered is evaluated by the database and the result is used as the search value.
- SQL Statement. The SQL statement entered is executed, the results retrieved, and the first data item of the results is used as the search value. For example, if you enter:
- Current Timestamp. The current timestamp (date and time combined) on the Tango Server computer is used as the search value.
- Current Date. The current date on the Tango Server computer is used as the search value.
- Current Time. The current time on the Tango Server computer is used as the search value.
For more information on what the CGI parameters evaluate to, see "<@CGIPARAM>" in the Meta Tags and Configuration Variables manual.
- CGI Parameters. The rest of the fixed value options are referred to collectively as CGI parameters. They include Client Name, Client Password, Client IP Address, Client Browser, Server Address, Server Port, Referer Page URL, and Method. They are passed by either the user's Web browser or the Web server with each request to Tango. When you specify one of these parameters as the search value, the parameter value used is the one passed in when the user clicks Find.
Summary: Setting Column Options
The following table describes the settings you can make in the Column Options section of the Search window.
Formatting the Search Page
Use the format options to define how the search fields and their titles display.
To change the format of the search page

- In the Search window, click the Page Format icon.
- In the main window, choose Page
Format from the Attributes menu.
The Page Format dialog box appears.
Tango aligns the page fields using an HTML table. Specify the table attributes as follows:
- Border width. The width of the table border in pixels. Select none, or from numbers 1 to 8.
- Border color. The color of the table border. Select default or a color from the list.
- Background color. The background of the table. Select default or a color from the list.
- Cell spacing. The amount of space, in pixels, inserted between individual cells in the table. Select none, or from numbers 1 to 8.
- Cell padding. The amount of space, in pixels, between the border of a cell and the contents of the cell. Select none, or from numbers 1 to 8.
Customizing Your Search Form and Creating Result Messages
Header, Footer, and No Results HTML
Use Header HTML and Footer HTML to customize the search form by specifying HTML to appear above and below the search form.
No Results HTML lets you specify the HTML to return when no records match the search criteria specified by the user.
To enter Header HTML, Footer HTML, or No Results HTML

- Do either of the following:
- In the Search window, click the Header HTML, Footer HTML, or No Results HTML icon.
- In the main window, from the Attributes menu, choose Header HTML, or Footer HTML, or choose Responses then No Results HTML from the submenu.
The corresponding HTML editing window appears.
You can switch between the HTML editing windows by clicking on the Header, Footer, and No Results tabs at the bottom of the HTML window.
- Enter the desired HTML.
- Close the editing window.
Changing Button Titles
The search form contains two buttons below your search fields:
- The Reset Values button resets the entry fields to their default values.
- The Find button initiates the search.
To change button titles

Setting Record List Options
Use the options in the Record List window of the Search Builder to define the appearance and functionality of the Web page returned after the search (defined in the Search section) is performed.
Among other things, you can specify:
- which columns from each matching record are displayed
- the ordering of result records
- the maximum number of records to be returned
- whether you want Next and Previous buttons to appear, allowing paging through large result sets
- which column or columns appear as links to the detail page.
Display Columns
Drag columns from the Data Sources Workspace to this list to have them retrieved from the database and displayed on the record list Web page. The order in which columns appear in the Display Columns list determines their order on the Web page.
Order By
Records from the database are sorted on the record list page according to the order specified in the Order By list. You can drag any number of columns into this list; however, each of the columns must also appear in the Display Columns list.
The records are sorted by the first column
listed. Then records having the same values in that column are ordered
by the second column, and so on. The default sort order is ascending,
meaning records with lower values in the sort column appear first in
the list. You can toggle between ascending and descending by clicking
the  and
and  icons.
Column Options
Use the Column Options section to set up options for each column in the Display Columns list.
Field Title
In the Field Title field, enter the text you want to appear as the column title.
Display As
You can specify how you want the columns returned to display in the browser after the search. From the drop-down list, select from the following options:
For more information, see "Encoding Attribute" in the Meta Tags and Configuration Variables manual.
- Normal Text adds the
following to the HTML generated for the specified column:
If the Add HTML line breaks option is selected for the specified column, the HTML becomes:
- Link to Detail. Select
this option to cause the selected column to appear as a hyperlink to
the record detail page, that is, the user can click a value from
this column and the detail for that record is displayed. You can
specify more than one column as a link to the record detail.
If you specify no column as a link to the detail page, the first column is automatically chosen for you when actions are built.
- Link to URL Stored in Column. If you have a URL stored in your database column, select this option to automatically generate a hot link. This option adds the following to the HTML generated for the specified column:
- Link to Email Address Stored in Column. If you have an email address specified in your database column, select this option to automatically generate a mailto link. This option adds the following to the HTML generated for the specified column:
- Image: File Name Stored in
Column. Select this option to display an image file
residing on your Web server. When you select this option, the
Image path field is enabled in which you enter the
path to the image.
This option adds the following to the HTML generated for the specified column:
- Image: URL Stored in Column. Select this option to display an image file residing on the Internet; that is, your database stores a URL pointing to the image. This option adds the following to the HTML generated for the specified column:
For more information, see "Encoding Attribute" in the Meta Tags and Configuration Variables manual.
- HTML. Use this option
if your database column contains HTML that you would like to
display. This option adds the following to the HTML generated for
the specified column:
If the Add HTML line breaks option is selected for the specified column, the HTML becomes:
Format As
The Format As field is enabled only when you select either the Normal Text or Link to Detail option from the Display As drop-down list.
For more information, see "Format Attribute" in the Meta Tags and Configuration Variables manual.
Each of the following options in the drop-down list (except No Formatting) adds a FORMAT="formatstring" attribute to the <@COLUMN> tag in the HTML generated for the column in the Record List action's Results HTML.
The following table lists the options and the corresponding format string.
Option |
Format String |
|
num:3-*,'@@thousandsChar',decimals,
|
|
|
,,decimals,'@@decimalChar',
|
Decimals
Specify the number of decimal places you want to display for number and currency values. The Decimals field is available only when you select one of the number or currency options from the Format As drop-down list. The default is 0 for number options and 2 for currency options. An empty or non-numeric value is evaluated as 0.
Add HTML line breaks
This option is available only when you select Normal Text or HTML from the Display As drop-down list and No Formatting is selected from the Format As drop-down list. Otherwise, this option is disabled.
Maximum Matches
Use the options in this section to restrict the number of matches displayed on the record list page.
Limit To
Select this option to limit the number of records returned by the search to the number specified. For example, to show only the first 10 records matching the search criteria, select this option and enter "10" in the Limit To field.
No Maximum
If you select the No Maximum option, all records matching the search criteria are retrieved and displayed on the record list page.
Show Multiple Pages If Limit Exceeded
If you specify a maximum number of matches in the Limit To field, this option is available. If selected, a Next button appears on the record list page (if the number of matching records exceeds the limit entered), along with an indication of the total number of records matching and which records are being displayed. When the user clicks the Next button, the next group of matching records appears. A Previous button appears on record list pages beyond the first, which allows the user to go backwards in the list of matching records.
Formatting the Record List Page

Tango displays results records in a table with one row for each record.
To change the format of the record list page
- In the Record List window, click the Page Format icon.
- In the main window, choose Page Format from the Attributes menu.
The Page Format dialog box appears.
Specify the table attributes as follows:
- Border width. The width of the table border in pixels. Select from numbers 1 to 8. The default is 1.
- Border color. The color of the table border. Select default or a color from the list.
- Background color. The background of the table. Select default or a color from the list.
- Cell spacing. The amount of space, in pixels, inserted between individual cells in the table. Select none, or from numbers 1 to 8.
- Cell padding. The amount of space, in pixels, between the border of a cell and the contents of the cell.
Customizing Your Record List Page
Header and Footer HTML
You use Header HTML and Footer HTML to customize the record list page by specifying HTML to appear above and below the record list.
To enter Header HTML and Footer HTML

- Do either of the following:
- In the Record List window, click the Header HTML or Footer HTML icon.
- In the main window, choose Header HTML or Footer HTML from the Attributes menu.
The corresponding HTML editing window appears.
You can switch between the HTML editing windows by clicking on the Header and Footer tabs at the bottom of the HTML window.
- Enter the desired HTML.
- Close the editing window.
Setting Record Detail Options
Use the options in the Record Detail window of the Search Builder to define the appearance and functionality of the Web page returned when a user clicks on a record on the record list Web page. This page displays a single record and supports user editing and deletion, if you choose to allow it.
Display Columns
The columns appearing in this list are displayed on the record detail Web page. To add a column to the list, drag it from the Data Sources Workspace. The order in which columns appear in the Display Columns list is the order they appear on the record detail page.
Column Options
Use the Column Options section of the Record Detail window to configure each detail column. This section describes each of the column options.
Field Title
In the Field Title field, enter the title to appear for this column's value on the detail page.
Allow Update
Select this option to allow the user to change the value of the column on the record detail page and save the changes to the database.
Field Type
If you select the Allow Update option for a column, the Field Type drop-down list and Field Properties icon are enabled, allowing you to select the type of value editing field you want to appear for the column on the detail page.
As with the search form, you can select from the available field types: Text, Drop-down List, List Box, Check Box, and Radio Buttons.
You specify the field type and its options the same way you do in the Search window of the Search Builder.
The selected column's Field Properties dialog box for each field type is the same in the Record Detail window as it is in the Search window, except you cannot specify a default value (text field type) or a selected item (drop-down list, list box, check box, and radio buttons). This is because the value of the column in the detail record determines the field's initial value.
When creating value lists for drop-down list, list box, and radio button field types in the Record Detail window, make sure you enter the item values exactly as they appear in the database, and include all possible values. If Tango cannot find the column's value in the list when it is constructing the detail page for a record, no item is selected by default. Depending on the user's browser, the first item may be selected or no item may be selected. Either way, if the user saves the record--even if no changes are made to that particular field--a new value (an empty value or the first value in the list) is saved in it.
For similar reasons, make sure check box fields are used only for columns that can contain either an empty value or the value you specify as its checked value.
Setting Column Options: Display As, Image Path, Format As, Decimals, and Add HTML line breaks
Setting these options is identical to setting the column options for the Record List page, except as follows:
- When you select the Allow Update option, these options are disabled.
- The Display As drop-down list excludes the Link to Detail option.
Record Options
If you select the Allow Delete of Record From option, a Delete button is added to the record detail page, giving the user the ability to delete the current detail record.
Deleting records from multiple tables simultaneously is not supported by the Search Builder, so if you have included columns from more than one table in the Display Columns list, use the drop-down list to select the table whose record you want to delete.
Formatting the Record Detail Page
Use the format options to define how the detail column values and their titles are displayed.
To change the format of the record detail page

- In the Record Details window, click the Page Format icon.
- In the main window, choose Page Format from the Attributes menu.
The Page Format dialog box appears.
Specify the table attributes as follows:
- Border width. The width of the table border in pixels. Select none, or from numbers 1 to 8.
- Border color. The color of the table border. Select default or a color from the list.
- Background color. The background of the table. Select default or a color from the list.
- Cell spacing. The amount of space, in pixels, inserted between individual cells in the table. Select none, or from numbers 1 to 8.
- Cell padding. The amount of space, in pixels, between the border of a cell and the contents of the cell. Select none, or from numbers 1 to 8.
Customizing Your Record Detail Page and Creating Response Messages
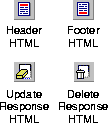
Header, Footer, Update Response, and Delete Response HTML
You use Header HTML, Footer HTML, Update Response HTML, and Delete Response HTML to customize the detail page.
Using Header HTML and Footer HTML, you can edit the HTML that you want to appear above and below the record data.
Using Update Response HTML and Delete Response HTML, you create messages in response to record updates and deletions.
To enter Header HTML, Footer HTML, Update Response HTML, or Delete Response HTML
- Do either of the following:
- In the Record Detail window, click the Header HTML, Footer HTML, Update Response HTML, or Delete Response HTML icon.
- In the main window, from the Attributes menu, choose Header HTML, or Footer HTML, or choose Responses then Update Response HTML or Delete Response HTML from the submenu.
The corresponding HTML editing window appears.
You can switch between the HTML editing windows by clicking on the Header, Footer, Delete Response, and Update Response tabs at the bottom of the HTML window.
- Enter the desired HTML.
- Close the editing window.
Button Titles
When you make a field updatable, or when you allow users to delete records from the detail page, buttons for these actions are added to the record detail Web page.
The record detail Web page contains three buttons below your record detail fields: Save, Reset Values, and Delete.
To change button titles

- Do either of the following:
- Enter new titles in the corresponding fields.
- Click OK.
Search Builder Tips
You can use the Search Builder to create actions that do not follow the standard search form, record list, and record detail sequence.
- Using only fixed values in the Search options. If you configure all of the Search columns to search for fixed values, the built actions on execution take the user directly to the record list and display the records matching the criteria you specify.
- Specifying no Search columns. If you do not specify Search columns, the built actions on execution take the user directly to the record list and display all the records in the database table.
- Specifying no Record Detail columns. If you do not specify Record Detail columns, the built actions do not contain detail functionality and no links appear in the record list.
- Specifying no Record List columns. If you do not specify Record List columns, the built actions on execution take the user straight to the detail page for the first record matching the Search criteria.
Defining Joins
For complete details on what joins are and how to define them using Tango Editor, see "Joining Database Tables".
You can include columns from more than one table in a search, if you define joins for the tables.
If you select columns from more than one table in a search, a dialog box appears telling you to define a join.
Either choose Define to go directly to the Join tab or Later if you want to define the join at a later time.
When you define the join, it adds the columns to the search. You must, however, define the join before you build the actions for the search or you save the application file.
Note:
You must define separate joins for the initial search (the one that displays the record list) and for the detail search.
Actions Built by the Search Builder
The actions built by the Search Builder appear in the application file.
The following table describes the actions resulting from the Search Builder process and the conditions under which actions are built:
 IfForm
 -
<@ARG _function> = form or <@ARG _function>is empty
This section appears only if one or more user-enterable search columns are specified.
 Form
Form  ElseIfList
 This section appears only if record list columns are specified. If no Form is present, this is an If action named IfList.
-
If you selected SQL Statement for any column value, a Direct DBMS action (one for each) appears immediately before the RecordList action.
 RecordList
 ElseIfDetail
 This section appears only if detail columns are specified. If no RecordList or Form section exists, this is an If action named IfDetail.
 RecordDetail
 ElseIfUpdate
 This section appears only if updatable detail columns are specified.
-
For information about the update response, see "Header, Footer, Update Response, and Delete Response HTML".
 Update
  UpdateResponse
  ElseIfDelete
 This section appears only if the Delete option is specified for the Record Detail page.
For information about the delete response, see "Header, Footer, Update Response, and Delete Response HTML".
 Delete
  DeleteResponse
  ElseError
  Invalid
Function
Invalid
Function  Return
 HTML Snippets
The Snippets Workspace contains a snippets folder named Builder Snippets, and a subfolder named Search. The Search folder contains snippets for the Form Header, Form Footer, Record List Header, Next/Previous Buttons, Record List Footer, No Matches, Record Detail Header, Record Detail Footer, Update Response, and Delete Response.
The Search Builder uses these snippets in the designated places as default values for the named attributes. To change the default values, you can edit these snippets.