as sold for £29.99*
| Contact: N/A | Tel: N/A |
| Price: N/A | Fax: N/A |
| System requirements: Windows 3.1 or Windows 95, 4Mb RAM | WWW: http://www.toplev.com |
| Limitations: None | E-Mail: N/A |
| UnInstall: Yes; Add/Remove software Control Panel |
|

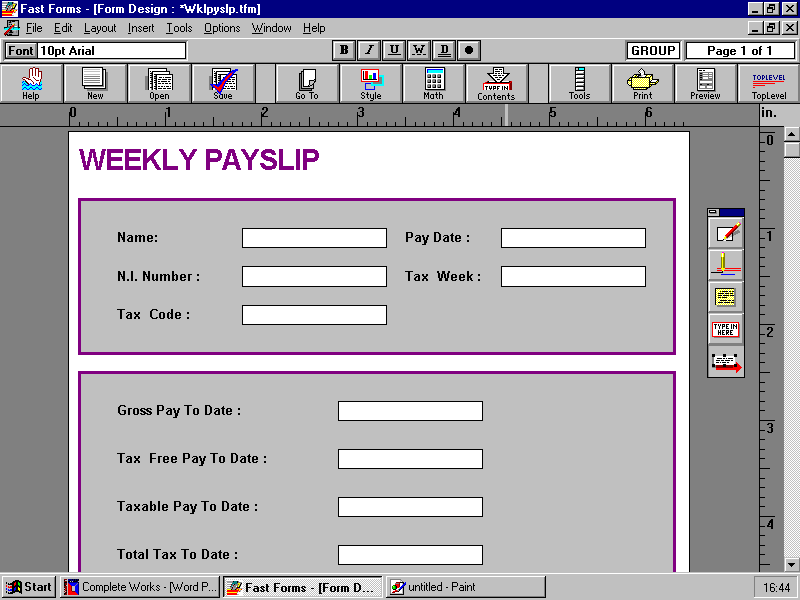
Open the designer application by clicking on Form Design. Select File/Open or the open (F3) button. Click on the library button if you have Win 3.x, or for Win 95 double click on the 'Formslib' folder. Open the file 'wklpyslp.tfm'.

Move the toolbar out of
the way by positioning the crosshair in the top right hand corner of it, holding
the left mouse button down and dragging it clear. Let's start by adding some
text to the form. First select the text tool. Now select the same font and point
size as the text on the body of the form (Arial 10pt,). To do this, click the
font indicator on the status bar and select your choice. 'OK' this and the
status bar will display your preference. You can also set character style from
the status bar, choose 'bold'. Position the crosshair underneath the text 'Tax
Week', hold the left mouse button down and start dragging to create a text
frame. When the frame is a suitable size, release the mouse button. The cursor
will be flashing and you are ready to type the words ''Payroll No.''. Press
return or click outside the frame when you have finished. To amend text, double
click on it so that the cursor reappears. To alter the positioning of the text,
select, and using the mouse drag the frame to the desired position. The markers
on the rulers enable you to line objects up easily.
Next, add a field to a form. A field is drawn when the box is to be filled in on a computer (if a form is to be filled in by hand, the box drawing tool can be used instead). First set the font, point size and character style in which field contents are to appear. Check which have been used for the other fields by clicking on the field above and noting the font etc used, from the status bar. Now select the field drawing tool and create a field in the top grey box, alongside 'Payroll No.' This is similar to creating a text frame, so you should have no problem! Use the markers on the rulers to make the field the same size as the others. Click on the field then press the contents button (F8). Fields are automatically given an unique default name, but it is wise to give a field a more meaningful name ie 'payroll'. Field Type is useful to validate that the data entered conforms to the type expected. A variety of text, number and date formats plus pictures is offered by clicking on the arrow. Select 'number' for the payroll field, now if text is typed in this field when the form is being filled, the invalid entry box will appear. Give each of the fields a name and type, where required.

Calculations can also be
set up in FastForms which include references to other fields on the form. Select
the Maths toolbar (F7), and we will produce a formula for Net Pay. Net pay
=Gross pay - Tax - N I. So, click on the net pay field, now press '=' on the
calculator, next click on gross pay field, followed by a minus, the 'tax
deducted' field, another minus, the 'N I deducted' field and finally 'OK' it .
The formula is now set and when the gross pay, tax and N I fields are filled in
net pay will be worked out for you automatically.

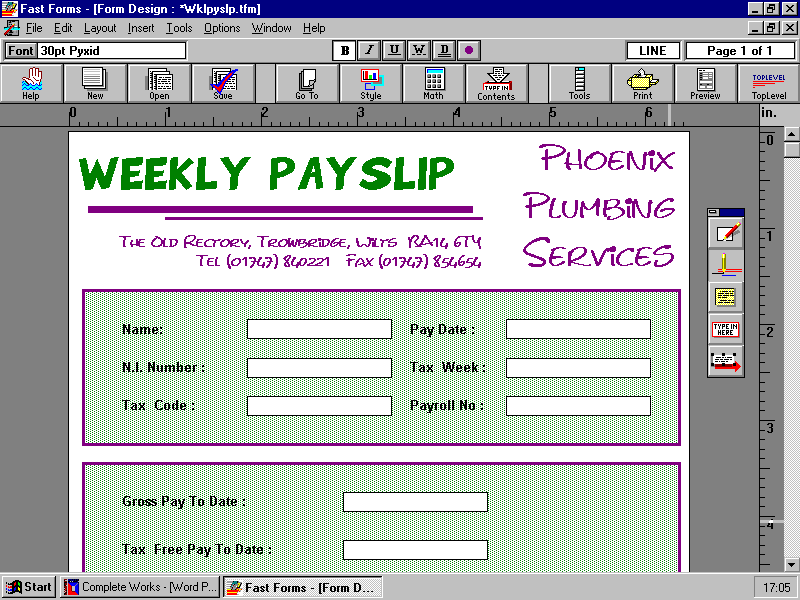
As you can see from the
illustration it is possible to make a form look a little more exciting, by
varying texts and changing colours. Select one of the grey boxes, press the
style button and a variety of background colours, shading, border colours and
thicknesses will be displayed. Experiment! Also, why not customise your form? -
Add your company details. Press the preview button (F11) to view the complete
form. Save your form design using the save function (F4) or select File/Save.
There is no need to rename the file, saving will update the original form design
to your new and improved version! Return to the main menu via the Toplevel
button and close your form.
Now fill in your form to check that it works satisfactorily. Press Form Entry, and open your form 'wklypyslp.tfm' from the library. The cursor will be flashing in the 'name' field, so start by typing in your name. To move to the next field you can either use the tab or return keys, or position the pointer in the appropriate field, using the mouse, and click once. Continue to fill in the form, when you reach 'Payroll No.' type ''hello'' and press return. This is seen as an invalid entry, because we set the field type to 'number' - not 'text'. Save the filled form by clicking on the save function button (F4), or 'save contents' under the File menu. Type a name for the form, of up to eight characters, in the file name box eg 'wkpay1' and click 'OK'. The contents of your form have now been saved - not the form itself - the system remembers which form to use with these contents. This means that if you decide to change the design of the form after saving the contents, the next time you open the contents the design will automatically be updated for you. Finally, print your form. Press the print function button (F10) or use File/Print. It's as simple as that!
Don't forget that there's also a demo of version 3 on this CD.
*Excludes manuals and original packaging