What’s in this Section?
In this section you will learn how to install and operate BounceBack and the hard drive using the fast and easy default settings as outlined below.
Section Topics
2-1: Installing and Using BounceBack
2-2: Disconnecting the hard drive
2-3: Recovering Data Using QuickRestore
2-4: Uninstalling the hard drive
2-5: Upgrading to BounceBack Professional
When installing BounceBack software, either on your notebook or
desktop PC, we highly recommend that you choose the default backup
options. For users of BounceBack Professional this is the best and
preferred method to create a complete (full) backup of your hard drive,
creating a bootable copy on the backup drive that is identical to the hard
drive on your system. This means you can easily recover from a complete disk
crash by simply replacing the damaged disk in your system with the backup
drive. If you own a
The installation process is in three stages; transfer of the program files from the CD to correct locations on the PC, configure the first backup and then running the first backup. Each of these stages has been simplified to make your first backup as ‘easy’ as possible.
To install the software:
1. This step is optional: You may want to temporarily disable your virus protection software (if you have it) during the install; this will increase the speed of the initial full backup. To temporarily disable it, click the icon for the anti-virus program in the taskbar and follow the instructions for temporarily disabling the program.
2. Insert the BounceBack CD into the CD-ROM drive.
Note: If the CD-ROM drive has a spindle, make sure that the CD is pushed all the way down.
3. The BounceBack menu should open automatically. If it doesn’t, double click the CD icon in My Computer and then click BounceBack Setup.
4. Click the Install option on the BounceBack menu.
5. In the License Agreement window, click Yes, that you agree to the License and to start the installation. This copies BounceBack to the hard drive on your notebook or PC, and starts the next stage of the installation the configuration of the backup.

The next window prompts you for BounceBack Activation code. This code is located inside the cover flap of the BounceBack ‘Quick Start Guide’ shipped with the software.

Selecting a Backup Drive
The next window asks you if you have a second hard drive on your system to use for dedicated backups. Choose NO if you don’t have a backup drive. The backup process will then default to backing up My Documents to a folder named My Backup on your system drive. Choose YES if you have an external drive or extra internal hard drive to use for backup.

If you select YES the software will locate any external or extra internal drives hard drives on the system. If no hard drives are found, BounceBack will prompt you to connect an external hard drive to use for backups. If at least one drive is detected, BounceBack will display the Device List, which allows you to explicitly indicate which hard drive to use for the backup process.

Select the drive letter of the hard drive you wish to use for
backups. If you have not connected the backup device, connect it now. Once it
has been identified by the system click Rescan
Device List. This will update the Device
List display to include the newly connected device.
If you selected an external or extra internal hard drive for backup, you are then offered the choice of enabling Disaster Recovery for the selected drive. Choose YES if you want BounceBack to create a bootable copy of your system on the backup drive. Click Disable Disaster Recovery if you wish to backup selected data only and don’t want a bootable backup.

WARNING: Selecting Disaster Recovery will cause BounceBack to re-partition and format the drive selected for backup. All data currently on the drive will be LOST.
If Disable Disaster Recovery is selected, proceed to Sizing the Initial Backup.
If Disaster Recovery is selected, the following screen with the options of Express and Advanced is displayed.

Express Setup will create a complete bootable backup of your system to the backup device, creating a mirror image of all the drives on your system. Selecting Express Setup is highly recommended for users unfamiliar with partitioning and formatting hard drives.
Advanced Setup allows the user to expressly create the drive configuration for the backup device. If this option is selected, BounceBack will first display the default drive configuration for the backup device. By rejecting the defaults, you can create your own custom drive scheme and add additional drives (partitions) to the backup device. Advanced Setup also allows you to select the format for each drive created on the backup device. For more information on creating drives and formatting the backup device, see Using the BounceBack Formatter.
Once a backup device has been selected, the software will continue by scanning the source drive to determine how much data you have to be backed up.
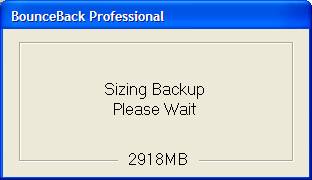
When sizing is complete, BounceBack will estimate how long the initial backup will take. This is displayed along with the backup size and the paths to be backed up.

To initiate your first backup, click Perform Backup.
Clicking Backup Later will halt the installation process. Your backup device will NOT be bootable until the initial backup and an incremental backup is completed. An incremental backup will be launched automatically by the software after the first full backup is completed.
Clicking View Settings will allow you to view or change the default backup options selected by BounceBack. For more information on the BounceBack backup settings, see Section 3 – Customized Backups.
On completion of the installation process, BounceBack will display the statistics for your first backup similar to:

Click OK. (Don't forget to re-enable your virus protection software if you disabled it. See the virus protection software documentation for instructions on how to enable it.)
After the initial installation and complete backup, each time you connect your bbackup device to your computer, the Auto Launch feature scans your system disk for any new files or modified ones, and automatically backs them up to the backup device.
The following backup options are also available.
û
To manually run a backup using the default
settings, click on the BounceBack icon ![]() in the taskbar, and select Launch
BounceBack Backup.
in the taskbar, and select Launch
BounceBack Backup.
û
To temporarily turn off the Auto Launch feature,
click on the BounceBack icon ![]() in the taskbar, and select Disable BounceBack Launcher.
in the taskbar, and select Disable BounceBack Launcher.
û If you have a Seagate® external hard drive that supports Push Button Backup, push the button.
û To create customized backups, See Customized Backups.
û To create scheduled backups, See Scheduling a Backup.
û
Do not disconnect your drive while it is backing
up your files—data loss and corruption will result!
û
You can connect or disconnect your backup drive,
while the computer is on, if it has one of the following interfaces:
û
USB 2.0 or USB 1.1
û
Firewire (IEEE 1394 A or B)
û
PCMCIA
It is important to stop the device before physically disconnecting it from the notebook.
Follow these steps:
1. Do not disconnect your drive while it is backing up your files—data loss and corruption will result!
2. Find
the icon for removable media in the Windows taskbar. It looks like this: ![]() or for Windows 98 this:
or for Windows 98 this: ![]()
3. Click the icon to and identify the external hard drive being used as the backup device. Click the appropriate drive letter to stop the device. When you see the You may safely remove this device message, you can remove the backup drive.
Note: This feature not available in BounceBack Express
Using the QuickRestore shortcut icon on your desktop is the quickest and easiest way to restore lost, changed, or deleted files.

1. To restore a file from the backup drive to the hard drive, click on the QuickRestore shortcut icon on your desktop. (You can also access the restore feature by clicking on the BounceBack Launcher icon in the taskbar and selecting BounceBack QuickRestore.)

1. In the left side of the BounceBack QuickRestore box, navigate to the backup that contains the file(s) you want to restore. You will see the file details on the right side of the screen.
2. Note the Status information for the files.
û Unchanged—the file on the backup drive unit is the same as the file on your hard drive.
û Older—the file on the backup drive unit is older than the file on your hard drive.
û Newer—the file on the backup drive unit is newer than file on your hard drive.
û Deleted—the file on the backup drive unit represents a file that has been deleted on your hard drive.
3. Click on the file(s) you want to restore.
4. Select the Restore Path:
û Select Restore to original location or,
5. Click the Restore button.
6. Select the Restore Option you want and click OK:
û Overwrite Existing Files without Asking
û Prompt before Overwriting
û Do Not Overwrite Existing Files

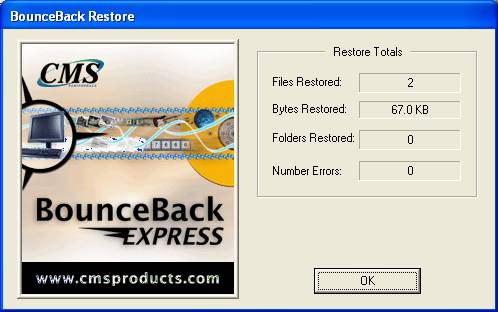
7. BounceBack QuickRestore scans and verifies the hard drive has enough space to accept the restore. Click Continue on the Statistics screen.
8. BounceBack restores the file(s) and reports under Restore Totals. Click OK to return to BounceBack.
For
Advanced Restore topics, See Using BounceBack QuickRestore
The instructions in this section apply to all Windows operating systems.
Follow these steps to remove BounceBack from your system:
1. Power on your computer.
2. Click Start on the Windows desktop, then point to Settings and click Control Panel.
3. Double-click Add/Remove Programs to open the Add/Remove Programs icon.
4. Highlight BounceBack Express or BounceBack Professional and click Add/Remove.
5. Follow the instructions on your screen.
Note: If BounceBack Express is already installed when a BounceBack Professional installation is initiated, the option of upgrading your current BounceBack Express software will be available. This will allow you to keep the current BounceBack settings and backup sets.
Follow these steps to upgrade from BounceBack Express to BounceBack Professional.
1. Visit our website at www.cmsproducts.com to purchase and download BounceBack Professional.
2. The BounceBack Professional installation will keep all the settings from your previous version if the upgrade option is selected. Otherwise, it will uninstall the current version before starting a fresh install of BounceBack Professional.
3. If you are already backing up your data to a backup drive using a previous software release, then you probably do not want to reformat your backup drive during the new software installation. You have these options:
û You can first copy the data you want to keep from the backup drive to another location on the hard disk in your notebook or PC. You can then install the BounceBack software and create a bootable backup. The installation will reformat the backup drive, so you will lose all data you had previously backed up. This is the recommended method to upgrade to BounceBack.
û You can choose during the installation to disable the disaster recovery option. If you do this, you cannot create a bootable backup disk. However, you can still recover from a disk crash by having all your data available.
4. Once you decide which option you want, follow the instructions for the installation procedure in Installing and Using BounceBack.