


Planner folders provide a convenient way of structuring your list of Planners. Planner folders are hierarchical which means that you can create folders inside other folders in just the same way that you can create nested sub-directories in the Windows Explorer.
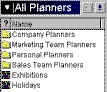
You can add a planner to a planner folder by dragging the planner in the left hand window and dropping it onto the folder. The planner will then disappear from the left hand window. To view the planners held in a folder you must open the folder by double clicking on it in the left hand window or by selecting the folder from the drop down list of planners.
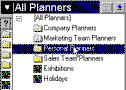
When you open a folder, the left hand window will show only those planners contained in that folder. A {bmct help0074.bmp} marker is displayed on the top line of the list of planners. Double clicking on this line will re-display the top level planners and planner folders.
To add a new Planner Folder, do the following:
select New Folder from the Edit/New menu in Planner mode. The Planner Folder dialog box will appear.
Type in a name for the Folder and press OK. The Planner Folder will be displayed at the top of the left hand window.
To delete a planner folder, select it and press the Delete key on your keyboard. When you delete a folder, any planners inside the folder will also be deleted. If you want to avoid this then you should move the planners out of the folder before you delete it. You can move planners out of a folder in the following way:
Double click on the folder to show the folder's planners.
Select the planners and drag them on to the {bmct help0075.bmp} marker. The planners will be moved up one level. If you now double click on the {bmct help0076.bmp} marker, you will see the planners along with all the other planners in the planner list.