
The Basics
OpenGL
The Editor and Simulator use the OpenGL Application Programming Interface (API). OpenGL allows the programming of real-time 3D-applications similar to Direct3D, which is a part of DirectX. The OpenGL API is supported by all Windows implementations since Win95b. Its driver model allows hardware-accelerated 3D rendering in NT 4.0 and on. Most modern graphics cards ship with OpenGL drivers. If no acceleration is present the driver will fall back on the standard software based rendering system. The Editor will run software rendering without much of a problem since the Editor uses wire-frame based display. However the Simulator will run extremely slow in software mode, and it is not recommended to run the game this way. It is best to update your graphics card drivers to the most recent version before playing NoLimits. To see if you are running in software rendering or in OpenGL in the Editor click on ?, then choose Info. In the Simulator click on Info. If you are running in software you will see this displayed:Vendor: Microsoft Corporation
Renderer: GDI Generic
Version: 1.1
If you are not running in software youll see information about your particular card and drivers. Both the Editor and the Simulator will try to use hardware-accelerated rendering first, and fall back to software if no other option is available. Very few cards support 24-bit color depth, with 16-bit and 32-bit being standard. There are some cards (3DFX) that do not support 32-bit color. The Simulator will run in either 32-bit or 16-bit color. The Editor uses the same settings as your desktop, but 16-bit color is recommended. Use the Windows display settings to change the color depth used for the Editor.
Track-Files
All NoLimits track files should be located in the Tracks subfolder. All saved elements (prefabs) will go in the Elements subfolder.Starting the Editor
When you are ready to build double click the icon of the Editor to start it. Unless disabled when you launch the editor you will be greeted by a Tip of the Day. These are handy tips that will aid you in building your coasters. If you do not wish to see them anymore uncheck the box in the lower left. This is what the display will look like: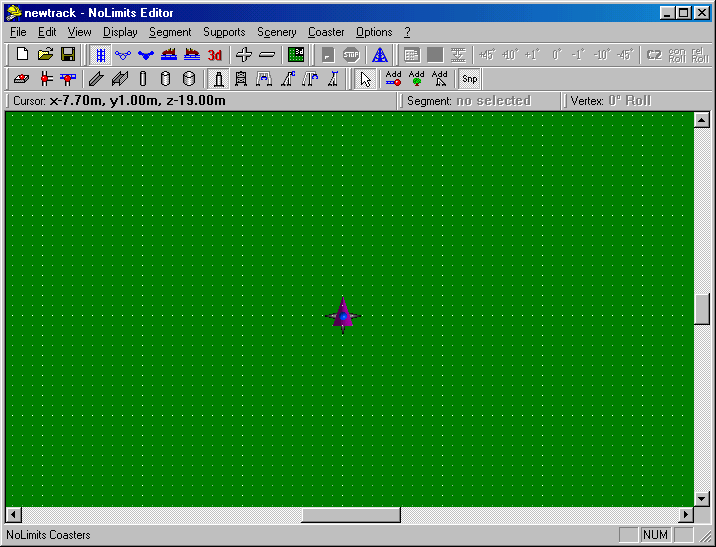
The Editor after start
Notice all of those buttons on the tool bars? They look quite confusing, but read on and we will go into depth about what each of them do.
Vocabulary
Before we get started lets become more familiar with names of the different items used in the Editor. A track consists of a series of Segments. Two adjacent Segments share a common point called a Vertex. Every Vertex has 2 other points that can be manipulated. These are known as Control Points. By moving Vertices and manipulating their Control Points you can modify the bezier curve that the track Segment will follow. Each Segment can either be standard track, or can be changed to many special types (more on this later). Have we lost you yet? This may help: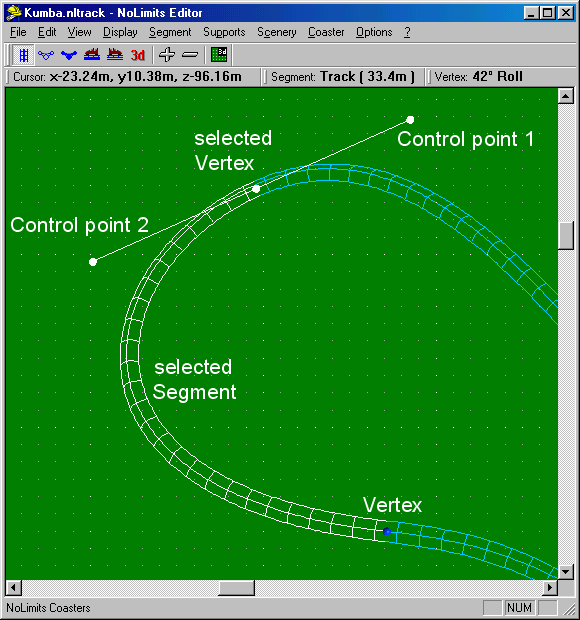
Vertices, control points and segments
If you read on you will find sections devoted to Segments, Vertices, and Supports.
The Views
All editing in NoLimits is done by clicking and dragging your mouse. To aid you in this there are 5 orthogonal (2 dimensional) views including top, front, back, left, and right. There is also a 3D perspective view. To change which view you are using you can use the buttons on the tool bar, or use hot keys. Here are the tool bar buttons:![]()
The View-Toolbar
Moving around in any of the Orthogonal views is really easy. Simply move the sliders on the scrollbars to change where you are viewing. You can also zoom in and out by clicking on the + or in the tool bar.
Movement in the 3D view is very easy as well. In 3D there are 2 modes,
Mouselook and Edit. When you first change to the 3D mode you will automatically
be in Mouselook mode. Moving the mouse will change the direction the camera
is facing. To end this and change to Edit mode click the right mouse button.
This will lock the camera in place and bring up a mouse cursor. In 3D view
you can always move around using the W, A, S, and D keys. Holding down
Shift will increase the movement speed.
When you have activated the Ride-View (see the Simulation Toolbar)
you can use W and S to move along the track, too.
When in one of the Orthogonal views you may turn on a small 3D Picture in Picture mode. When activated you will see a small real time 3D view from the angle you last oriented the camera at in the 3D view. This is very useful for creating a smooth coaster. The size of this window can be adjusted in the Options>Preferences menu.
Picture in picture
All of the Orthogonal Views will only modify the Vertex or Control Point in 2 dimensions. You will have to switch to another orthogonal view to modify the remaining dimension. You can modify control points in the 3D view as well, but it will be at a depth and plane based on the angle of the camera and the current selected object. Any point you move will move along the X/Y axis of the screen and not the 3D world. If you change the camera angle you will change the X/Y plane that the point will move on.
The Settings
There are a lot of settings that control the editing modes and the display-quality of the editor. Most settings will be set for the corresponding view individually. That allows you to optimize each view for your needs. The settings will automatically be written to the registry at the applications-end and will be restored when you launch it.
You can enable or disable several aspects of the display in the
"Display"-menu. If an aspect is disabled it cannot be seen therefore cannot
be modified. That allows you to hide objects that you do not want to modify
at a certain situation.
Under the Display menu you will find many options to adjust what is shown in the editor. Many of these can be set individually for each view. Your settings will be saved when you exit the program and will be ready for you the next time you start.
- Show Grid: This is used to turn the grid on and off. This option can be set for each view. Does not work in 3D view.
- Show Scenery: This option is used to show the trees you can place. This option can be set for each view.
- Show Vertices: This option is used to show or hide the Vertices (Blue Spheres). This option can be set for each view.
- Show Supports: This option is used to show or hide the Supports and Support Nodes. This option can be set for each view.
- Show Ties: This option is used to show or hide the crossties. This option can be set for each view.
- Show Origin: This option is used to show or hide the point 0,0,0. This option can be set for each view. Does not work in 3D view.
- Show First Vertex: This option is used to show or hide a purple cone used to identify the First Vertex. This option can be set for each view. Does not work in 3D view.
- Show Block Borders: This option is used to show or hide the block boundaries. (more on the Block Safety System later). This option can be set in each view.
- Show Inside 3D: This option is used to show or hide the small 3D window. This option does not work in 3D mode, and cannot be set for each view.
- Show Shadows: This option is used to show a shadow of the track in the shape of a black line in the 3D mode for better depth recognition.
- High, Medium, Low, and Very Low Detail: Adjusts the detail level of the track. This option cannot be set for each view individually.

The Origin |

The First-Vertex |
If something is hidden from the display you will not be able to edit it. Being able to show and hide certain items will help you see what you want to modify more clearly.