
Vertex Editing
Control-points
A blue ball visualizes a Vertex. A Vertex consists of 3 points: the position (the central blue ball) and the two Control Points. If you select a Vertex you will be able to manipulate its Control Points which will shape the adjacent track Segments. This section will go into detail about the Vertex and advanced editing features associated with it.The First-Vertex

Roll (Banking)
You can set the Roll of each Vertex by using the various buttons in the tool bar to change the Roll in degree increments of 1, 10, 45, or you can reset the roll to 0.![]()
The Segment-Toolbar
A change in roll between 2 segments is assumed to be constant.As
a result the program figures out the change in roll between the two Vertices
and draws the curve accordingly. See this example:
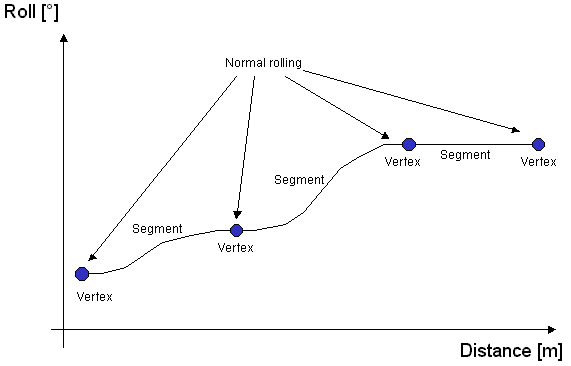
A series of Vertices with normal rolling
A smoother change in Roll can be achieved by using the Continuous Roll function.
By default all roll angles are measured in absolute angles. There are some circumstances when an absolute angle cannot be determined (vertical track is one), and for that you can use the Relative Roll function. Relative Roll (the "Rel Roll"-button) determines the Roll relative to the last angle. For example if your previous Vertex was at an angle of 35 and you selected Rel Roll for the next Vertex with the Roll set at 5 Degrees, then the next result would be the new Vertex banked at 40 degrees. It takes much longer to compute this function, so it is best to use it sparingly. It is best used on vertical or near vertical track.
Continuous Rolling
If the "Continuous Roll" option is enabled the roll will be drawn like this. This is the same situation as the previous picture, but the "Con Roll"-button has been pushed for 2 Vertices.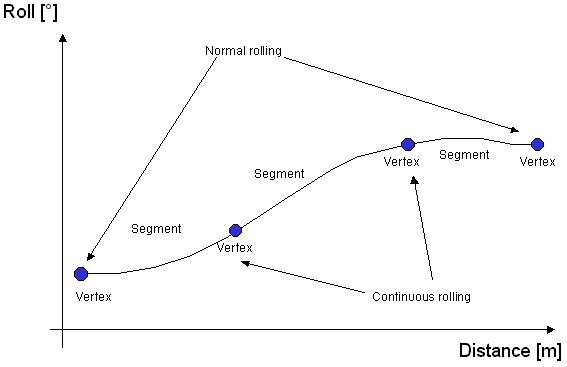
A series of vertices with normal and continuous rolling
If your coaster contains a lot of twisting track you will find that Continuous
Roll has very different effects. Experiment to find out when it is best
to use this feature to produce a smooth coaster.
C2-Continuity
The "C2-Continuity" option is a restriction that will keep both Control Points of an equal distant from the Vertex. There are many instances when this will simplify the building of your coaster.