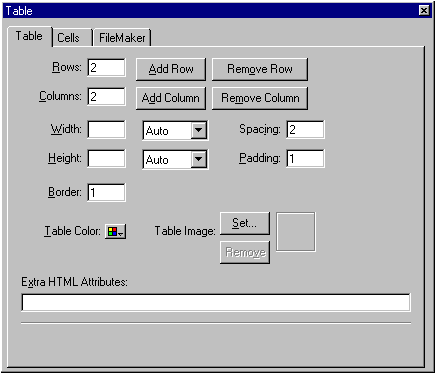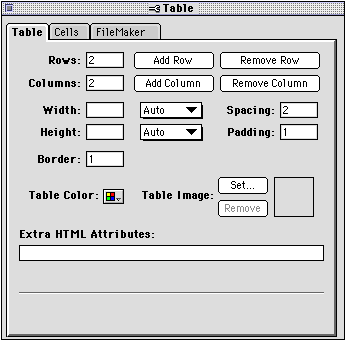

Use the Table Object Editor to change the attributes of a table and the contents of each cell. For example, you can make the border invisible so your viewers are unaware that the information is contained in a table. The Table Object Editor appears automatically when you insert a table into your page.
You can also open the Table Object Editor three other ways:


Note When you select the table border and open the Table Object Editor, only the Table tab settings are displayed. To see the Cells tab settings, select a cell in the table.
To change the attributes of a table, select the table and then change the settings in the Table Object Editor (click the Table tab if necessary). To apply the new settings, press Tab or click the close box of the Table Object Editor. See Resizing a table or parts of a table for more information.
|
Use this table |
To do this |
|---|---|
|
Rows |
Specify the number of rows in the table. Rows are added to and subtracted from the bottom of the table. The maximum number of rows you can specify is 100. |
|
Add Row |
Add a row directly below the selected cell or table. |
|
Remove Row |
Delete the selected row or the bottom row of the selected table and its contents. |
|
Columns |
Specify the number of columns in the table. Columns are added to and subtracted from the right side of the table. The maximum number of columns you can specify is 25. |
|
Add Column |
Add a column directly to the right of the selected cell or table. |
|
Remove Column |
Delete a selected column, or the right-most column of a selected table, and its contents. |
|
Width |
Change the width of the table. Choose Percent to make the width a percentage of the browser window's width. Choose Pixels to make the width a fixed amount that is not affected by the browser window's width. Choose Auto to make the width fit evenly around the table elements. For more information on changing the table width, see Changing the table width or height. |
|
Height |
Change the height of the table. Choose Percent to make the height a percentage of the browser window's height. Choose Pixels to make the height a fixed amount that is not affected by the browser window's height. Choose Auto to make the height fit evenly around the table elements. For more information on changing the table height, see Changing the table width or height. |
|
Spacing |
Change the amount of space between cells (by making the border thicker). |
|
Padding |
Change the amount of space around the data in cells. |
|
Border |
Change the thickness of the table borders to make it appear beveled or three-dimensional. A setting of 0 makes the borders of the table invisible. |
|
Table Color |
Change the background color of a table. For more information on changing the color and background of a table, see Changing the color and background of a table. |
|
Table Image |
Specify a background image for a table. Click Set to select an image file. Click Remove to restore the default background setting. |
|
Extra HTML Attributes |
Add other HTML attributes to a table. Requires knowledge of HTML. For more information, see Adding extra HTML to your page. |
To change the attributes of a cell, select the cell and then change the settings in the Table Object Editor. Click the Cells tab if necessary in the Table Object Editor to display the cell attribute settings. To apply the new settings, press Tab or click the close box of the Table Object Editor.
|
Use this cell |
To do this |
|---|---|
|
Column Width |
Change the width of all the cells in a column. For more information, see Changing the table width or height. |
|
Column Span |
Change how many columns a cell spans. For more information, see Resizing a cell to span rows and columns. |
|
Row Height |
Change the height of all the cells in a row. For more information, see Resizing a row or column using the mouse. |
|
Row Span |
Change how many rows a cell spans. For more information, see Resizing a cell to span rows and columns. |
|
Horizontal Align |
Change how elements are horizontally aligned within the cells. For more information, see Changing the alignment of elements in a table. |
|
Line Wrap |
Make text wrap in a cell. |
|
Vertical Align |
Change how elements are vertically aligned within the cells. For more information, see Changing the alignment of elements in a table. |
|
Header Cell |
Format the selected cell as a table header cell in order to label a row or column. (Text in header cells appear in bold face type in Claris Home Page; they may look different in your browser.) |
|
Cell Color |
Change the background color of an individual cell. For more information, see Changing the color and background of a table. |
|
Row Color |
Change the background color of an entire row.
|
|
Cell Image |
Specify a background image for a cell. Click Set to select an image file. Click Remove to restore the cell's default background setting. |
|
Extra HTML |
Add other HTML attributes to an individual cell in a table. Requires knowledge of HTML. For more information, see Adding extra HTML to your page. |