Claris Home Page automatically converts image files such as PICT and BMP files into GIF format when you insert them into a page.
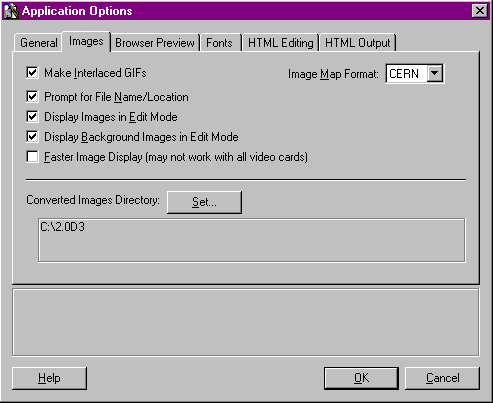
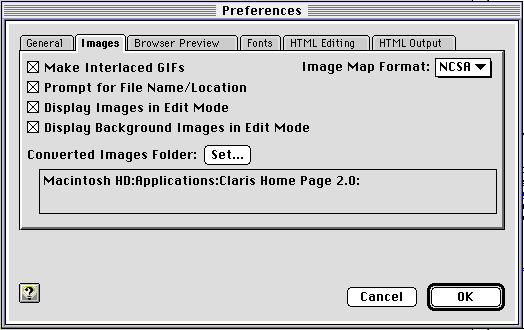
When Claris Home Page converts an image, it automatically stores the converted image file in the Claris Home Page folder. You can set the default so that images are automatically stored in your images folder in the site folder, or you can also have Claris Home Page prompt you for a filename and location each time it converts a file. You can also set Claris Home Page to automatically add an interlacing effect to the converted images. For a description of what the interlacing effect does, see Creating an interlaced image.
To set the default location where Claris Home Page stores the converted GIF files:
To set Claris Home Page to prompt you for a filename and location each time it converts an image file to GIF format:
Note When Claris Home Page converts Photoshop or TIFF files, it automatically adds the word (converted) to the filename.
When Claris Home Page converts an image into GIF format, an interlacing effect is applied to the converted image. You can change the default setting so that Claris Home Page does not automatically make every image it converts to GIF interlaced as well. For more information, see Creating an interlaced image.
To remove the default interlacing for converted images:
Note This setting only affects GIF files that Claris Home Page automatically converts from other image file formats, such as PICT or BMP files.