Select images to print, then click on the button ôPrintö of the QuickStep bar or the ôPrintö button on the toolbar.
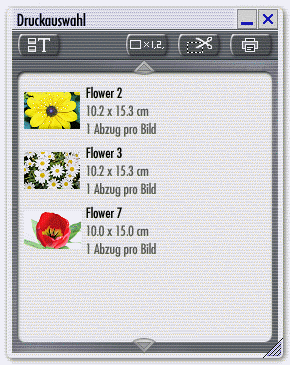
The selected images appear in the Print Spooler panel. The ôViewö button on the left toggles the image list between different display styles.

The buttons on the right control the print process in detail, such as the size, number and layout of images.
This button opens a panel to choose the number of times an individual image is printed. This can be helpful, if the various guests of an event ask for copies of different photos you took. Select one or multiple images in the print queue, click the ôPrints per Imageö button and enter the number of prints needed.
Click this button to change the cutout area, orientation or size of an image.

The drop-down list ôPicture Formatö lists popular image sizes. The cropping handles in the image preview area will adjust automatically, if the aspect ratio of the chosen picture format is different than that of the picture itself. Any excess area is filled with a background color, which can be chosen by clicking the ôBackgroundö button.
To crop the image to the picture format, drag the cropping handles in the image preview area. If the aspect ratio is locked, two perpendicular cropping handles will automatically move proportionally. To define the exact cutout area, click in the center between the cropping handles and drag the cutout.
Refer to the Reference Guide for additional functions available on this panel.
After choosing appropriate options for each image, proceed by clicking the ôPrintö button. This will include all images in the Print Spooler. To choose specific images for printing, select those images in the Print Spooler before clicking the ôPrintö button.

The ôPrintö panel opens.
If you have access to more than one printer, choose one from the drop-down list. The ôPrinter Settingsö button will allow you to change options that are hardware-specific.
Two buttons allow you to limit the print process to any images that were selected from the Print Spooler û or to disregard the selection and print all images.
The ôCopiesö option determines how often each page will be printed.
Use the ôCrop marksö option, if you intend to cut the printed images with the help of a ruler and cropping blade.
Click the Print Preview button to view the effect of any options you have chosen.
ôImages per Pageö can be used to limit the number of images that are printed on the same page. This may be helpful when pages intended for a photo album. The ôMaximumö option will minimize the use of expensive photo paper.
ôOptimize Utilizationö will change the order and orientation of images across all pages to minimize the number of printed pages. This option should be used, if you plan to cut the individual images from the printed page.
ôCenter on Pageö will center the page content on the paper. This will produce the most aesthetically pleasing look.
ôOptimize Qualityö will determine the exact resolution of the printer. If necessary, images are printed slightly larger, to match the printer resolution. The result are higher-quality prints û but the printing process may be slowed down significantly.