[Previous] [Main] [Next]

Creating a Menu

This is a step-by-step tutorial for creating a Menu. This tutorial illustrates some of the features seen in the "first.swi" file in the Samples Menu.

1. Open file "myfirst.swi"

2. Check that Scene 2 appears in the Scene row on the Timeline Panel. If Scene 2 does not appear in the 'Timeline' Panel, select Scene 2 from the Outline Panel

3. Press the myfirst-fit_in_window.png 'Fit in Window' Zoom button to see the complete stage

Note: You can also Zoom In or Zoom out on the stage at any time by pressing the zoomin.png Zoom In button or the zoomout.png Zoom Out button

4. Select the recti.png Rectangle/Square Tool from the Toolbox. Click near the top left corner of the stage and drag the mouse down and right to create a rectangle

5. Select the Transform Panel and change the width of this shape to W: 702 and the height of this shape to H: 40 (The 'Uniform' box should not be checked). At the top of this panel there is a 'Center' button indicating the object's alignment. As the Movie's width is 702, the center of the object's X location should be 350. If it is not, change the value in the 'X:' box to 350. As the object's height is 40, the center of its Y location should be 19. Change the value in the 'Y:' box to 19 if it is another value. This will ensure that there is no gap around the top or sides of the shape when played

6. Select the Shape Panel, change the Line color to a dark green and the Fill color to a light gray

7. While the Rectangle shape is selected, press copy.png to copy, and paste.png to paste your object. It will paste directly over the original shape. Click on the shape and drag it towards the bottom of the stage. Check the rectangle's X and Y position in the Transform Panel, and change to X: 350, Y: 431, if necessary

8. Select the recti.png Rectangle/Square Tool from the Toolbox. Click over the left corner of the rectangle at the top of the stage, and drag the mouse down and right to create a rectangle that will completely cover both rectangles.

9. Select the Transform Panel and change the width of this shape to W: 700 and the height to H: 450 (the 'Uniform' box should not be checked). Center the object on the stage by changing the value in the 'X:' box to 350, and the value in the 'Y:' box to 225

10. Select the Shape Panel and change the Line color to a dark green and the Fill to None

11. Right-click on Frame 10 in the Scene row and select Stop from the context Menu

12. Select Scene 1 from the Outline Panel. From the Timeline Panel in Scene 1, remove the Stop Action at Frame 125 by right-clicking on the Stop Action marker and selecting Cut Action or by pressing Control + X while clicking

13. From the File Menu, select 'Test | Test in Player' to check that your rectangles are placed correctly. Your introduction will play first and this Scene will follow. Close the 'Player' window

14. Select Scene 2 from the Outline Panel

15. Select the 'LINK 1' button and press the front.png 'Bring to Front' button on the Standard Toolbar, then drag it over towards the top left corner of the stage, placing it over the gray rectangle where desired

The 'Layout' Panel should look like this:  
 
tute5_1.png  

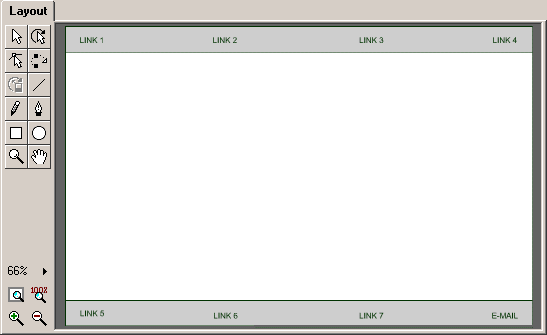
Before making a Menu, you may want to consider whether you want your buttons to look more or less the same and whether you want them to have similar behaviors. If you want your buttons to look uniform, it can save a lot of time if you create one button and then copy and paste as many of those buttons as needed, and then go into the different states to change the text. This way, the buttons will be consistent in size and color. If you want the buttons to have similar behaviors as well, you should add any sounds and perhaps some or all of their actions before copying and pasting. You can always go into the different states and change the specific Goto Scene or URL references  
 
For this tutorial, all buttons will have the same sounds attached to the On Roll Over, and On Press Events, but the other actions will be different. As these sounds have already been attached, you can begin copying and pasting the 7 additional buttons we will be using.  

16. From the Outline Panel make sure that your button's states are not visible, clicking the minus (-) symbol to the left of the main button's icon, if necessary

17. With the button selected, press the Control+C keys to copy your button, then select Scene 2 from the Timeline Panel

Note: It is important that the Scene is selected before you paste and not the button, as a button cannot be pasted inside of another button

18. Press paste.png to paste the copy of your button. Drag your button over to the left and place it about 200 pixels away from the first button

19. This Menu will have 8 buttons, 4 buttons over the top rectangle and 4 over the bottom rectangle. Continue pasting the 7 additional buttons (selecting Scene 2 from the 'Timeline' Panel) prior to each paste, then drag each button so that all the buttons will be more or less evenly spaced over the top and bottom rectangles

The 'Layout' Panel should look something like this:  
 
tute5_2.png  

20. From the File Menu, select Test | Test in Player to check that your buttons are placed correctly

21. When you are happy with the placement of your buttons, select the button to the right of the 'LINK 1' button, and from the Button Panel change the name from "LINK 1" to "LINK 2"

22. From the Outline Panel, click on the plus ( + ) symbol to access "LINK 2" button's states. Change the text for the Up, Over, and Down, states from "LINK 1" to "LINK 2"

23. Repeat step 22, for the all but the button on the bottom right; increasing the number of each button by one

24. For the bottom-right button, change the name from "LINK 1" to "E-MAIL"

The 'Layout' Panel should now look something like this:  
 
tute5_3.png  

25. From the File Menu, select Test | Test in Player to check that your buttons are placed correctly

26. When you are satisfied with your Menu, save your Movie

You are ready to continue with the Creating a Sprite tutorial.


[Previous] [Main] [Next]