


The ThinkPad computer preloads a lot of useful software. This section introduces how to use your computer by using this software in the Windows 95 environment.
You can send or receive a fax message with the ThinkPad's Mwave feature and a preloaded application FaxWorks(**). With FaxWorks, the ThinkPad computer works as a fax machine, telephone, or answering machine.
This section describes how to send a fax from the Windows 95 application WordPad.
|
To attach the telephone line:
> reference #39. |
If you are using FaxWorks for the first time,
you are prompted to do the basic setup.
Follow the step-by-step instructions on the screen
until the following window appears in Windows 95:
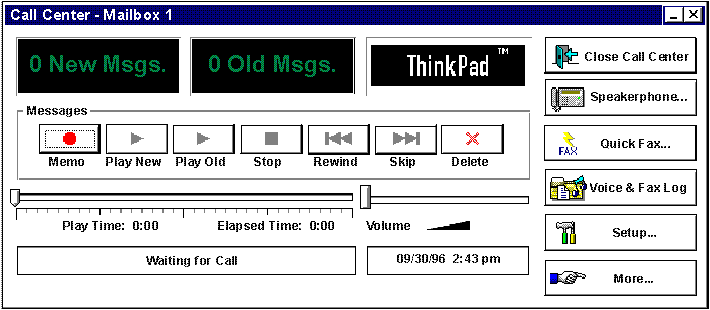
The FaxWorks - Send Fax window is automatically displayed.
Check if your fax has been sent to the destination number.
For more information about FaxWorks, see the document for FaxWorks that came with the computer.
The following describes how to attach a printer to the computer and set up for Windows 95:
 )
at the rear of the computer.
)
at the rear of the computer.
The new icon for your printer appears in the Printers folder. Now, you can use your printer from Windows 95.
For more details, refer to the "Printing" section in the Windows 95 manual (Introducing Microsoft Windows 95), which is contained in the Windows 95 package.
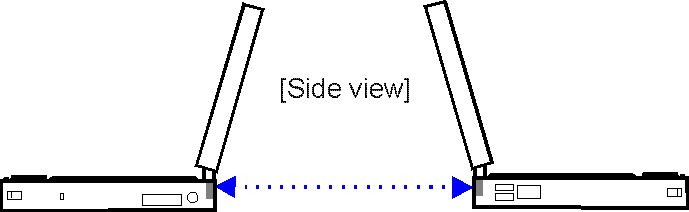
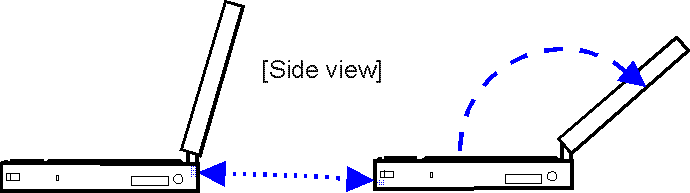
Your ThinkPad computer is equipped with two infrared ports on the front and rear of the computer. Through each port you can share or transfer computer data without any cables between your computer and another computer equipped with an infrared port.
This section describes how to communicate between two ThinkPad computers using a preloaded application TranXit.
You will see a file manager window.
Type your favorite name for each computer. (The names must not be the same.)
|
Note:
|
| Note |
|---|
When you use the front infrared port,
open the LCD to a wide angle
to prevent the light from the LCD from affecting
the infrared communication.
 |
After a short pause, the file manager window splits in two:
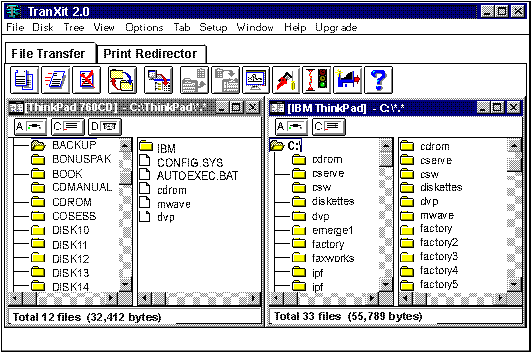
The window on the left displays the contents of the
hard disk in the other ("remote") computer.
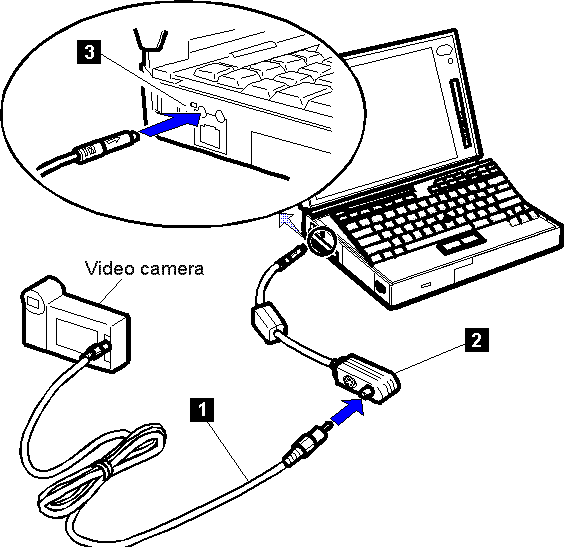
You can easily capture video using the preloaded application Digital Video Producer and your video equipment. You can use the captured image to create a bitmap file, or to "cut and paste" into your presentation file.
This section describes how to capture motion video using the video camera, and save it to the computer's hard disk.
 ready.
Also, have the following video in-out cable
ready.
Also, have the following video in-out cable  (shipped with
the computer at the time of purchase) ready.
(shipped with
the computer at the time of purchase) ready.
 (
( )
of the computer as follows:
)
of the computer as follows:
|
Note:
|
|
Note:
|
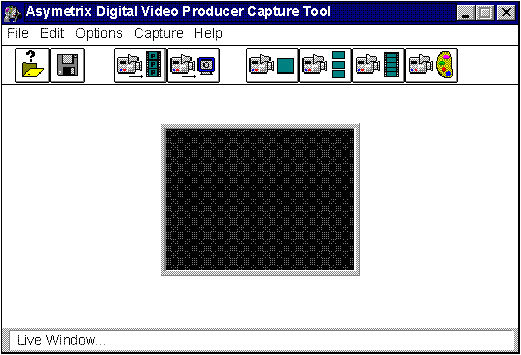
In this window, define the name of the file your captured image is saved to. (You can use the default name capture.avi.) Select OK to return to the main window.
|
Note:
|
This setting specifies that Digital Video Producer will capture motion video for 10 seconds into the file capture.avi (or whatever file name you specified).
The moment you select Video, the computer begins capturing motion video for 10 seconds.
Select Start, Accessories, Multimedia, and then Media Player.
 )
to view your captured image.
)
to view your captured image.
You can save audio information concurrently using Digital Video Producer. For more information about Digital Video Producer and the video capture function, see "Using the Enhanced Video/MPEG Features".
 )
faces the top when you attach the video in-out cable
to the video-in port of the computer.
)
faces the top when you attach the video in-out cable
to the video-in port of the computer.