To create a query select the Query | New Query menu item  or click the appropriate button on the toolbar. Set an optional name for the new query (it is used, e.g. for keeping the query history).
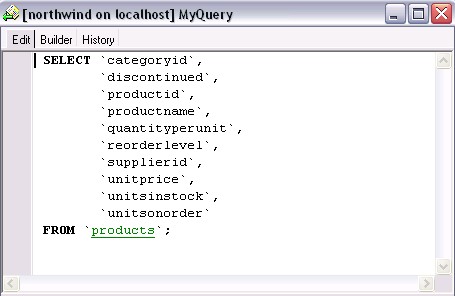
Now you can edit the new query on the Edit or Builder tab of the Query Editor.
The Edit area is provided for working with the text of the query. To make editing faster you can drag tables and fields from the DB Explorer and drop them to the edit area. Dropping a table adds a SELECT statement for this table to the query, and dropping a field adds a field name to the cursor position.
For your convenience the Quick Code system is enabled, i.e. when you type first word symbols in the SQL text editor you are offered some variants for the word completion in a popup list (analogue of the Code Insight in Delphi IDE). You can activate these popup lists yourself by pressing the following key combinations:
Ctrl+Space All SQL keywords and database objects
Ctrl+Alt+S SQL glossary
Ctrl+Alt+T Table list
Ctrl+Alt+U UDF list
Ctrl+Alt+F MySQL function list
Database objects are highlighted in the text. You can open the proper object editor by clicking the object name in the text, holding button Ctrl pressed on the keyboard.
The popup menu of the edit area contains standard functions for working with the text (Cut, Copy, Paste, Find, Replace, Toggle Bookmarks, etc) and also functions for processing the whole query, which allow you to execute/prepare query, save/load query to/from file, and preview/print query.
On the Builder area you can build your query by placing the database tables on the area, selecting the required data and setting links between objects.
To add a table to the query, choose the required object in the DB Explorer table list, then double-click it or drag it to the Builder area. The selected table will appear on the Builder area with the list of its fields. To include a table field in the query, click at the left of the field name in the list or double-click it to set the blue icon next to the field name. To include all the fields, set a flag at the left of the object alias. To remove the fields from the query, uncheck the fields; to remove the object, close it by clicking the button 'X' next to the object alias. To edit the object alias, double-click the alias.

To associate database objects by two fields, just drag one field from the object list to another. This will set a link between these objects by the selected fields. When you drop a field, a line will appear between the linked fields. You can view and edit the properties of object association. To do that, aim cursor to the link line. A hint, containing the association condition, will appear. To edit the properties, double click the line or right-click and choose Properties item from the popup menu. A dialog window will appear, where you can change the association condition by choosing it from the list (=, >, <, >=, <=, <>). Also you can check or uncheck Include all from <object_name> option for each object, included into the association. Click 'OK' to confirm the changes you made. To drop a link between objects, right-click on the link line and choose Delete Link item from the popup menu. To delete all the links of some object, click button '-' next to the object alias. To insert a point to the link line, right-click on the line and choose Insert Point item from the popup menu. A new point will appear, using which you can move the link line. It doesn't cause any changes in the query but makes the diagram performing more obvious and the visual building handler.
To set other query properties, use tabs at the lower part of the window.
Criterions
On this page you can set the selection conditions. To add a condition, click button at the left and select 'Add condition' in the popup menu. Edit the condition by clicking its parts and setting their values. Clicking the button at the left of the condition string activates the popup menu, which allows you to add a new condition of the same enclosure level, add a new enclosure level, delete the current condition, open or close the condition, if it is composite. A simple condition string contains three fields: an argument, a condition and a second argument (if required for the condition). Clicking each field allows you to set its value. Clicking the argument field allows editing it as a text field. You can set a table name or a definite value in this field. Right-clicking the field in the edit mode activates the popup menu, which contains the Insert Field function (also called by Shift+Enter). This function allows you to choose a field from the list of all the table fields, available in the query. Clicking the condition field activates the popup menu, where you choose the condition you need. The way of proceeding the condition is set in the upper string of the area (All, Any, None, or Not all of the following are met). Click the underlined word to change it.
Selection
This page displays the output fields of the query. It allows you to edit the names of the query output fields, set their displaying order and set the aggregate functions (SUM, MIN, MAX, AVG, and COUNT) for each field. To remove the field from the list, right-click the field row and choose 'Delete current row' from the popup menu. To change the input query field, double click it and then type the field name on the keyboard or choose it from the drop-down list.
To change the output query field name, double click it and type the field name on the keyboard.
To set the aggregate function for the field, double click the field row in the Aggregate column and then type the function name on the keyboard or choose it from the drop-down list.
 Include only unique records
If you check this option the repeated records are not included into the query result.
Grouping Criterions
On this page you can set the conditions for grouping the query records. They are set in the same way as the selection conditions (see above). These conditions will be included into the HAVING statement of the current query.
Sorting
Set the way of sorting the query records on this page. The field list at the left represents all the output query fields; the list at the right contains fields, by which the query records will be sorted. To move the field from one list to another, drag the selected field or use buttons 'Add' and 'Remove'. To change the sorting order, select a field in the right list and move it using buttons 'Up' and 'Down'. To change the sorting direction, select a filed in the right list and switch the direction (Ascending, Descending) using button 'A..Z'/'Z..A'.
To execute the query click the Execute  button on the toolbar or press F9. If the query text is correct, the query executes and the Results area opens at the lower part of the window with the data returned by the query. If an error occurs while executing the query, execution stops, and the error message is displayed in the bottom area.
The Results area allows viewing the query result data set in two modes: as a grid or as a form. The buttons of the navigation panel (see picture below) work in the following way: go to the first records in the set, go to the previous record, go to the next record, go to the last record, refresh data.

The popup menu of the grid view allows you to set filter for displaying data, set to record to null, to empty string, to now (depends on the field data type). The form view provides easier editing, especially for string or date/time fields.
You can save/load a query text or a builder diagram. To save current query to SQL file just click the Save  button on the toolbar and set the filename in the dialog. To save it as a diagram click the down-arrow near the save button and select Save Diagram.
To save an already saved query to another file, click the Save As  button (or select the Save Diagram As in the same way).
To load a previously saved query, click the Load Query  button on the toolbar and load an SQL file or a builder diagram from file.
All recently edited queries are saved on the History tab of the Query Editor. In the left part of this area the list of edited queries is displayed. Date is date and time when this query was edited and Name is the name you set on creating the query.

Select a query in the list to display its text in the right part of the window. This text can't be edited here. To make a query active and available for editing and executing, just double-click the required query in the list. It opens in the Edit area and you can work with it in the way described above.


