Bump Mapping Tests
Introduction
Emboss bump mapping can be used on almost every hardware. The most general implementations of it do not require any special features or DirectX6 materials.
The Emboss tests have been divided into three different categories, each using a bit different set of 3D accelerator features (explained below). The 3 passes method works on almost every 3D accelerator, except some older hardware that lack some of the required basic blending modes or just report them incorrectly in the driver. The 2-pass and 1-pass methods require multitexturing capabililties.
All bump mapping tests aim to produce visually as similar output as possible to make the results comparable, and each of the test gives out a result in frames per second (FPS).
Texture Usage
Bump Mapping (Emboss, 3-pass)
Bump Mapping (Emboss, 2-pass)
Bump Mapping (Emboss, 1-pass)
Bump Mapping Usage In Games
Problems and limitations with Embosss Bump Mapping
When creating and mapping textures used with bump mapping, wrapping textures create an additional problem. As emboss bump is based on shifting UV coordinates, the textures can’t be UV-mapped from (0.0, 0.0) to (1.0, 1.0) but must have some free space around the edges. Otherwise the texture will bleed over when tiling or wrapping the texture. Clamping the UV coordinates will not work for tiling textures.

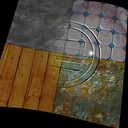
Texture Usage Emboss bump mapping requires additional textures, usually known as "height map". It is a grayscale texture where the brightness of a pixel is used to represent the "height" of that pixel. The textures used in 3DMark are 512*512 pixels in size. If the Bump map tests look a little bit blurry on your 3D Accelerator, it is probably because your hardware is limited to using 256*256 pixel textures.
Base Texture Height Map Texture The height map texture is converted to two seperate textures.The Shifted Height Map has been shifted 1 bit to contain only half of the original brightness. The Inverted and Shifted Height Map has first been made negative of the original height map and then been shifted 1 bit. How this works out in the actual rendering process is explained later in the bump map tests.
Shifted
Height MapInverted and Shifted
Height Map
Bump Mapping (Emboss, 3-pass) The 3-pass Emboss bump works on widest set of hardware but uses a lot of fill rate since the screen output is rendered three times to get the image, hence the name 3-pass.
Required Direct3D features:
- Additive Alpha Blending
- Multiplicative Alpha Blending
The 3 rendering passes to the frame buffer look like:
Frame Buffer after
first pass:Frame Buffer after
second pass:Frame Buffer after
third pass: [finished]
When setting the materials for the rendering passes, with some simplification they go like:
First Pass
(normal texture)Second Pass,
Additive,
with offset UV'sThird Pass,
Multiply (2X)
(with Gouraud shading)+ *2X
If you are interested in the Direct3D RenderStates and TextureStageStates that 3DMark uses, the exact States used are in a seperate file available here.
Bump Mapping (Emboss, 2-pass) This method does the emboss bump mapping in two passes. It requires multi-texture capable hardware. The first two passes that create the actual "height" feeling have been combined to one pass.
Required Direct3D features:
- Multitexturing (texture + additive)
- Multiplicative Alpha
The 2 rendering passes to the frame buffer look like:
Frame Buffer after
first pass:Frame Buffer after
second pass: [finished]
When setting the materials for the rendering passes, with some simplification they go like:
First Pass
(normal texture)Multitexture,
Additive,
Offset UV'sSecond Pass,
Multiplicative (2X)
(with Gouraud shading)+ *2X
If you are interested in the Direct3D RenderStates and TextureStageStates that 3DMark uses, the exact States used are in a seperate file available here.
Bump Mapping (Emboss, 1-pass) Requires multitexture hardware that supports the ADDSIGNED2X operator.This method has a "problem" with the ADDSIGNED2X, which may cause some clamping in the color range. In 16 bit modes this method produces worse visual results than the other emboss methods. With 32 bit textures the problems are not as visible.
Required Direct3D features:
- Multitexturing (texture + additive)
- 2X Multiply
- Gouraud Shading
The 1 rendering pass to the frame buffer looks like:
Frame Buffer after
first pass: [finished]
The material setting for this bump mapping method is fairly complex and you will need to see the Direct3D RenderStates and TextureStageStates that 3DMark uses. The exact states used are in a seperate file available here.
Bump Mapping Usage in Games As 3DMark is "The Gamer’s Benchmark", we have investigated into the uses of bump mapping in detail. Basically, implementing emboss bump mapping with DX6 is easy. But the quirks come in when you try to make it look good.
Primary limitation of bump mapping is that it works properly only with one light source. If you want to make it look good in a game, you either need to define a separate bump map light source or use always the closest light source for bump mapping. For static objects this is fine (although bump on static objects is probably not ideal).
- You can either use several light sources per-bump-map-vertex similar to gouraud shading with several light sources, but that lessens the maximum bump effect. And in a worst case scenario could bring a lot of bump-lighting CPU overhead.
- If you use only one light source, you will need to decide which light is now being used as the bump light. This could be a general directional light from above to simulate sun, or the game could pick the nearest\strongest light, but that creates a problem when the bump-mapped object is moving from area of one light to next.
- Or you could use several bump passes to get the transition smooth, but the bump material must be rendered as many times as there are bump-casting lights, thus slowing performance.
Additionally, just creating the DX6 material for Emboss Bump mapping is not enough. Issues like vertex normal in regard to light normal, and vertex position in regard to light position might be needed to be taken into account.
Finally, emboss bump mapping is vertex based, and relies on the bump mapped object to be somewhat tessellated (using more polygons than would be otherwise required), not giving optimum performance for gaming use.
When creating and mapping textures used with bump mapping, wrapping textures create an additional problem. As emboss bump is based on shifting UV coordinates, the textures can’t be mapped from 0,0 to 1,1 but must have some free space around the edges. Otherwise the texture will bleed over when tiling/wrapping around. Clamping the UV coordinates will not work for tiling textures.