|
Reflections
|
|
|
This will work for any object, not just for text. Here is another example. There are many variations of this effect, for the sake of illustration we will use the text. |
|
| Step 1 | |
 |
Start with a gradient. Tip: To constrain the gradient to 90 degrees hold down the shift key. |
| Step 2 | |
 |
Add your text or image |
| Step 3 | |
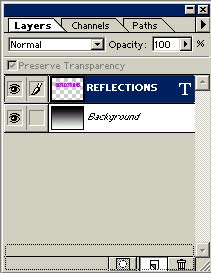 |
Make a copy of the text by dragging to the new layer icon |
| Step 4 | |
 |
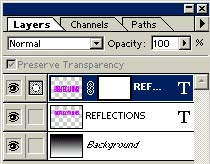
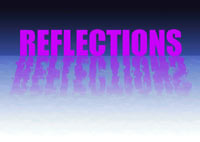
On the copy go into free transform by pressing Ctr/Cmd+T. Mac: Option+Click>Flip Vertical. PC: Left click >Flip Vertical. Drag the reflected copy below the original |
| Step 5 | |
 |
Free Transform again and stretch image by dragging down on the bottom middle handle. |
| Step 6 | |
 |
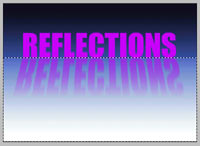
Add a layer mask to the reflected copy and fill with a black to white gradient |
| Step 7 | |
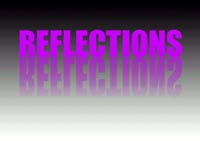 |
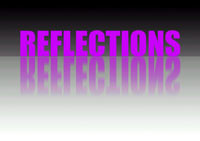
Should look like this |
| Step 8 | |
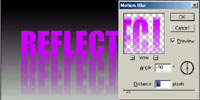 |
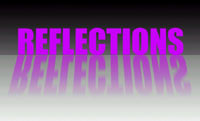
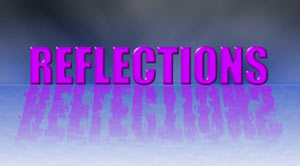
Filter>Blur>Motion Blur. Angle -90 |
| Step 9 | |
 |
Make a selection around the bottom part of the background layer. Image>Adjust>Levels or Ctrl/Cmd+L Adjust the sliders to lighten the surface |
| Step 10 | |
 |
Free Transform again - Perspective |
| Step 10 | |
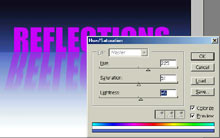 |
Select the background. Open Hue Saturation box. Colorize to add some color to the background. |
| Step 10 | |
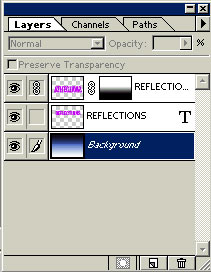 |
Merge the reflection layer with the background by clicking on the box between the eye and the thumbnail, a link should now appear in the box. Click on layers>merged linked. |
| Step 10 | |
 |
Make a selection around the bottom part of the image by using the rectangular selection tool |
| Step 10 | |
 |
Filter>Distort>Ocean Ripple. Adjust settings to suit |
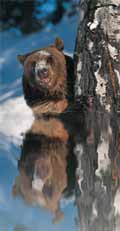 Here
we will learn how to get realistic water reflections.
Here
we will learn how to get realistic water reflections.