|
Title
|
|
|
|
|
| ByColin Smith |
| Step 1 | |
 |
Create text on new layer 1. and rasterize - PC right click on name in layers pallette/Mac-Cmd Click >rasterize |
| Step 2 | |
 |
Make new
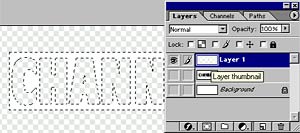
layer 2. and using rectangular marquee tool make a box around the text. Deselect - Cmd/Ctrl +D |
| Step 3 | |
 |
Fill the
new box with white. While layer 2 still active, Ctrl/Cmd click on layer 1 thumbnail. |
| Step 4 | |
 |
press del, should look like this |
| Step 5 | |
 |
hide layer 1 and Ctrl/Cmd click on layer 2. This is the image
we are going to make 3d. |
| Step 6 | |
  |
Click on the new channel button in the Channels Pallete. Alpha 1 will apper. fill your selection with white, it should resemble the image on the left. |
| Step 7 | |
 |
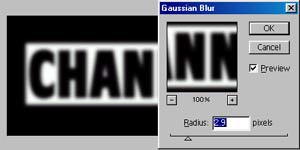
Deselct and go to Filters>Blur>Gaussian blur. The higher you make the blur the more your image will be bevelled. Click on the rgb channel at the to of the pallette. |
| Step 8 | |
 |
Go back to the layers pallete and select your image layer |
| Step 9 | |
 |
Here is where the magic happens. Filter>Render>Lighting effects. Use the settings here or play around with your own. Click on texture channel and load Alpha 1. I deselected the white it high for this example. Click on the color picker to give your light some color. We used purple. |
| Step 10 | |
 |
Click ok and say "wow." The finished result.
I put a drop shadow and a blue gradient in the background for coolness
sake. |