

|
Manipulating
Styles in Photoshop 6
|
|||||||||
|
Al
Ward, Action Fx Photoshop Actions Resource Though I'm generally known as an actions guy, I'm interested in all types of addons you can create in Photoshop. 5.0 gave us a lot of options, but Photoshop 6 has surpassed the older versions by leaps and bounds in presets that can be created, saved and reused in Photoshop, as well as be distributed to others. I've dealt with some of these features in my articles on Planet Photoshop (http://www.planetphotoshop.com) as well as my site (http://actionfx.com), but I still think there is plenty to cover in these areas, especially where it comes to Layer Styles. Maybe
you are unfamiliar with Layer Styles as yet, and so I'll cover
them briefly. Layer Styles are simply groups of commands saved
as a preset, that may be instantly applied to type or a filled
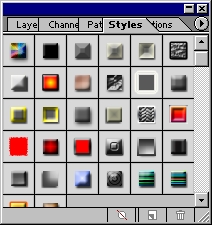
selection in Photoshop. Going to Window>Show Styles will
bring up the Styles Palette, which may look something like this:
When you initially open the palette, there will be a few styles loaded. These are not all that came with the program. If you want to check out more styles click the small arrow to the upper right of the palette and go to load or replace styles. The rest of the presets available are in Photoshop 6>Presets>Styles. Let's run through a couple examples. To begin
with I'm creating a new image with a white background. I'll
enter some large type so you can see what is going on…
any color will suffice. For those of you interested, this font
was found online. The name is Viper Squadron… very cool
I think!
With the type layer active, let's pick a couple Layer Styles and see what happens. With one click, we get this:
… or this:
or even this:
Pretty cool stuff, huh? The obvious benefit to developing and using layer styles is to create a site with similar effects in the buttons, titles, portions of an interface, etc. The graphics mesh, thus giving the viewer of your site the impression that you know what you are doing when it comes to design… and you did it all with a couple mouse clicks! These can also be fantastic in generating rollovers, and Adobe has even labeled a couple of their style sets thusly. Let's go back to that last style we used. Let's
say it is close to the effect you are looking for, but not quite…
is there a way to alter the Style to suit your needs? Sure there
is… we can even save the style in it's altered state without
losing the original style. Once you have applied the style,
go to the layers palette. Beneath the active type layer there
are a few commands attached to the layer, under the heading
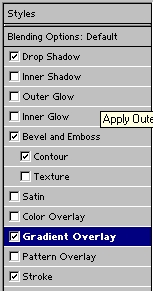
'Effects'. Clicking this will bring up the layer style options,
where we may change any of the presets to taste. For example,
say I'd like more of a metallic effect. I know from past experience
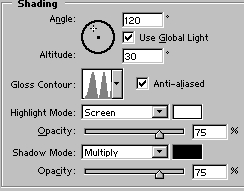
that I want to adjust the curve applied to the bevel, and by
selecting the bevel/emboss option I can apply either a saved
preset curve to the bevel or, by clicking directly in the small
curve window, create my own to apply to the text. Here are my
settings:
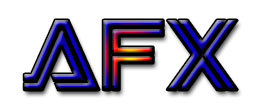
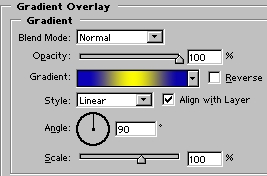
Here is the result: Not too bad, but I'm not too fond of red. I started with blue type, and I can still have a semblance of blue with this style by deselecting the Color Overlay option. I can them apply a gradient overlay instead for another variation.
Again, the result:
That I like! I used to have to record all these steps in an action to recreate the effect later, but as I've stayed within the realm of the Layer Styles and only effected one layer, I can instead save this as my own style for later application. When I'm satisfied with the effect, in the Layer Style Options window I can click 'New Style' and the preset will now be loaded into my Styles Palette for later use. Once I have a bunch created, I can then save the group and, as I've done on Action Fx and here, distribute them to whoever has an interest. I hope this little article has been informative as well as helpful. Until next time, Chow! Al Ward
|
|||||||||
