


|
Volume Number: 25 (2009)
Issue Number: 01
Column Tag: Network Administration
Integrating OS X With OpenLDAP/Samba, Part 2
An article, in a series, on "Configuring Your Mac To Work With Linux Samba and LDAP Servers."
by Noah Gift
Introduction
In Part 1 we covered talking to a Samba Server running on an Ubuntu Virtual Machine, but we stopped at merely obtaining read only access to data. In this article we fully configure Samba on Linux in an ideal configuration for OS X, and then get into authenticating all of this to LDAP on Linux.
Because we delve into a fairly complex undertaking of getting Linux and Samba configured inside of OS X, it is important to point out how powerful this combination truly is. OS X, universally known for simplicity and ease of use, can yet again, hide the complexity of a Linux server within the shadows of its own operating system by using virtualization. Linux servers talking to, and running inside of OS X is a very compelling choice to consider, as it combines the strengths of both platforms, and minimizes their respective weaknesses.
Dirt Simple Home Samba Configuration
In the last article, we downloaded a pre-configured Ubuntu Virtual Machine here: http://examples.oreilly.com/9780596515829/vm/ and then got it talking to Samba, but we only had Read-Only access. Now it is time to optimize the configuration file to make file-sharing work completely with OS X for a typical home setup behind a firewall.
If you remember from the previous article, we created a very minimal read only configuration. Here are the steps to get a full read/write configuration working from scratch with zero authentication. This is perfect for a home network behind a firewall, in which no username or password is desired in order to connect to the share/.
If you are still working off of the downloaded virtual machine, then go ahead and edit /etc/samba/smb.conf and add the contents below. (Remember that the username and password is py4sa. Alternately, you can simply use this configuration on existing Ubuntu Virtual Machine or server you already have running.)
Step 1: Edit the smb.conf file
Listing 1: (zero security) samba config /etc/samba/smb.conf
[global]
workgroup = home
netbios name = py4sa
security = share
[share]
comment = Home File Server
path = /usr/export
force user = py4sa
force group = py4sa
guest ok = yes
read only = no
With this configuration file squared away, next we need to create the actual directory to share out, change the ownership, and restart samba.
Step 2: Create the shared directory mentioned in the configuration file
py4sa@py4sa:~$ sudo mkdir /usr/export
Step 3: Change ownership to match the "forced" user and group privileges we set in the configuration file
py4sa@py4sa:~$ sudo chown -R py4sa:py4sa /usr/export
Step 4: Restart the samba daemon
py4sa@py4sa:~$ sudo killall -HUP smb
With this out of the way, we can perform a command line debugging step first to see if our share is available. Under OS X, we can simply run this command (note that your IP address may be different):
[ngift@macintosh-8][H:743][J:0]# sudo smbclient -L //192.168.1.200
Next, we should see some form of output like this:
Domain=[HOME] OS=[Unix] Server=[Samba 3.0.26a]
   Sharename    Type   Comment
   ————-    ——   ———-
   share        Disk   Home File Server
   IPC$         IPC    IPC Service (Samba 3.0.26a)
Domain=[HOME] OS=[Unix] Server=[Samba 3.0.26a]
   Server               Comment
   ————-            ———-
   PY4SA                Samba 3.0.26a
   Workgroup            Master
   ————-            ———-
   HOME                 PY4SA
   MOTHERSHIP           MOTHERSHIP
Here, we can see that our share is indeed alive, and it is named "share", with a comment "Home File Server", just as we wrote. I am a huge advocate of doing the simplest possible thing that will work, and in our situation, this is quite literally, the simplest possible configuration a user could want on a home network.
This configuration creates a simple read/write share that requires no password from a Mac. In the next section, we will go through the connection process.
Mounting Samba Read/Write As Guest
Now, that we have Samba configured, and running, we can simply mount the volume by using "Apple + K". Here is a sequence of screenshots showing the processes.
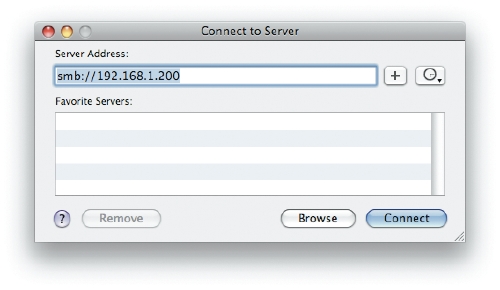
Figure 1: Connect To The Samba Server

Figure 2: Authenticate as Guest (No password required)

Figure 3: Test Read/Write Privileges
In the sequence of screenshots shown in Figures 1 through 3, we demonstrate how handy this simple "home brew" Samba Server really is. It allows us to setup read/write privileges for a guest user in seconds. Having this tip in your back pocket can sure get you out of some potential problems in a pinch, such as sharing a common web development environment. The nice thing about using a virtual machine running inside of your Mac is that the complexity can simply be turned off when you're done, or alternately, it can run forever as a server inside of a desktop Mac, or perhaps Mac Mini.
Now that we have conquered the simple Samba setup for OS X clients, let's get into conquering the simple LDAP setup for OS X clients.
OS X to Linux LDAP Configuration in 60 Seconds
LDAP is another protocol that can be a complete pain to deal with, as it can get quite complex for the newbie in a hurry. In this section, though, we reuse a pre-configured "vanilla" Ubuntu LDAP server running on the virtual machine we downloaded, and shudder, authenticate our OS X client directly to it in about 60 seconds. One of the reasons why this is so easy is because we have a pre-configured virtual machine, which hides the complexity of setting up LDAP initially from scratch.
Our goal in this section is, once again to do the simplest possible thing that works. Here is a sequence of screenshots of authenticating to LDAP:

Figure 4: Using Directory Utility to create a connection to LDAP

Figure 5: Read the error message, (Note, Linux LDAP doesn't just work out of the box).

Figure 6: We use advanced settings to configure a RFC 2307 mapping (chosen from the drop-down menu).
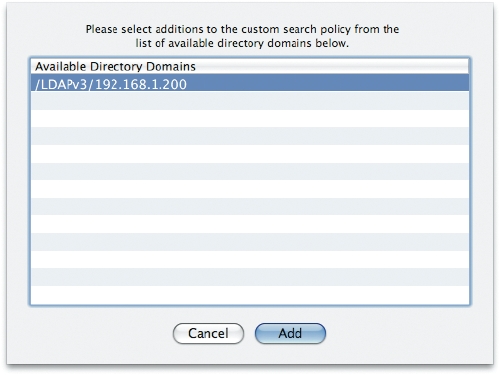
Figure 7: Still using Directory Utility, we manually add our new LDAP server to the search path.

Figure 8: In the Accounts Preference Pane, we setup "fast user switching," simply to allow easy testing of LDAP user account logins
Authenticating to LDAP from OS X
Now that we are configured to talk to Linux LDAP, let's test it out from the command line by interactively exploring our LDAP session from the awesome "dscl" command line tool.
Listing 2: exploring LDAP from the command line
[ngift@macintosh-8][H:753][J:0]# dscl
Entering interactive mode... (type "help" for commands)
 > ls
BSD
LDAPv3
Local
Search
Contact
 > cd LDAPv3/
/LDAPv3 > ls
192.168.1.200
/LDAPv3 > cd 192.168.1.200/
/LDAPv3/192.168.1.200 > ls
Automount
AutomountMap
CertificateAuthorities
Groups
Mounts
People
Users
/LDAPv3/192.168.1.200 > cd Users/
/LDAPv3/192.168.1.200/Users > ls
nobody
py4sa
root
This interactive session for the dscl command shows us that we are indeed connected to the LDAP directory on the Linux server, and can see the user accounts on that machine, such as py4sa. Next, let's actually login using that account.
If you notice, we can log in as the py4sa user, but we get a weird error from bash, because there is no home directory specified inside of LDAP.
Listing 3: using py4sa to login
[ngift@macintosh-8][H:761][J:0]# su py4sa
Password:
bash: /home/py4sa/.bashrc: Input/output error
bash-3.2$ whoami
py4sa
The final thing to test is to actually do a fast user switch login to the new "py4sa" account that gets pulled from the LDAP database on the Virtual Machine. If you go through with the process it will hang for about 30 seconds, and then bring up a warning that it couldn't find the user's home directory, yet still login, to a temporary home directory.
So what does this prove? Well, it proves that we have the simplest possible Samba, and LDAP connections running from a pre-configured virtual machine. Not to shabby for some virtual machine file on your file system.
Conclusion
In this second article in a four part series, we fully configured a Read/Write Samba share running off of a virtual machine. The security was intentionally set to allow not require a user name and password, as this is very appropriate for ad hoc or home networking.
Next, we did the simplest possible LDAP authentication we could by configuring OS X to talk to the same virtual machine. We stopped at really doing anything too useful though, as we weren't able to use a home directory yet. In the next article, we go beyond our simple Home Samba Server, and lightweight LDAP configuration, to setup a sample Enterprise configuration, that ties in home directories, 3rd party LDAP administration tools, and more. In the final and fourth article we then take our enterprise LDAP/Samba configuration, and make tie in authentication to Apache and Trac. This allows for one firecracker of a virtual machine, that again, is just some file sitting on your OS X box.
BIBLIOGRAPHY AND REFERENCES
Noah Gift. "How To Build A Dirt Easy NAS with Samba". Red Hat Magazine, http://www.redhatmagazine.com/2007/06/26/how-to-build-a-dirt-easy-home-nas-server-using-samba/.
Noah Gift. "Getting Started With Open Directory". O'Reilly. http://www.macdevcenter.com/pub/a/mac/2007/06/01/discover-the-power-of-open-directory.html
Noah Gift and Jeremy Jones. "Python For Unix and Linux Systems Administration". O'Reilly . ISBN: 0596515820
Noah Gift has been a Mac user since his family bought a Macintosh Performa 6300 in 1992, and started connected to BBS networks immediately and then eventually the World Wide Web in 1993 when it become open to the public. He is the co-author of "Python For Unix and Linux System Administration" by O'Reilly, and the upcoming "Google App Engine In Action" by Manning. Noah has a couple of decades of experience in the Television and Film industry starting off as an editor for ABC Network News as a teenager. He contributed to the first feature animated film for Disney Feature Animation and Sony Imageworks. He also had stints at Turner Studios and Caltech, where he worked for the Nobel Prize winning President as a Mac expert. He has a Master's degree in CIS, and is LPI and ACSA certified. He currently works for Weta Digital in New Zealand. Many of his projects and writing are available at www.noahgift.com. He can be contacted at noah.gift@giftcs.com


- SPREAD THE WORD:

- Slashdot

- Digg

- Del.icio.us


- Newsvine
