


Fitting a RiscPC into a PC case
Dave Holden takes out his toolkit...
Acorn's RiscPC case
When the RiscPC first appeared it's case was acclaimed by Acorn as an innovative design. The main benefit that they promoted was that it was extremely easy to get access to the processor card since it didn't require the use of any tools to take the top off the case. It was also "expandable" by adding additional "slices" and had a sliding flap to cover the drives on the front. As well as all this it was made of plastic instead of metal and, more importantly for a lot of people at the time, it looked completely different from PC cases.
The ability to change processors quickly and easily was obviously something that Acorn were very keen to promote. At the time of the launch of the RiscPC they had already announced that the first card would be available shortly, so purchasers needed to be assured that it would be easy to fit this. Acorn were also anticipating other ARM processor upgrades and wanted these to be easily "user fitted" without the use of tools.
Unfortunately processors were the only thing it was easy to upgrade on a RiscPC. Almost every other item that you might want to change involves the almost complete disassembly of the computer. Even fitting a CD ROM drive involves completely disassembling the machine as the retaining screws have to be fitted from underneath so you have to remove the part of the case it's being fitted in.
The only things you can replace without stripping the entire machine are RAM or VRAM, and even then you have to remove any expansion cards. The things that most users needed to replace in the years following the launch of the RiscPC were hard drives, as prices dropped and capacity increased, and CD ROMs (and later on, CD writers) as these became almost universal. However, because of the RiscPC case design upgrading was much more difficult than with the average PC. Not only that, but the standard RiscPC "single slice" case had room for only one hard drive, one CD ROM (or a second hard drive) and one floppy drive. If you wanted to fit additional drives you had to fit a "second slice" (if you didn't already have one) at a cost of around £70, about twice the cost of a standard PC case complete with power supply.
Yes, you could add an extra "slice" to expand the case but even if you did so you still had only about the same room for extra drives as even a small PC. It still only gave you room for one additional drive, although many people squeezed a hard drive into the spare floppy drive slot. This was acceptable with the hard drives available at the time, but is certainly not a good idea with modern drives which generate a lot more heat. There was also the additional cost of a replacement power supply if your computer was fitted with one of the original 65 watt units. This pushed the cost of the upgrade to over £100.
Advantages of a PC case.
At the time I obtained my first RiscPC I had a PC in a desktop case. This was quite an expensive case, I think it cost me £49. The reasons for purchasing it was that it was a bit narrower than many desktop cases at the time (about the same width and height as a two slice RiscPC) with room for plenty of drives, but the thing I particularly liked was that the lid was hinged. To open it you just pressed a release catch and lifted. It even had a "prop" to hold it open. In fact, it was even quicker and easier to get access to the internals than the RiscPC, especially as everything was accessible, not just the processor.
Today there is an enormous choice of cases available, both desktop and tower. Almost all except the very cheapest tower cases have removable sides, and in many cases you don't even need a screwdriver to gain access. They also usually have a lot more space for expansion, and this is important as people add additional hard drives and CD ROMs. To go with this they will have a larger power supply.
You can, of course, spend a lot of money on a case. My own RiscPC is fitted into a Lian Li all aluminium case (shown below) which cost around £70 (and that was without a power supply). However, you don't need to spend anything like that amount to get a something suitable, and the ones illustrated later both cost around a third of this including a power supply.
With each of the following illustration click on the picture for a larger version of the image.
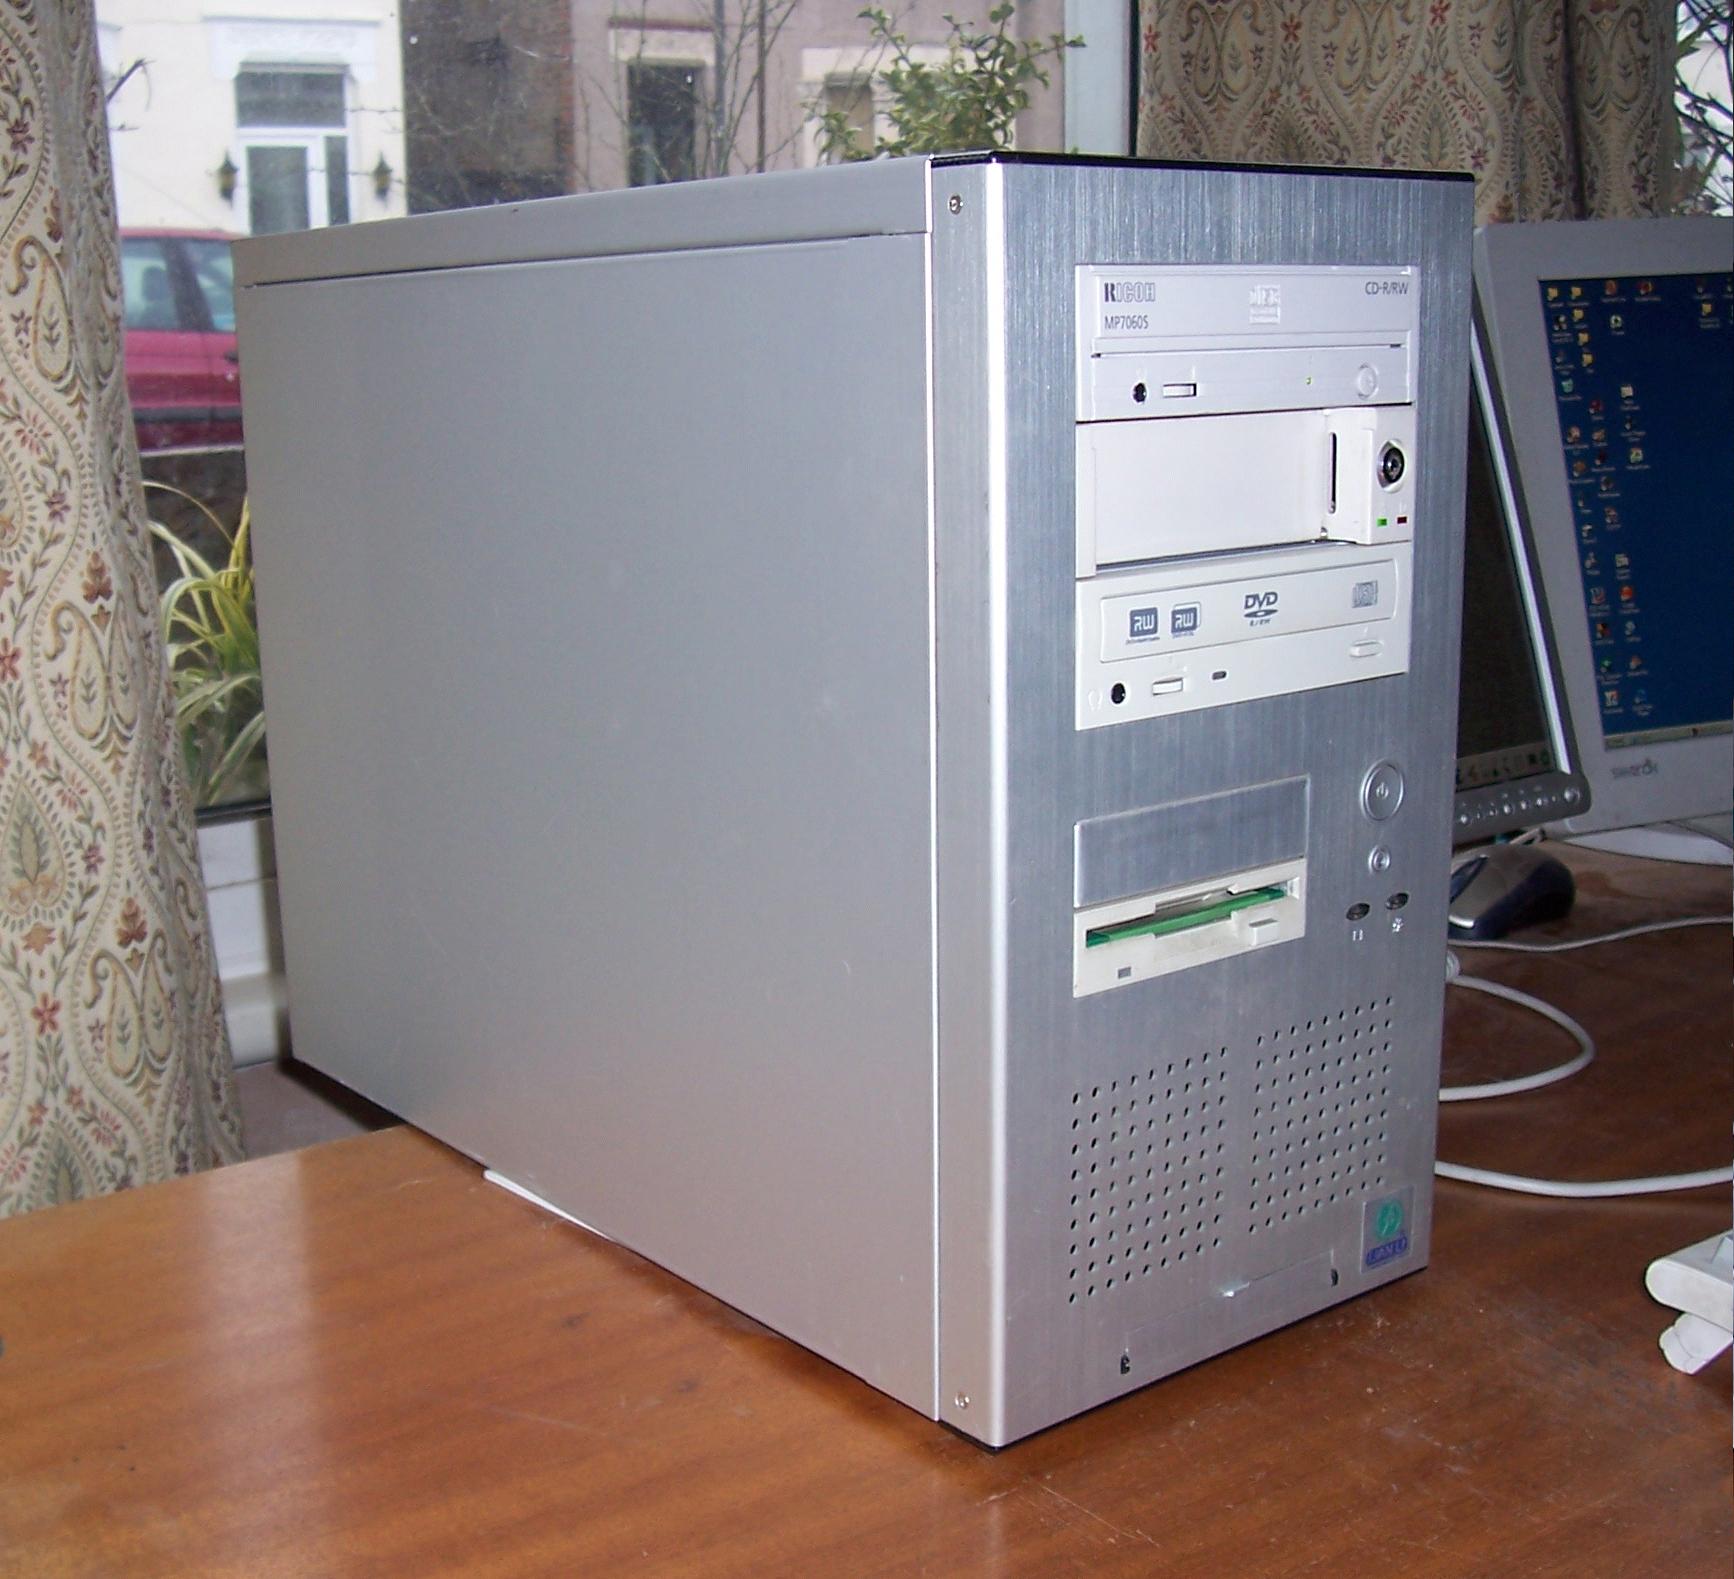
You need to exercise some care when choosing a case. The main things to watch for are that there needs to be sufficient width (or height in the case of a tower case) to accommodate the RiscPC motherboard. This required at least 28 cm. If you want to use a 4 slot backplane then you will almost certainly need a tower case as desktop cases aren't normally high enough. You also need to make sure that the case is wide enough as some are too narrow. In practical terms this means at least 37 cm high for a tower case and 18.5 cm. wide to accommodate a 4 slot backplane and around 44 cm. wide for a desktop case if you want to use a standard PC power supply although this can be reduced as shown later.
There are a couple of things to be careful of with tower cases. Even if the case dimensions appear large enough the height I've described assumes that the power supply is fitted horizontally at the top of the case, where it takes up around 9 cm. of the height available. Some cases have the power supply mounted several cm. below the top, which may not leave enough space below it for the motherboard. Another problem, although very unusual, is if the power supply is mounted vertically instead of horizontally. This is extremely rare, and the only case I know of like this is, in fact, the Lian Li case that I used for my own machine. This meant that I had to do a lot of extra work, but as I particularly liked this case and it was otherwise exactly what I wanted I decided it was worth the effort.
Power supplies
Ideally it's best to use an AT type power supply rather than an ATX. All modern power supplies are ATX, and if your case comes with a power supply that is what it will be. The problem with the ATX type is that they do not have a remote mains switch, although they may sometimes have a mains switch on the rear of the case. They are intended to be turned on or off by software, and there is a special connection on the PC motherboard for this. It is possible to connect an on/off switch to an ATX power supply, but it won't switch off the monitor power connector even if it does have one.
So, a much simpler solution is to obtain an AT power supply. These are now regarded as obsolete, but they are still available, and normally quite cheaply. They are physically the same size, but are intended to have a "proper" mains switch which will also switch off the monitor power connector. You will still need to fit the switch itself to the front of the case as ATX units only have a low voltage push button, but this is normally not too difficult.
Some examples.
In the next issue of RISCWorld I'll take you through the process of fitting a RiscPC into a tower PC case step by step. For the moment, in best television cookery program tradition, here are a couple I made earlier.
The first two pictures show a desktop case. With the original power supply there wasn't sufficient room to accommodate the RiscPC motherboard so a "mini ATX" unit was fitted instead. By installing this vertically there was then plenty of room for the motherboard. Although this is only 140 watt, small by PC standards, it's still much bigger than a standard RiscPC power supply and can easily cope with any expansion anyone could wish to fit into this case, whether podules or additional drives.
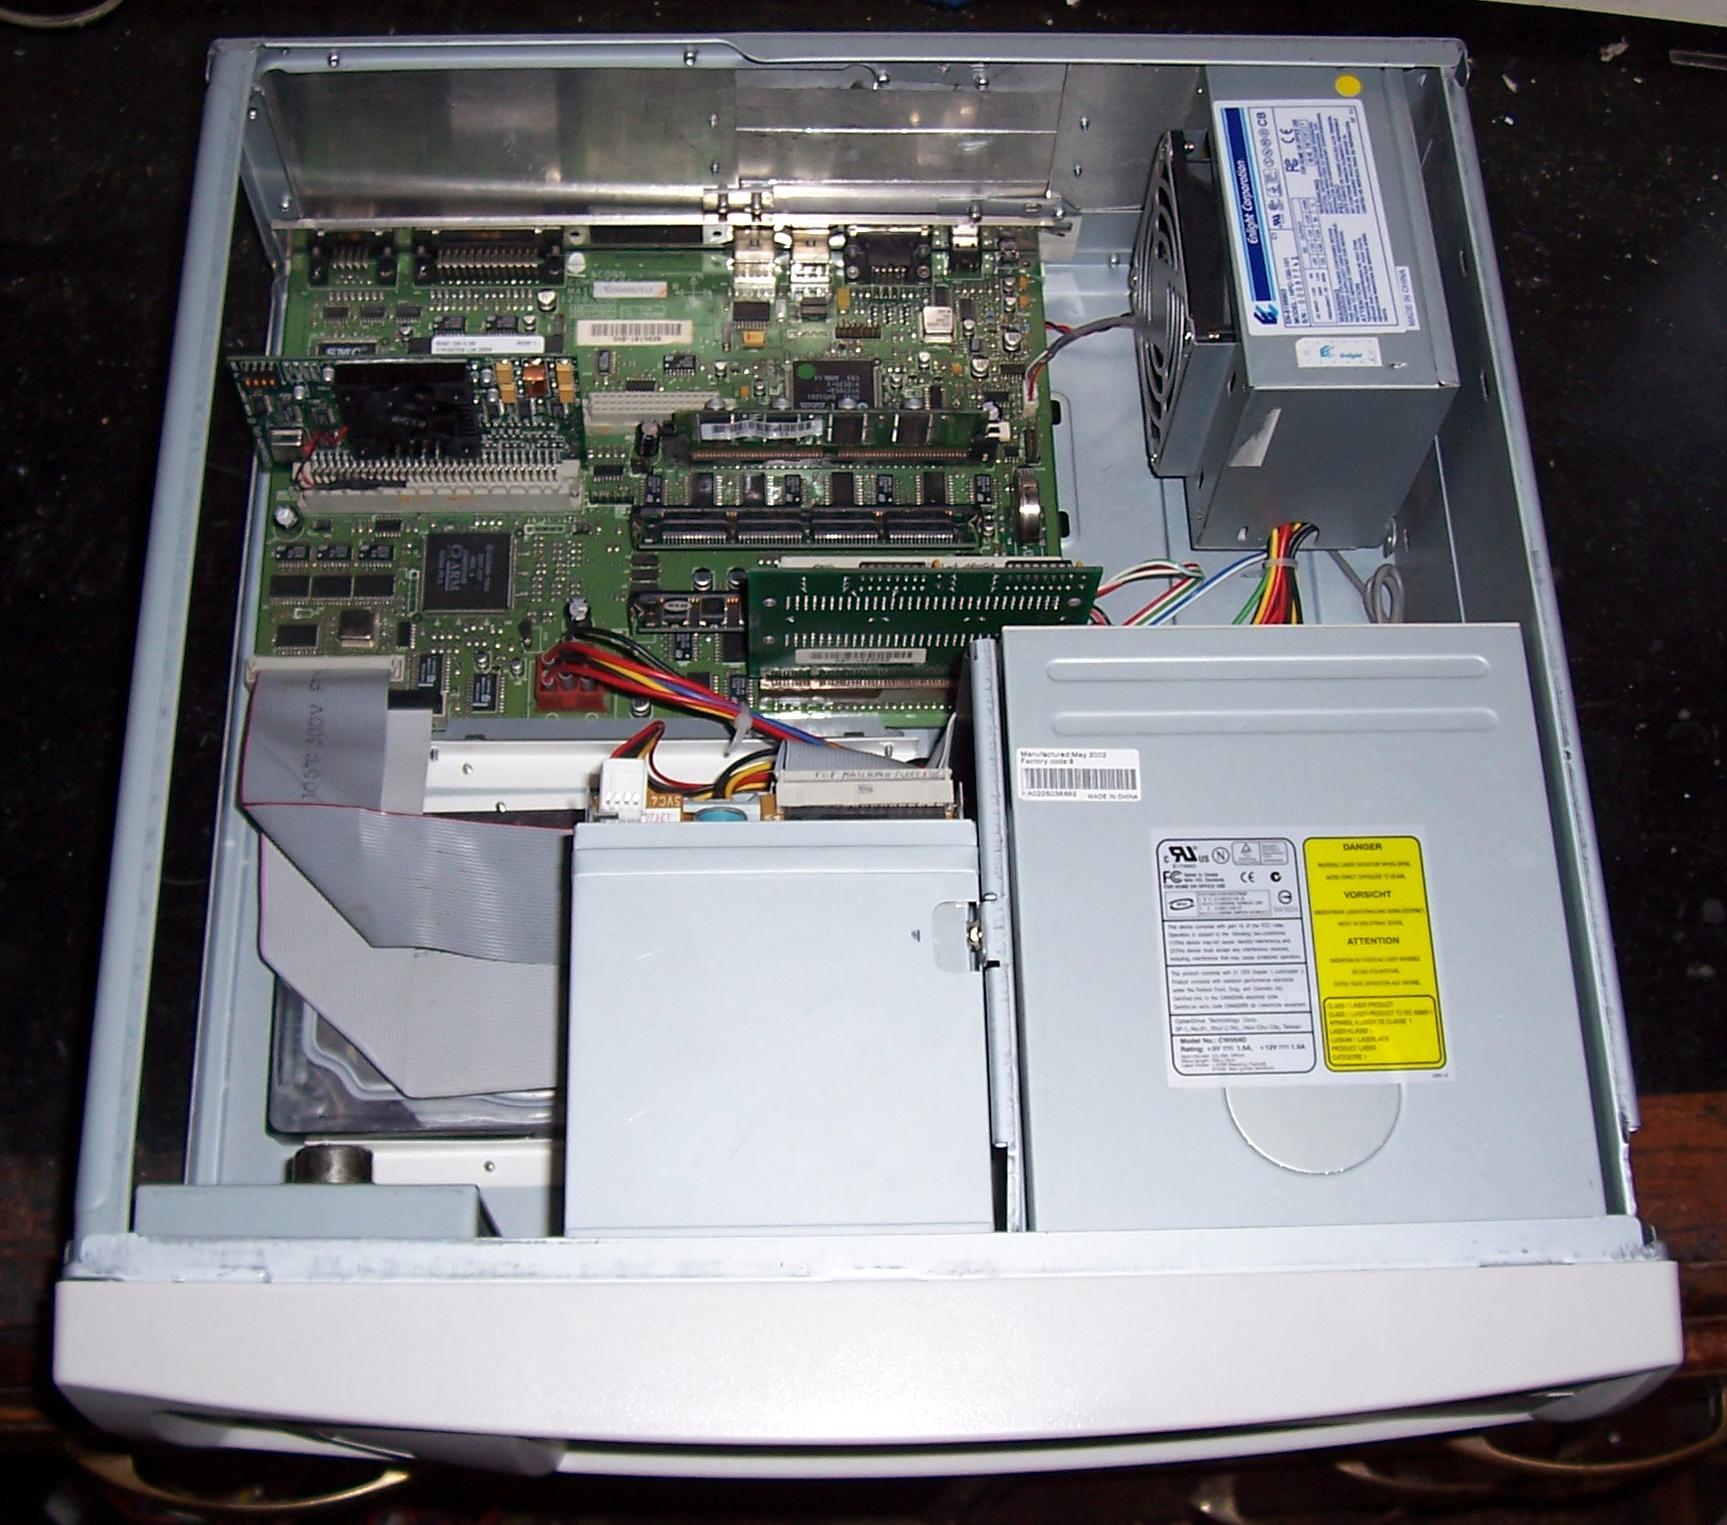
The hard drive is mounted on the base of the case using a pair of brackets made from plastic angle (you can see its front left hand corner below the ribbon cables).
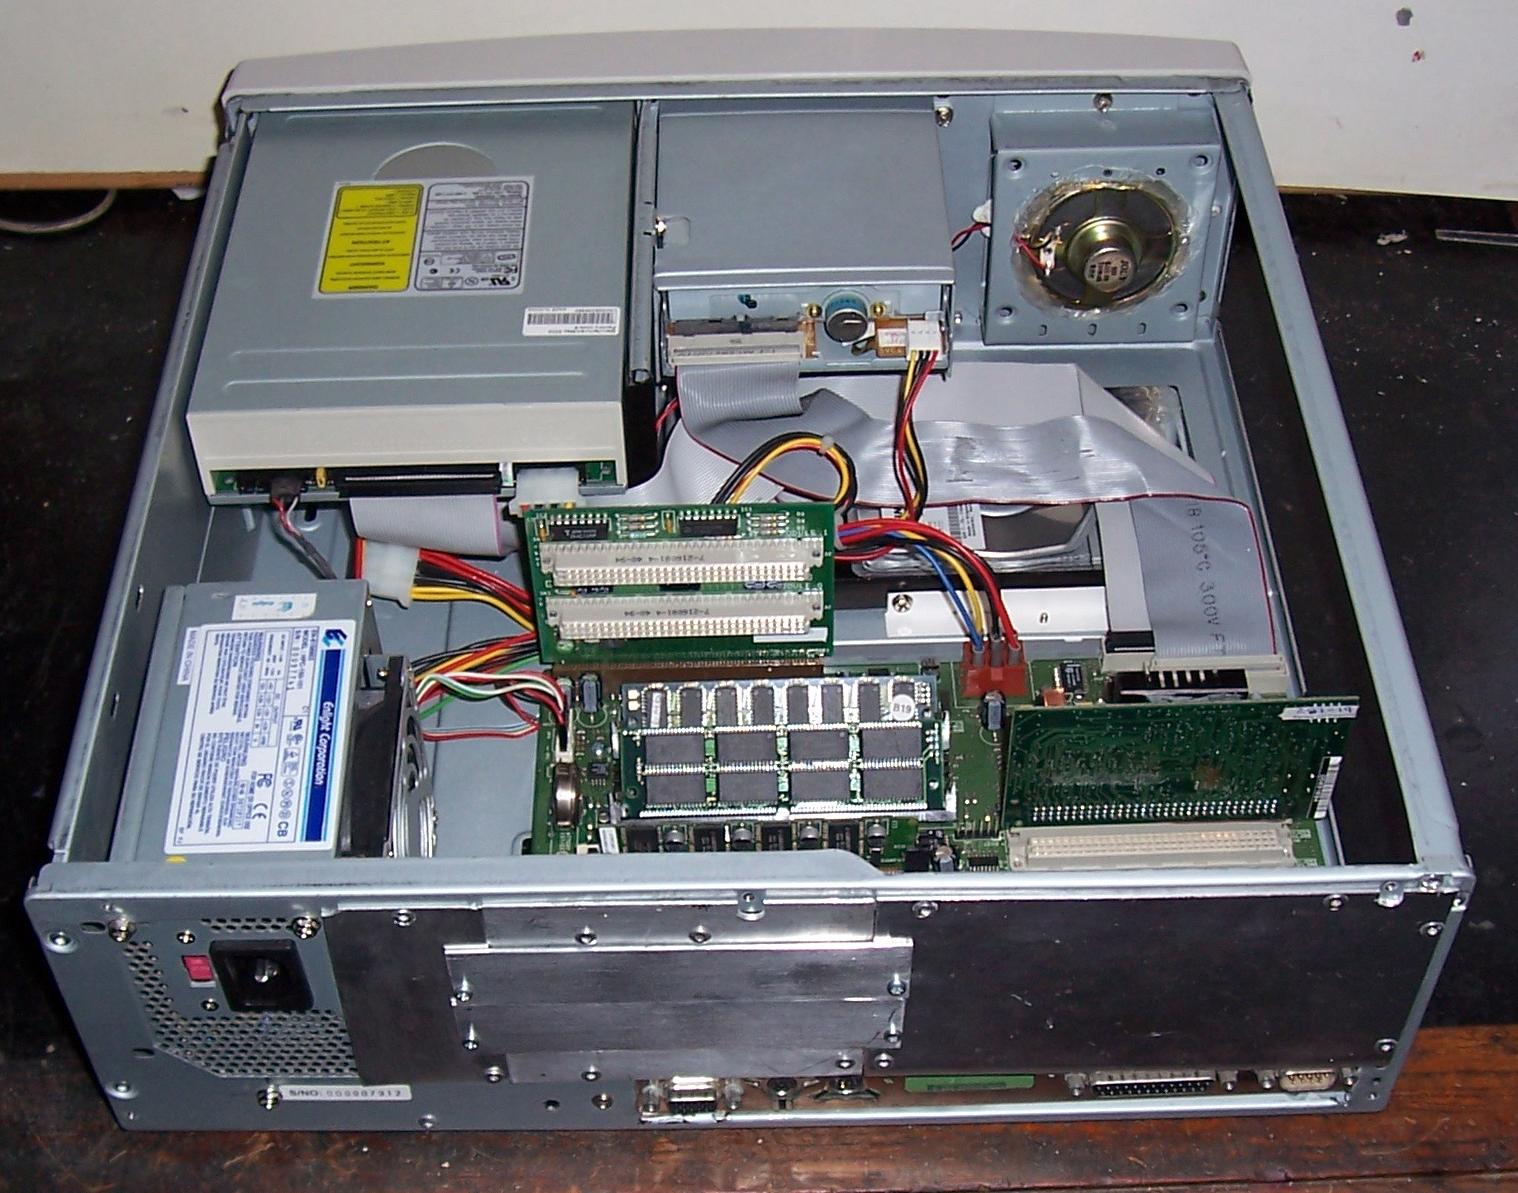
The picture below shows the rear of the case. In both this picture and the one above you can see how the main part of the rear of the case was cut out and replaced with sheet aluminium with cutouts and blanking plates to enable podules to be fitted. The aluminium does not go right to the bottom of the case to give access to the connectors on the motherboard.
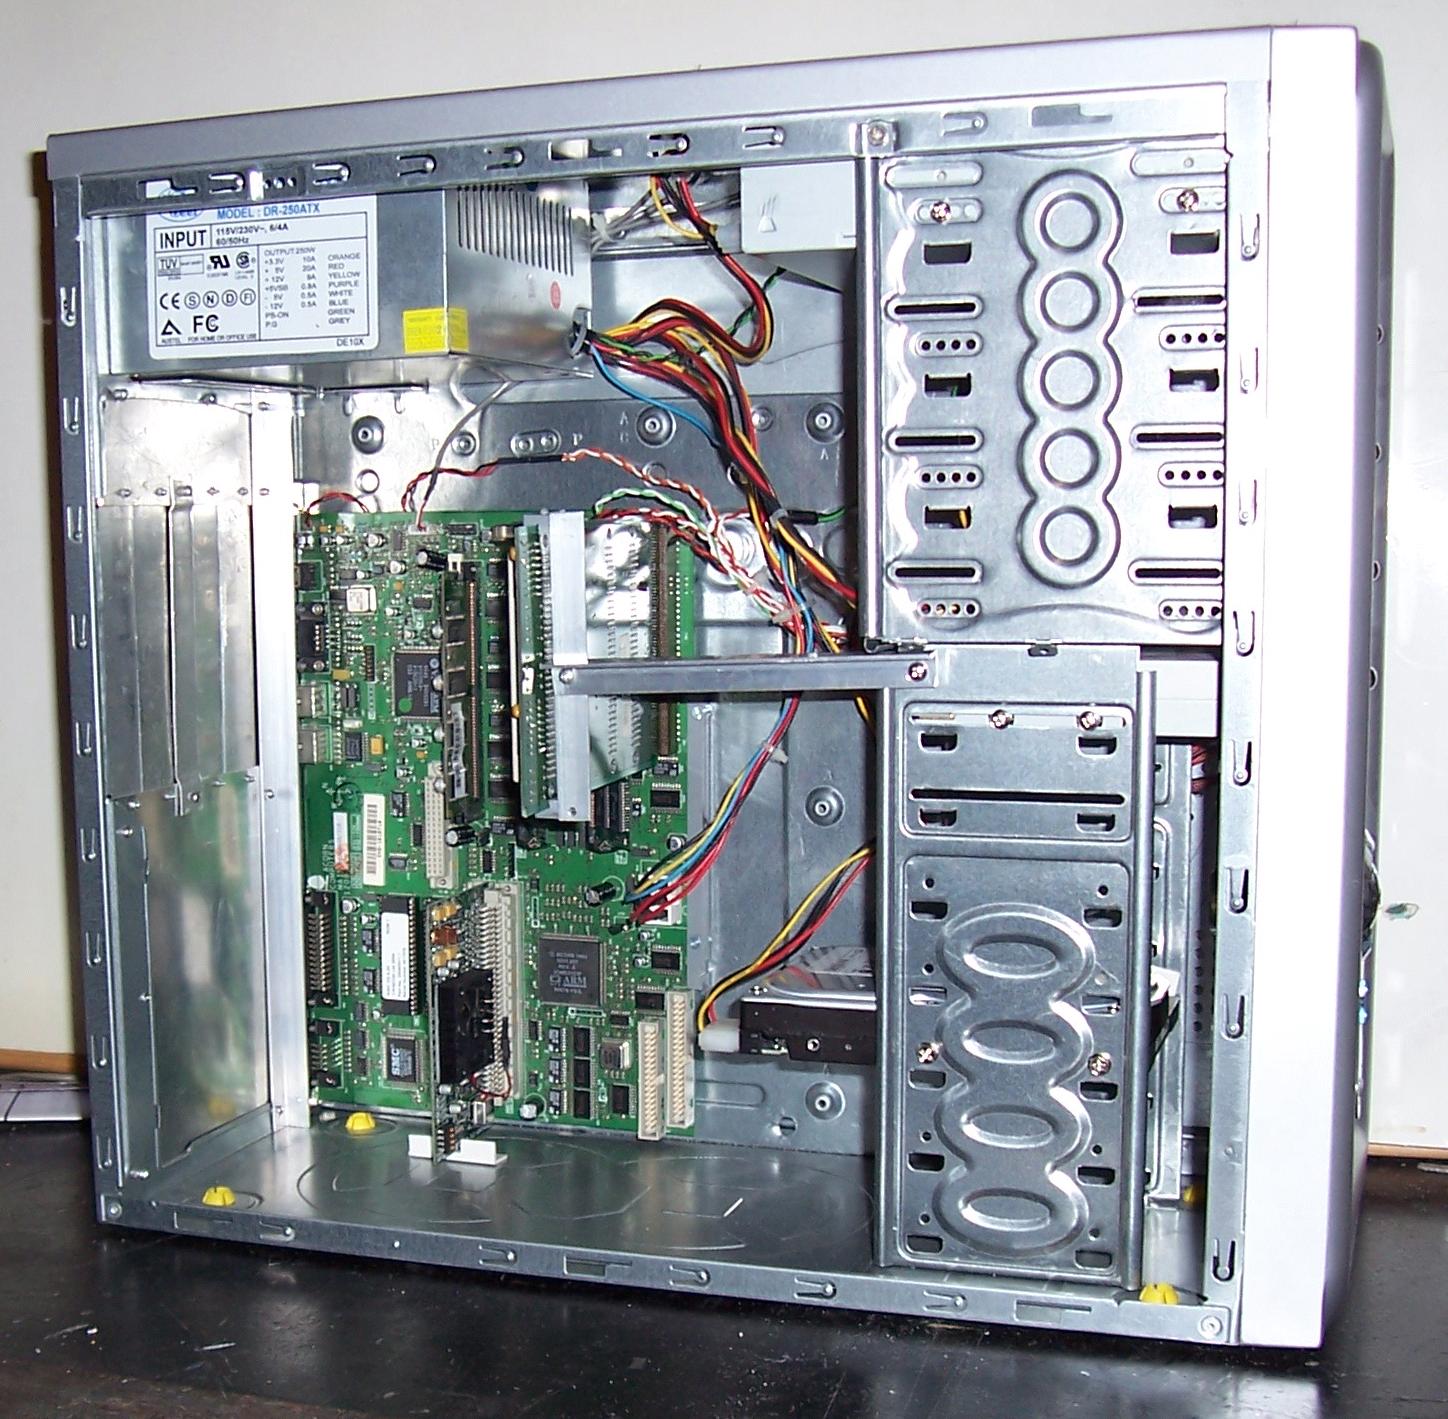
The picture below shows the side view of a tower case. As you can see there are lots of spare slots for both 3.5" and 5" drives, far more than anyone could need. The hard and floppy drive ribbon cables have been removed to give a better view for the photo.
As there is more space in this case it is fitted with a standard size 250 watt power supply.
As this machine has a 4 slot backplane there is a strut (made from aluminium angle) which braces the backplane. Ideally this should be done with the 2 slot backplane in the desktop case but it's not really necessary with this as long as you support the backplane when inserting or removing podules.
Below is a rear view of the same case. This is constructed in a similar way to the desktop case except that there are four blanking plates to allow for the four podules that this case can accommodate.

Although it isn't obvious from the pictures both of these cases have good ventilation. The desktop case has a fan which blows air directly over the motherboard with ventilation holes cut in the left hand side of the case and, although it isn't used, there is provision for an extractor fan to be fitted to th front of the case. The mounting bracket for this is actually used to hold the speaker, as you can see in the picture, but as the holes in the case aren't obstructed this ensures airflow over the hard drive and out of the front of the case.
The tower case has provision for four extractor fans, and this can be seen in front of the hard drive if you look at the rear view picture. No fans are fitted (though it would be easy to do so if required) but the holes ensure good airflow over any hard drives. Although there is no direct airflow over the motherboard with this case unlike the standard RiscPC case there is plenty of room for air to circulate without restriction. It would be very simple to fit a small fan on the rear of the case to blow air over the motherboard if this was felt to be necessary.
It would also be simple to make some ventilation holes in the aluminium plate on the rear if there were no suitable holes in the case elsewhere. PC cases often have some provision for ventilation in this area and both of the cases illustrated did actually have this but it was, of course, eliminated by fitting the new back.
If you're fed up with struggling with the standard RiscPC case then I hope this will have shown that it's not terribly difficult to fit your RiscPC into a modern PC case without too much difficulty. In the next issue of RISC World I shall go through the entire process step by step. You'll obviously need to do some basic metalwork, but nothing too complicated, and when it's done you'll have a machine that can accommodate all the extra drives and expansion cards you're likely to need.
Dave Holden