![]()
![]()
Step 2: Find the OverDrive® processor socket. If your system does not have an empty OverDrive processor socket, you'll need to remove the existing processor.
Step 3: Remove the existing processor (if necessary) and insert
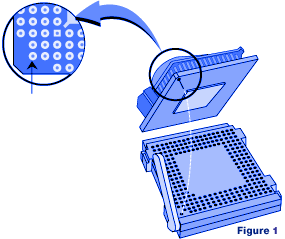
the OverDrive processor. Orient by aligning the blunt corner of
the OverDrive processor to the socket corner which has a pinhole
arrangement that is different from the other three corners. (See
Figure 1.)
Step 4: Set jumpers or switches if necessary.
Step 5: Replace the cover, plug in your system, and that's it! Test your installation by using the special diagnostic software that comes with the OverDrive processor, or use a favorite software program and experience the difference in speed.