The Disk Monitor
The Disk Monitor is a tool that provides single click access to the drives of your choice. It also presents information on drive free space and disk capacity.
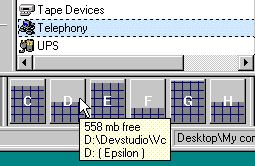
The Disk Monitor (see fig 1) contains a number of buttons, each representing a disk. The buttons are labelled with the drive letter corresponding to the drive they represent.
In order to point a Folder Browser (or a Tree Browser) to a certain disk, the corresponding button in the Disk Monitor is pressed.
To get information on the status of a disk, hold the mouse cursor still atop of the corresponding Disk Monitor button, and a popup window appears (see bottom of fig 1).
Fig 1: The Disk Monitor

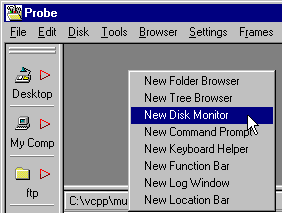
A Disk Monitor is started according to:
More information on handling frames is available under Frames, Reference.
Fig 2: Starting a new Disk Monitor

Each button on the Disk Monitor has three parts (see fig 3):
In fig 3, it can be seen that the disk C:\ is almost full, since it's button is mostly colored dark gray.
Fig 3: A Disk Monitor button
![]()
NOTE: In the drive containing the Probe work directory, temporary files from remote sites and compressed archives are stored. The total size of these files are represented using red color in the Disk Monitor.
Using the Disk Monitor for Navigation
To point a Folder Browser or a Tree Browser to the current directory of a certain drive:
To see how much free space there is in a certain drive, and the current directory of that drive:
Fig 4: Displaying a mouse popup hint

The Right Mouse Button Popup Menu
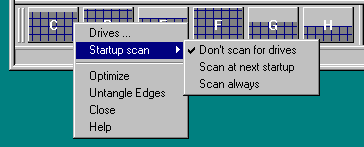
Pressing the right mouse button in the Disk Monitor brings up the popup menu for the frame, shown in fig 5. Click the menu items to jump to their associated help text.
Fig 5: The Disk Monitor popup menu

This menu item invokes the Drive Selection dialog for the Disk Monitor. It allows for adding and removing drives that are display in the Disk Monitor.
This sub-menu decides whether Probe will scan for drives to be shown in the Disk Monitor or not, on program startup. If it doesn't scan, the same drives as when the program was last shut down are displayed.
This option is the default one. On program startup, the same drives that were displayed on the last shutdown are displayed in the Disk Monitor.
This option causes drives to be searched for the next time the program is started, but not after that. This option is used for installing new layouts.
Using this option, drives are added and removed from the Disk Monitor each time Probe is restarted.
More information on commands common to all Probe frame types is available under Frames, Reference.
Next: Link
Back: Link