Getting Started with Pasteboards
This tutorial offers a quick, practical, introduction to using pasteboards. It doesn’t provide in-depth explanation of how pasteboards work, or details of the methods used. These are discussed in later articles in this document.
Introduction
This tutorial introduces you to pasteboards on Mac OS X. The project is a simple document-based application that manages a window containing an image view. You can copy and paste images between documents in your application, or to and from another application. The application will not support saving and opening documents, although you can easily add this functionality.
On completion of this tutorial, you should be able to:
Copy objects to and retrieve objects from a pasteboard
Understand how to validate user interface items based on the content of the pasteboard
Before You Start
This tutorial assumes you already have familiarity with the fundamentals of Cocoa development. Concepts you must understand include:
How to create a new Xcode project
How to configure a user interface in Interface Builder
How to define and implement a simple class
You must have at least either worked through Developing Cocoa Objective-C Applications: A Tutorial or gained equivalent experience using other examples.
It is also helpful to understand:
The document architecture
You don’t need to understand the document architecture in detail—the application will not support saving and opening documents, although you can easily add these features. The goal is simply to provide an application that supports copy and paste between multiple windows, and this is most easily achieved using the document architecture. If you want to know more about the document architecture, read Document-Based Applications Overview.
Toolbars
The document makes use of a toolbar to illustrate user interface validation.
User interface validation
User interface validation provides a standard way to set the state of interface items as appropriate for the current application context. In this tutorial, it is used to disable the Paste toolbar item if there is no suitable data on the pasteboard. You don’t need to know more than this, but for more details see User Interface Validation.
Summary
The main stages of the tutorial are as follows:
Create a simple document-based application
Configure the document class to interact with a simple user interface
Configure the document user interface
Add copy and paste methods to the document
Add user interface validation to the application
Tutorial
Create a new Xcode project
Create a new Xcode Cocoa document-based application. Call your new project CopyImage, or something like that.
Use the project settings to enable garbage collection. This avoids the need to include memory management code throughout the tutorial. To find out how to enable garbage collection, see Garbage Collection Programming Guide.
Update the document class
The document maintains a interacts with a simple user interface that contains an image view. It knows how to copy an image from the image view, and paste an image into the image view.
Update MyDocument.h to this:
#import <Cocoa/Cocoa.h> |
@interface MyDocument : NSDocument |
{ |
NSImageView *imageView; |
} |
@property (nonatomic, retain) IBOutlet NSImageView *imageView; |
- (IBAction)copy:sender; |
- (IBAction)paste:sender; |
@end |
Update MyDocument.m. In addition to the methods provided by the template, synthesize the property and add stub implementations of the copy: and paste: methods: methods:
@synthesize imageView; |
- (IBAction)copy:sender { |
} |
- (IBAction)paste:sender { |
} |
Configure the user interface
To the document window:
Add an image view
Connect the document’s (File’s Owner’s)
imageViewoutlet to the image viewAdd a toolbar
Add two toolbar items to the toolbar—one labeled “Copy”, the other “Paste”
Connect the “Copy” and “Paste” toolbar items’ actions to File’s Owner’s
copy:andpaste:actions respectively
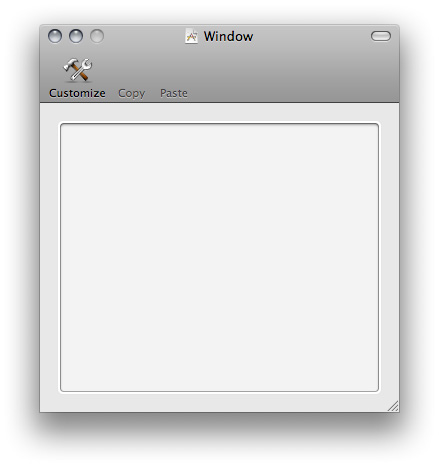
You should end up with a document window that looks like this:
Add copy support to the document
There are three steps to writing to a pasteboard:
Get a pasteboard
Clear the pasteboard’s contents
Write an array of objects to the pasteboard
Objects you write to the pasteboard must adopt the NSPasteboardWriting Protocol Reference protocol. Several of the common Foundation and Application Kit classes implement the protocol including NSString, NSImage, NSURL, and NSColor. (If you want to write an instance of a custom class, either it must adopt the NSPasteboardWriting protocol or you can wrap it in an instance of an NSPasteboardItem—see “Custom Data.”) Since NSImage adopts the NSPasteboardWriting protocol, you can write an instance directly to a pasteboard.
In the MyDocument class, complete the implementation of copy: as follows:
- (IBAction)copy:sender { |
NSImage *image = [imageView image]; |
if (image != nil) { |
NSPasteboard *pasteboard = [NSPasteboard generalPasteboard]; |
[pasteboard clearContents]; |
NSArray *copiedObjects = [NSArray arrayWithObject:image]; |
[pasteboard writeObjects:copiedObjects]; |
} |
} |
Test the application
Build and run your application.
Drag an image from Finder or from another application into a document’s image view
Press Copy in the toolbar
You should find that you can paste the image into another application. (For example, in Text Edit, create a new Rich Text document then select Edit > Paste.)
Add paste support to the document
Before you try to read from a pasteboard, you need to check that it contains data you want.
You check that the pasteboard contains objects you’re interested in by sending it a canReadObjectForClasses:options: message. The first argument is an array that tell the pasteboard what classes object you’re interested in.
Classes you ask to read from the pasteboard must adopt the NSPasteboardReading Protocol Reference protocol. Like writing, several of the common Foundation and Application Kit classes implement the protocol, again including NSString, NSImage, NSURL, and NSColor. (Similarly, if you want to read an instance of a your own class class, either it must adopt the NSPasteboardReading protocol or, when you write it to the pasteboard, you can wrap it in an instance of an NSPasteboardItem and retrieve that—see “Custom Data.”) Since NSImage adopts the NSPasteboardReading protocol, you can read an instance directly from the pasteboard
If the pasteboard does contain objects you’re interested in, you can retrieve them by sending the pasteboard a readObjectsForClasses:options:. message. The pasteboard determines which objects it contains that can be represented using the classes you specify, and returns an array of the best matches (if any).
In the MyDocument class, complete the implementation of paste: as follows:
- (IBAction)paste:sender { |
NSPasteboard *pasteboard = [NSPasteboard generalPasteboard]; |
NSArray *classArray = [NSArray arrayWithObject:[NSImage class]]; |
NSDictionary *options = [NSDictionary dictionary]; |
BOOL ok = [pasteboard canReadObjectForClasses:classArray options:options]; |
if (ok) { |
NSArray *objectsToPaste = [pasteboard readObjectsForClasses:classArray options:options]; |
NSImage *image = [objectsToPaste objectAtIndex:0]; |
[imageView setImage:image]; |
} |
} |
Test the application
Build and run your application:
Drag an image from Finder or from another application into the document window
Press Copy in the toolbar
Create a new document (select File > New)
In the new document, press Paste in the toolbar
You should find that you can paste the image from the first document into the second. If you have another application that allows you to copy and paste images, you should also find that you can copy and paste between that application and the tutorial application.
Extra Credit: Menu validation
It’s good practice to restrict the user to performing actions that will have an effect. In the current application, you can press the Paste toolbar item even if there is no image on the pasteboard. It would be better to disable the item if there isn’t anything on the pasteboard that can be pasted.
User interface validation—supported by the NSUserInterfaceValidations protocol—provides a standard way to set the state of interface items as appropriate for the current application context. The protocol contains a single method—validateUserInterfaceItem:—that returns a Boolean which specifies whether or not the user interface element passed as the argument should be enabled.
When you implement validateUserInterfaceItem:, you typically first check the action associated with the user interface element (you don’t want to enable or disable every item on the basis of a single test). In this case, you’re only interested if the associated action is paste:. If it is, you then need to to check whether there’s anything on the pasteboard that can be pasted. You can use canReadObjectForClasses:options: to ask the the pasteboard if it contains any data that can be converted into an NSImage object.
In your document class, implement validateUserInterfaceItem: as follows:
- (BOOL)validateUserInterfaceItem:(id < NSValidatedUserInterfaceItem >)anItem { |
if ([anItem action] == @selector(paste:)) { |
NSPasteboard *pasteboard = [NSPasteboard generalPasteboard]; |
NSArray *classArray = [NSArray arrayWithObject:[NSImage class]]; |
NSDictionary *options = [NSDictionary dictionary]; |
return [pasteboard canReadObjectForClasses:classArray options:options]; |
} |
return [super validateUserInterfaceItem:anItem]; |
} |
If you build and run your application, you should find that you can copy and paste images as before. You should also, though, find that if you haven’t copied an image, the Paste toolbar item is disabled.
Last updated: 2009-05-28