|
|
Appendix A - Install the Microsoft SQL Server
The Microsoft SQL Server is delivered as a part of several packages
from Microsoft. It's delivered as a part of the Microsoft Backoffice
Small Business Server, as a part of the Microsoft Developer Network
and as a separate product. All this packages has their own setup
programs, and some of them may be different from this description.
But the main issues will be the same no matter which package is
to be installed. This installation description is based on the
Microsoft Backoffice Small Business Server.
- When you start the installation program you will be prompted with
this dialog. Press the continue button.

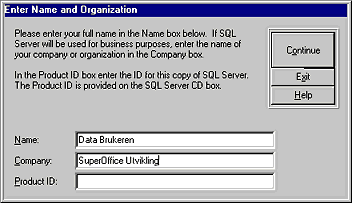
- Enter the user name, company and the product ID for license information.
Press Continue.
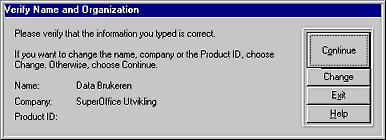
- Verify the information you have entered.
- Tell what you want to do. Normally you'll select the "Install
SQL Server?" option. Press Continue.

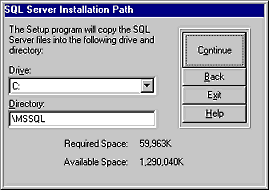
- Decide where the server is to be installed. This does not have
any importance for where databases are placed. This information
is only for the server software. Press Continue.
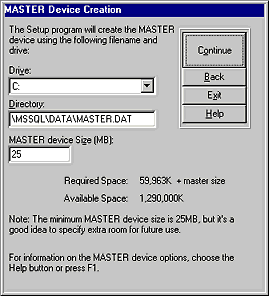
- The master device is the physical file where the master database
is installed. This data device should not be used for SuperOffice
data.
- The SQL Server Books Online is documentation and examples that
are useful for operating the server. If you have space on your
drives do install them. Press Continue

- The installation options dialog is very important. The "Sets" button displays available character sets. Default is "ISO Multi
Language". Press the "Sets" button if you want to override the
default setting. The "Orders" button displays alternative ways
to sort data in the SQL-Server. The "Networks" button displays
which network support the server will use. Named Pipes is default
and cannot be chosen away. But you can add additional networks
to support your network configuration. Named Pipes is dependent
on the NetBeui protocol. If you don't have that installed on your
client we recommend that you add network support for TCPIP protocol.
You can choose to check the boxes for "Auto Start?" of the SQL
Server and the SQL Executive. The SQL Server will then be started
each time the NT-Server boots.

- If you choose to Auto Start the SQL Server the password for the
Administrator is needed. Press Continue.

- After the last dialog is bypassed the installation program will
copy all files and complete the installation. Then you are ready
to configure the server
|
|