| Introduction - Units and Structures |
Vehicles - click on
any of the images below for a full description
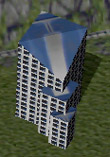
 HoverTruck
 |
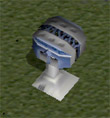
 CombotCrew
 |
 Combot Combot |
 Tank
Tank |
 Artillery Artillery |
 MissileCar MissileCar |
 DrillTruck DrillTruck |
 Nemesis Nemesis |
 HoverJet
 |
 HoverBomber HoverBomber |
Structures -
click on any of the images below for a full description
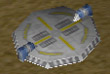
 MatterConverter MatterConverter |
 VehicleFactory VehicleFactory |
 CombotPartFactory CombotPartFactory |
 AssemblyBay AssemblyBay |
 Cryofarm Cryofarm |
 Outpost Outpost |
 Hanger Hanger |
 MobileWalls MobileWalls |
 ResearchFacility ResearchFacility |
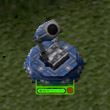 Railgun Railgun |
 PointDefense PointDefense |
 A.I.Facility A.I.Facility |
 DefenseRelay DefenseRelay |
 EnergyBank EnergyBank |
 ImagingPole ImagingPole |
 SolarPanel SolarPanel |
 Other Structures
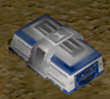
HoverTruck - Produced by the Vehicle Factory
All purpose utility truck. Operates in orbit, planetside and
underground. Functions include: thermal energy acquisition,
constructing/dismantling/repairing
buildings, repairing vehicles in the field, and collecting Combot
parts in the field. Slow moving, light armo. It's hover ability
allows it to "fly" in Orbit.
HoverTrucks collect energy: Select a HoverTruck, select energy
source location (a lava field on the surface or underground). The
HoverTruck will
move to the location and "suck" the energy (beam
animation) which is automatically sent as metajoules to the
player (i.e., HoverTruck does not have to
return to the base and dump a payload). It may take awhile to
collect all the energy there.
HoverTrucks build structures: Select a HoverTruck, select
structure to build from the tool bar (cursor becomes a build
pointer unique to that
structure), select location to build. The HoverTruck will proceed
to the location, and upon arrival it fires a laserbeam which
carves the structure out of
a
lump of inert matter. NOTE: Metajoules are deducted progressively
as the building is made. Manpower is deducted when the building
is completed.
If
Metajoules run out during construction the HoverTruck will wait
for more to be collected, and apply them to continuing
construction as they come in.
If
a Structure is completed and there is not enough Manpower
availiable for it, that structure behaves the same way it
normally would if IT HAD BEEN
OFF (that is, the structure is there, but is turned off and
doesn't do ANYTHING) and an audible warning is given for a
"stucture off" situation. It will
automatically turn "on" once you get enough manpower.
Once the HoverTruck has finished building something (depending on
the structure's build time and whether other HoverTrucks are
helping the build
process), the HoverTruck is available for new tasks. If you give
the HoverTruck something else to do while it is building
something, the structure will
remain uncompleted and slowly go away (see TA for an example).
The HoverTruck, or any HoverTruck for that matter, can resume
building if the player
wishes (just right-click the unfinished building). Multiple tasks
can be given to the hovertruck by holding the shift key and right
clicking the desired tasks
in
the order in which the user wants them completed. When one task
has been completed, the hovertruck will automatically proceed to
the next one.
HoverTrucks collect Combot parts: Select a HoverTruck, select the
part (typically the part is laying on the playfield). The
HoverTruck will move on top
of
the part, and appear to lift it. Holding a part enables the
"drop" button on the HoverTruck's tool bar. Send the
HoverTruck where you want to take
the Combot part, then hit "drop" to drop the part.
HoverTrucks repair buildings and vehicles: Similar effects of
building a structure are used when repairing or dismantling a
structure. While repairing takes
awhile, dismantling is a very quick activity.
HoverTrucks dismantle buildings: Select the HoverTruck, select
the "Raze" button, then select the building to raze.
The effect takes awhile (Note: we
used to have it do this faster, but didn't want the Raze command
to become a commonly used offensive weapon against enemy
structure). This will
immediately free up the men there (if any are there), and give
you back 50% of the required MJ's to build it (100% during
Prebuild).
CombotCrew - Produced
by the Cryofarm
Combots cannot function without a Combot crew. Combot crews
are trained (created) as special men, different from the basic
manpower resource, using the Cryofarm. They are needed to pilot
the Combots. They are also used to 'Blast-Off' with your
MatterConverter when the mission requires it. Hero Combot crews
(crews that are integral to the storyline) are designated with
special markings so
the user can see which Combots carry them at a glance.
NOTE: Combot crews cannot be built until an AssemblyBay has been
constructed.
Rimtech special Combot markings - Large Yellow striped shoulder
pads
Mil-Agro special Combot markings - Samarai style flag
Neuropa special Combot markings - Three horned helmet
Combot - Produced by the Part Factory
and Deployed at the Assembly Bay
Standing
over four stories high, and configured with a deadly arsenal of
advanced weaponry, the Combot is the ultimate weapon of war in
the 23rd century. Each
Combot
has five parts: two legs, two arms, and a torso. When playing
Metal Fatigue, you will be able to re-configure your Combots to
suit the impending battle
scenario. For instance, a heavy attack Combot might consist
of a rotary blade arm, plasma cannon arm, a missile-launching
torso, and armored legs. Once a
body
part is manufactured, it can be exchanged with other Combots or
replaced with newly manufactured body parts. In addition, you
will even be able to amputate
the
limbs of your enemy Combots and re-use their parts against them.
It's as fun to watch as it is to play! Below is an image of
a Combot firing it's long-range and
devastating Howitzer Torso, one of the most feared Combot parts
in the game.
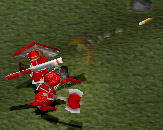 Mil-Agro
Combot - Howitzer Torso, Armor Legs, Left Shield Arm, Right
Axe Arm
Mil-Agro
Combot - Howitzer Torso, Armor Legs, Left Shield Arm, Right
Axe Arm
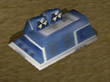
Tank - Produced by the Vehicle
Factory
Produced from the Vehicle Factory
these vehicles provide support for Combots as well as being
useful for
underground defense.
Rimtech
Tanks - Medium armor, medium shot damage, medium speed
Mil-Agro
Tanks - Heavy armor, heavy shot damage, slow speed
Neuropa
HoverTanks - Light armor, Light shot damage, High speed, Good
visual distance
MissileCar - Produced by the Vehicle Factory
Faster
and smaller than a tank, it makes an excellent recon and light
attack vehicle. It is also a good defense against flying vehicles
because of its missile
launcher. It fires 2missiles per salvo.
Artillery - Produced by the Vehicle Factory
Essentially the MobileArtillery is just a huge, lightly armored
GunTank. It's turret is much larger than the tank, and cannot
rotate nearly as far. In fact it
has a limited rotation of a 90 degree arc. Its slow moving and
thus requires a lot more time to get into a comfortable firing
position. The turret itself
angles upward slightly to fire. Once the attack is over the
turret lowers again and the vehicle can move as normal. Plus it
cannot shoot at objects which
are at close range. It's really best for shelling the enemy at a
distance.
DrillTruck - Produced by the Vehicle Factory
The DrillTruck is used to drill new underground pathways and
create elevators.
How to drill: It's simple. Select the DrillTruck, and click on a
location that is drillable rock. The DrillTruck will go there and
drill out the rock. If you
tried to tell any other vehicle to move there, you'd get the
illegal target location message (buzz sounds, cursor shows
"you can't do that" symbol). If you
want the DrillTruck to drill a specific pathway through a big
area of drillable rock, use the waypoints method (shift queue
command).
To create a passage to the underground layer, select the
DrillTruck, select "elevator" icon on the toolbar, and
then choose the location (it's like building a
structure with the HoverTruck). NOTE: Smart cursor will reveal
what's drillable/what's not when giving DrillTruck waypoints into
unrevealed territory.
Drilling through rocks is not a fast process. Every tile the DrillTruck drills through will take a few seconds.
Note that there is both drillable and undrillable rock
underground. If a DrillTruck is instructed to go to an unexplored
place, it will take the best path,
which may include drilling to get there.
DrillTrucks capture alien structures: To do this, select the
DrillTruck and click on an alien enhancer. The truck will drive
up to it and drill on it for a
while, eventually "breaking through". The building then
becomes yours. You can also do this with the invade command. Note
that the DrillTruck actually
enters into the building and theoretically becomes part of it
(translation - once the building is taken over, the truck is
gone).
Nemesis -
Produced by
the Vehicle Factory
The Nemesis is a highly specialized anti-Combot vehicle.
Basically, once given a COMBOT target it will drive as close to
that Combot as it can get (essentially
right next to it, but use the maxrange value) and self-destructs
in an energy based implosion. This causes all Combots in the
blast area to be briefly
paralysed but vehicles and structures in the vicinity will not be
damaged.
HoverJet
- Produced by
the Aircraft Hanger
Produced by the Hanger, the HoverJet is an aerial attack plane
(light damage) that does not have to worry about terrain
obstacles. It cannot function in the
Underground level, but can function in Surface/Orbit. The
Hoverjet, HoverBomber, and Combots with either the JetPackTorso
or JetLegs can move between
the Surface and Orbit layers simply by giving them a destination
to move to that layer.
HoverBomber - Produced by the Aircraft
Hanger
A
more powerful, yet slower moving, version of the HoverJet that
drops a payload of bombs on the designated target. No air
defense.
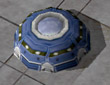
MatterConverter
This is the core structure of the Surface base. Conceptually it's
the Invasion Craft the player used to land for that Mission, and
is a pre-requisite
structure for most of the higher tech level build abilities. So
don't lose it, and if you do, build another one! The
MatterConverter creates a defense grid
that provides extra shielding for structures that reside within
it. Defense Relays can be built to extend this grid.
CombotPartFactory
The CombotPartFactory allows the player to construct Combot
parts. Clicking on the building gives you the toolbar buttons for
the various parts you can
build.
AssemblyBay
The building consists of a construction "pad" where new
Combots can be assembled. Selecting this building will display on
the toolbar all the parts that are
currently available from the CombotPartFactory. You can select
from these parts to put together a Combot. As parts are selected
they will be named in the
portrait window
Once you've got a 'legal' Combot you get an active
"deploy" button, or you can just right click the map
and the Combot will be deployed.
For quickness and ease of use, if you simple click the assembly
bay and then right-click on the map, the AssemblyBay will
configure as much of a Combot as possible,
and assuming you had enough parts for a full configuration, it
will also deploy it.
Also, another option you have when constructing a Combot is
assigning a CombotCrew. Combot Crews are typically created at the
CryoFarm although you
usually start with hero crews already available. The name of the
"best" available Combot crew is the default crew in the
portrait window (beneath the
image of the Combot). This is actually a toggle, and clicking on
it will cycle through all available crews. Like Combot Parts that
are in storage, the Crew's
are listed in order of how well upgraded they are. If no crew is
chosen before a Combot is deployed, then the top crew is selected
and added
automatically. If there are no crews available, then "no
crew" appears in the crew box. If the player attempts to
deploy this crewless Combot, a warning
sound is given and the player must build a Combot crew or the
Combot cannot be deployed.
An AssemblyBay is also a Combot repair facility. An injured
Combot can be told to go to the AssemblyBay, assuming that
nothing is currently on
it
(like a rotating half constructed Combot). Any injured Combot
standing on the structure will slowly begin to "heal".
Technically, whenever a Combot steps
onto the Assembly Bay this Combot becomes an undeployed Combot on
the pad. Similarly, any part
dropped on the AssemblyBay (e.g., HoverTruck brings in a part
from the field and drops it) will be stored and healed. Note
that, parts which
have been built by the CombotPartFactory are stored there until
the moment the Combot is deployed.
VehicleFactory
The VehicleFactory is used to construct and deploy all vehicles
except for the MobileWall, HoverJet, and HoverBomber. After
selecting the factory, the
player will get a list of buildable vehicles on the toolbar. As
some new structures are built, or after certain research is
accomplished, new vehicles will
become available for construction.
How to build a vehicle: Select the VehicleFactory. On the
toolbar, select the appropriate vehicle icon to start the
process. As the vehicle is built, the
cost in megajoules is drawn from your account. Progress of the
construction is indicated by a horizontal build bar in the
portrait window. When the
vehicle is finished it will roll off the production ramp (or
appear and begin to move) and stop nearby the outside of the
VehicleFactory "doors".
What if no "men" are available to man the vehicle being
produced? Men are added when production of a vehicle has been
completed. If there aren't
enough men available at one tick before completion, the Vehicle
Factory halts vehicle production until enough men are available.
If several vehicles are
queued up for production, the queued up vehicles don't even start
production. Once enough men become available, they are added to
the completed
vehicle and the vehicle is sent out of the Factory.
Cryofarm
This building contains frozen people which are automatically
thawed (up to housing capacity) to man your base and vehicles.
Each CryoFarm houses
40
Men, and is amply stocked with frozen men when the structure is
built. On creation, some men are immediately available (e.g., 5
men), and the rest
are thawed out OVER TIME (currently uses the metajoule
acquisition rate column in MAN/SEC created) until the Cryofarms
are at Max Capacity.
Thawing out men is FREE.
It's important to note that Cryofarms are globally linked. That
is, the player doesn't have to worry about which one of the
Cryofarm's has housing
capacity. If one CryoFarm is at 80% capacity, then all CryoFarms
are at 80% capacity. The act of building a new CryoFarm should
increase the max
manpower capacity, and automatically set ALL Cryofarms to begin
to generate men until the player is at max manpower.
As Men die (e.g., enemy destroyed a vehicle which had 5 men, or
destroyed a structure at FULL manpower which might have 10 men
inside it) the
Cryofarms will automatically start trying to refill the manpower
pool (i.e., all Cryofarms collectively try to stay at max
capacity).
If you need more Men than your CryoFarms can house, then build
more CryoFarms. Remember, to minimize the fiddliness, CryoFarm
are always
trying to build to max capacity. In other words, it will
automatically try to stay at 100% occupancy, as will all other
CryoFarms built, given space/time
constraints.
Effect of destroying a CryoFarm: Destroying a CryoFarm instantly
kills all Men that are LEFT WITHOUT HOUSING space. First killed
are men in
excess capacity. If still more men are left without housing, they
too are killed and ALL the structures cut back to work at AUTO ON
(unmanned, run
by
computers) at their low manpower rate (e.g., 10%). All structures
operating at AUTO will automatically return to normal operation
once ALL
structures at AUTO can simultaneously return to normal operation.
Note that an AUTO structure has no men inside it, so no men are
killed if an AUTO
structure is destroyed. You can turn the structures OFF specific
structures, which completely turns them off (OFF concept is
similar to what we used to
call "evac"), in an attempt to lower the number of men
required to run ALL the remaining structures in AUTO mode. Or,
you can build another
Cryofarm and wait for the manpower level to come back.
NOTE: This means there are three states a structure can be in:
FULL ON (operates normally and "contains" normal number
of men), AUTO ON
(operates crippled, say 10% and contains no men) and OFF
(Structure doesn't function at all, also contains no men).
When a player rebounds from a "low manpower" crisis and
has enough men to run all AUTO mode structures, all the AUTO
structures simultaneously
come back to FULL ON. There still may be OFF structures out
there, and these structures ONLY come back ON to full manpower
when the player
tells them to AND there is enough manpower to come back to FULL
ON.
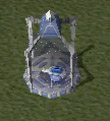
Outpost
Outposts are teleportation pads that also create their own small
defense ring. They contain the extremely sophisticated (and
expensive!) computers,
which convert a unit (e.g., tanks, Combots) into data, and
transmits it to a receiving teleport pad which reconfigures the
data back into the unit.
Outposts can ONLY be built on the Surface or in Orbit -- they
CANNOT be built Underground since the planet's crust renders them
useless. You can
build as many Outposts as you like, but if you have more than
two, only one can be selected (via the behavior toggle) as the
"Primary" or destination
teleporter that all other teleporters will "Send" units
to. A toolbar button lets the player designate the selected teleporter to be
the active destination teleporter.
"Launch" is another toggle the Outpost can be set
to. If an Outpost on the surface is set to Launch, it will
attempt to launch whatever unit enters it into the orbit layer
directly above the Outpost. Ground Vehicles can only be
launched to an asteroid, so an asteroid MUST be directly above
the Outpost. HoverTrucks, however, can
be
launched to any location in the orbit layer. Any unit can
be launched from the orbit to the surface.
Hanger
This is the structure required to create an airplane, and repair
any damaged aircraft that lands on it. Each AircraftHangar can
service three HoverJets or
one HoverBomber.
DefenseRelay
The DefenseRelay is used to EXTEND (not create) an existing
defense ring. Defense rings are generated by Matter Converters
and Outposts and they
power the structural integrity of structures. Any structure
existing outside a defense ring does not have any resistance
against kinetic or energy attacks.
When these vulnerable structures outside a def-ring are attacked,
all damage dealt will be deducted in it's entirety from the
structure's hit point health,
without any of the damage being deflected. Note that clicking on
a Def-Relay, MatterConverter, or Outpost will create a visible
circle on the screen
which represents its defense ring radius. This gives the player a
good overall view of the defense ring in its current state.
A DefenseRelay that is outside of a defense ring will display a
yellow defense grid. This yellow defense grid is useless to
any structures inside of it since
the Relay is out of range to relay a Defense signal.
Another DefenseRelay would need to be constructed that joined an
active (green) grid to the inactive
(yellow) grid to make the yellow grid active.
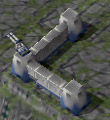
MobileWalls
Mobile Walls are constructed by HoverTrucks and can move (very
slowly) to join together and form wall barracades. Turrets
can be erected on these walls
that fire artillery, lasers, or missiles for air defense.
Turrets can be replaced as needed.
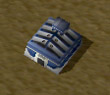
EnergyBank
EnergyBanks are required to store any excess metajoule energy you
collect (1000 Metajoules each), beyond the capacity of the
MatterConverter.
ImagingPole
It's is an inexpensive, small vertical post that can be placed in
the ground (either built there by a HoverTruck, or fired there
via the RailGun shell called the
ImagingPoleSalvo shell) which eliminates fog-of-war within its
hefty visibility range.
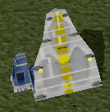
Railgun
The Railgun is a launching platform for various powerful turrets.
In essence, it functions similar to how the mobile wall upgrades
to get a turrets. You
build the Railgun Platform first. Once the platform is done, you
select a type of turret to place on it. The UI for building a
turret is the same as the
Mobilewall. Clciking on the empty platform will give you a
project button for the appropriate turrets you can make. Once
built the turret will have a
single shot ready to go.
Unlike MobileWall turrets, the Railgun turret's MUST be given a
target, and will not simply shoot because something enters their
range. Reload times
and ranges are specific to each turret and are generally
exceptionally long. The only defense against Railgun attacks are
the Point Defense structures.
NOTE: Railguns DO have minimum attack ranges. They will NOT fire on targets within this range.
Like wall turrets, at any time the player may choose to change
the Railgun turret. The build time and cost for that specific
turret always applies, even
when replacing an existing turret.The main advantage is not
having to build another platform, but obviously it will be
cheaper in the long run to build
more platforms rather than changing the existing turret to
something else.
Some turrets are common to all corps, some are unique to a corp. Some turrets become available further down the tech tree.
ImagingPoleSalvo - Shoots 5 imaging poles to designated target.
OrbitalBomb - Powerful weapon that launches a highly destructive shell at designated target.
NeutronBomb
- Destroys
manpower when launched at a base, and can kill a crew inside of a
weak Combot. This leaves the
Combot vacant for other crews to take over, if the Combot has
less than 20% health remaining.
TectonicTorpedo - Powerful shell
that penetrates the surface and destroys units underground.
If the shell strikes a unit on the
surface, the unit and the shell may be destroyed.
PhaseCharge - Powerful energy blast that inflicts heavy damage to Combots.
EMPTurret - Electro-Magnetic Pulse that damages Combots and disables them for several seconds.
ResearchFacility
The ResearchFacility is required to study unfamiliar Combot parts
so your PartsFactory can produce them. Here's how it works: When
an enemy
part is acquired, it can be immediately used by the Combot.
If the player has a ResearchFacility, the act of depositing the
unfamiliar part at the AssemblyBay means it also shows up as a
research option at the
ResearchFacility. Unless an unfamiliar part has been researched,
copies of the part cannot be built in the PartsFactory. Click on
the ResearchFacility to
view the progress of the research as indicated by a build bar in
the portrait window. In the inventory and build part window of
the PartsFactory, a part
under research appears as a darkened icon that cannot be selected
yet. When the research is complete, an audio cues announces a new
part is
available, and the ResearchFacility is available for you to tell
it what to research next. In the PartsFactory the newly research
part is now "undarkened".
Researching a part can be canceled at the ResearchFacility
(player deselects the part being researched). During the midst of
researching a part, the
player can cancel research (research time spent on it is lost),
and the part is now available for selection in the inventory of
parts at the AssemblyBay
(and the darkened icon in the Build section is no longer there).
If the player deposited the part again for research, the process
starts all over from the
beginning as if it had never been partially researched before.
Constructing multiple ResearchFacilities allows you to carry on
separate research projects at the same time. Research projects
that are underway at
another facility are darkened and cannot be selected.
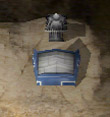
PointDefenseSystem
The PointDefenseSystem is a small structure. The central part of
the structure is a Spherical "projector", which creates
the defense sphere
.
The PointDefenseSystem starts out with three protectors. This is
represented by small discs which slowly orbit around an invisible
half-sphere
over your base. The protector orbits slowly about, and when a
Rail-Gun launched shell or bomb begins to come into range, a
protector will quickly
move along this "sphere" to intercept the target. It
will also block enemy aircraft from entering it's airspace. You
can build as many as you like, but only
6
protectors will be deployed at a time (destroyed protectors are
automatically replaced if you had extras built up beyond 6).
PointDefenseSystem,
each one is able to absorb a single hit.
So, the more you have, the more simultaneous hits that can
absorb. For example, if 4 NeutronBombs are launched at my base,
and I have 3
protectors, 3 bombs will be absorbed but the 4th one will get
through. The 3 protectors are destroyed in the process.
SolarPanel
SolarPanels provide another
method of gathering metajoule energy. They can only be built in
Orbit (where they work best), on the Surface (work
poorly, say 25% efficiency) or Underground (no solar energy
collected). The advantage of collecting solar energy vs. lava
mining is solar energy is a constant resource which never runs
out. Also, it does not require you to go hunting around
potentially dangerous exposed
parts of the map for you to get the energy and it doesn't take
men to man the solar panels. Downside of SolarPanels is that they
acquire metajoule
energy very slowly, and although small, they do take up precious
land on your asteroid base. They're also very fragile, so they're
easy to destroy.
AIFacility
The AIFacility allows for moving
further down the tech tree, more construction options and, in
particular, it lowers the number (e.g., 30% global
reduction in men required for vehicles, structures, etc.) of men
required to operate the base. Just what you'd expect an AI
Facility to do!
Other
Structures
Archeology Station -
For
Single-Player missions only. Has no abilities or functions
other than those tied to a mission description.
Prison -
For
Single-Player missions only. Holds Combot Crews until
destroyed. Has no abilities or functions other than those
tied to a mission description.
Alien Enhancers (Attack,
Construction, Defense, Recon) -
Enhances the
owner's Attack, Defensive, Construction or Recon abilities
depending upon which enhancer is owned. Enhancers can be
"captured"
by "invading" them with a DrillTruck.