 .
.Use the Define Sites command to add or change the remote server information, local root folder, and check in/check out preferences for an existing site or to create a new site.
To define a site:
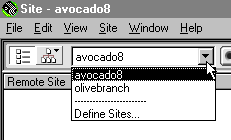
| 1 | Choose Define Sites from the current sites pop-up menu in the Site window, or choose File > New Site (Windows) or Site > Define Sites (Macintosh)
. |
| 2 | In the dialog box that appears, click New or select an existing site and click Edit. |
| 3 | In the Local Info panel of the Site Definition dialog box, enter a site name and click the folder icon to browse to and select a local root folder (the folder that represents the top level of your site) if you have not already done so. |
| 4 | Select the Cache option to improve the speed of link and site management tasks. See Managing links. |
| 5 | Enter the URL of your site in the HTTP Address field. |
| For example, the HTTP address for the dreamcentral web site is http://www.dreamcentral.com. This value is used by the Link Checker to determine whether absolute path links refer to files within your site or to files on external sites. See Checking links between documents. | |
| 6 | In the Category list at the left, click Web Server Info. |
| 7 | Choose one of the following Server Access options: |
| Use None if you only want to work with your site locally and do not plan to upload it to a server, then skip to step 13. | |
| Use Local/Network if your web server is mounted as a network drive (Windows) or as an NFS server (Macintosh), or if you are running a web server on your local machine. Click the folder icon to browse to and select the folder where your site files are stored on the server and then skip to step 13. | |
| Use FTP if you connect to your web server via FTP. | |
| 8 | Enter the host name of the FTP host to which you upload files for your web site. |
| Do not use ftp:// in front of the address. For example, the FTP host for the dreamcentral web site is shell16.ba.best.com. | |
| 9 | Enter the name of the host directory at the remote site where documents visible to the public are stored (also known as the site root). |
| For example, the host directory for the dreamcentral site is public_html/. For other sites, the directory may be several levels down (such as www/public/docs/ or public_html/htdoc/), or it may be the login directory (in which case this field should be left blank). | |
| 10 | Enter your login name and password. |
| Your password is saved automatically. Deselect Save to be prompted for a password each time you connect to the remote server. | |
| 11 | Select the Use Firewall option if you are connecting to the remote server from behind a firewall. See Site FTP preferences. |
| 12 | In the Category list at the left, click Check In/Out. |
| Turn on the Enable File Check In and Check Out option if you are working in a team environment (or working alone but from several different machines). | |
| This option is useful for letting others know that you have a file checked out for editing, or for alerting yourself that you may have left a more recent version of a file on another machine. See Using the check in/check out system. | |
| Turn on the Check Out Files When Opening option if you want files to automatically be checked out when you double-click to open them from the Site window. | |
| Enter a check-out name. | |
| This is the name that will appear in the site window alongside any files that you have checked out, enabling other team members to locate you if you have a file that they need. If you work alone from several different machines, use a different check-out name on each machine (for example, AmyR-HomeMac and AmyR-OfficePC) so you'll know where the latest version of the file is if you forget to check it back in. | |
| 13 | Click OK. |