To get started working with Dreamweaver, you need to create a local site. This site defines the structure of the pages you are creating.
A site is a storage location for all the documents and files belonging to a web site. A local site requires a name and a local root folder, which tells Dreamweaver where you plan to store all of the site's files. You should create a local site for each web site you work on.
For this tutorial, you'll specify the Olivebranch_site folder as the local site folder.
To create a local site:
| 1 | Open the Site Definition dialog box in Dreamweaver as follows: |
| On the Macintosh, choose Site > New Site. | |
| In Windows, choose File > New Site. | |
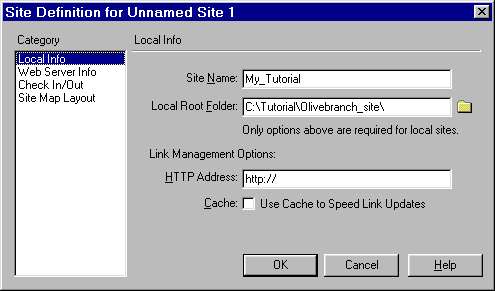
| 2 | In the Site Definition dialog box, make sure that Local Info is selected in the Category list. |
| 3 | Name your site My_Tutorial by typing in the Site Name field. |
| The name of your local site is essentially a nickname that leads directly to the folder that you've defined as your local site. | |
| 4 | Click the file folder to the right of the Local Root Folder field and navigate to the Olivebranch_site folder, then click Select.
|
| Note: The complete path to the Olivebranch_site folder will vary, depending on where you have Dreamweaver 2.0 installed. | |
| 5 | Click OK, then click Create when asked if you'd like to create a cache file for the site. |
| Caching the files in the Olivebranch_site folder creates a record of existing files so Dreamweaver can quickly update links when you move, rename, or delete a file. | |
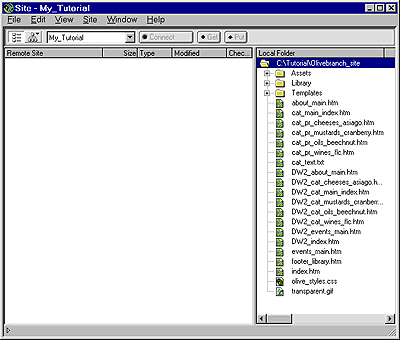
| The Site window now displays a list of all the folders and files that the local site My_Tutorial contains. The list also acts as a file manager, allowing you to copy, paste, delete, move, and open files just as you would in the file finder or explorer on your own computer.
|
|
| 6 | Close the Document window for index.htm, but leave the Site window open. |