It's time to start sending Christmas cards again! So Helen Bradley and Annette Castles have created some cost effective ideas for making your own personal cards..

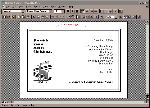
Figure 1b: This month's design project is a folded Christmas card that is smart, stylish and simple to create.
By folding a rectangular sheet of paper twice you can create a clever, free-standing card. Depending on whether you're designing for yourself, your family or your business, you can personalise it in unlimited ways. One of the advantages of this card is that you send the paper through the printer only once, saving time and wear and tear on your printer. However, you'll need to be careful when you're folding the card to make sure the graphic is centred in the borders when the card is 'closed'.
The card, shown in Figure 1b, uses a Reindeer graphic from Corel Gallery. This has been teamed with the decorative font Broad-Street for the main greeting. Other fonts that would have worked equally well include Penoir, Blippo and Impact. However, this graphic would look uncomfortable against, say, a more traditional Christmas font such as Vivaldi or Script-Roundhand. The sans serif font Arial has been used for the inside text. Broad-Street and Arial work well together because, although they're similar in shape, they contrast strongly in weight and style. For your card, choose a graphic from your own collection and a font that works with it and reflects your personality.
The lines around the card border mimic the weight of the lines in the graphic and stabilise the page. Heavier or lighter lines would have left the card unbalanced. Notice how the text on the front of the card lines up with the edge of the graphic and the text on the right is right-aligned. These strong edges to the text areas form an invisible frame inside the border and help keep the card balanced.

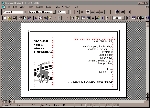
Figure 2b: All the elements on the page are tightly aligned; the 'invisible' lines are made visible here so you can see how they work.
.
If you print your design in black on coloured card you'll find it's cost-effective. We used a pine green paper with a leather-grain finish. When folded, the card fits easily into a C5 envelope and you'll find these, along with a fabulous range of coloured papers, at any good stationery outlet.
Your database
One of the nicest things about this design is that it will interface with your customer
database. You can replace the salutation with a merge field and merge print the cards. Not
only does this allow you to personally address each card, but you can easily mix and match
the message in the text depending on whether you're sending the card to a friend or a
client.
Open a new document and using the Page Setup options in your word processor choose A4 size paper with a Landscape orientation. Set the margins around the page to 2cm top, bottom, left and right.
The borders are two unfilled rectangles drawn using the drawing toolbar. The borders of the rectangles are each 5pt weight, and the Fill has been set to None (Transparent). With snap to grid turned on it's a simple process to size the rectangles to fill the page and to position one inside the other.
The graphic is placed on the page using the word processor's Insert, Picture option. If you don't own Corel Gallery, then search through your own clipart collection for a suitable graphic to use. Position the graphic in the first third of the page; you'll want it where it can appear centred on the page when the card is folded.
The text is placed in two separate Text Boxes -- one for the text on the left and one for the text on the right of the page. The text in the text box on the left of the page is left-aligned and the text in the right text box is right-aligned. Type your text (we used Broad-Street 23.5pt and Arial 20pt) and line the text boxes up so the distance from the edge to the nearest border is the same for each text box. Line the left edge of the graphic up with the left-most text box. Figure 2b shows you how each element lines up with the invisible lines on the page.
If you find an element of your document 'disappears', it will be caused by an object being layered over the top of another. Try selecting the object that's visible and, using one of the layering options such as Send Back or Send Behind Text, alter the layering to reveal the missing part of your document.
If you choose to merge print your document, use your word processor's Merge function to replace the salutation with the appropriate fields from your customer database.
Top of page |
WEB: |What's New
| Net Guides | Web Workshop | Net Sites | About PC User |
|