| User Level: Beginner
to Intermediate What you need: Word 97, Word Pro 97, WordPerfect 7 |
What's on the CD?
In the \INTERACT\PLANNER\ folder
on the CD you will find a sample document in Word DOC, WordPerfect WPD
and WordPro LWP formats.

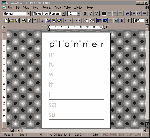
Figure 1a: This month's project is a weekly planner that is striking but
quite easy to create.
Never forget a meeting or lunch date with Helen Bradley's neat weekly planner.
This month's project is shown in Figure 1a. The planner is printed on A4 paper although you can size it down to half-size and print it on A5 paper. Start with a new document in your word processor and follow these steps:
Step 1: Set up your page size to A4 paper. In WinWord use File, Page Setup, Paper Size, in the Paper Size list box select A4 paper and select OK.
In WordPerfect, use Format, Page, Paper Size and in the Name list box select A4 and press OK.
In Word Pro, select File, Document Properties, Page and the Size and Margin tab. From the Page Size list box select A4 and close the dialogue box.
Step 2: Set up your margins so you can type closer to the edge of the page than you would usually do. In Word use File, Page Setup, Margins and set the Top, Bottom, Left and Right margins to 2cm and select OK.
In WordPerfect, use Format, Margins and set the Top, Bottom, Left and Right margins to 2cm and select OK.
In Word Pro, select File, Document Properties, Page and the Size and Margin tab. From the Page Size list box change the Top margin to 1.5cm and the remaining margins to 2cm and close the dialogue box.
Step 3: Type the word 'planner' in a plain sans serif font in capitals, we used AvantGarde Medium BT, 72 point (pt) size. If you're using Word Pro add a couple of blank lines at the top of the page before you start typing.
To space the letters further apart, in WinWord select the word and use Format, Font, Character Spacing and in the Spacing list box select Expanded and in the By text box experiment with various point sizes until the text stretches the full width of the page (we used 37pt of spacing here).
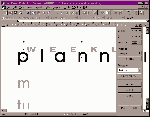
In WordPerfect, select Format, Justification, All (see Figure 2a).
In Word Pro select the text and select Text, Text Properties, select the Misc tab and increase the Kerning percentage until the letters fill the width of the page; we used 98% Kerning.

Figure 2a: WordPerfect's 'All' Alignment option makes stretching the text to fit extremely easy.
In WordPerfect create a text box using Graphics, Text Box, type 'weekly' into it, and set the colour using Format, Font, Shading 25%, and set the Alignment to All. Right-click on the Text Box and set Borders to None and Wrap Text to No Wrap Through. Move the Text Box into position and size it so the letters of the word 'weekly' fall between the letters of the word 'planner'.
In Word Pro use Create, Frame and select Size & Place Frame Manually and click and drag a frame onto the page. Type the word 'weekly' into the frame, including a space between each letter. Set the font, size and colour using Text, Font & Color and select the Misc tab and adjust the kerning until the letters of the word 'weekly' will sit between the letters of the word 'planner'. Select the frame, right-click on it, select Frame Properties and the Placement tab and select the Wrap Through option, select the Lines tab and select Pattern: None and close the dialogue. Move the frame into position.

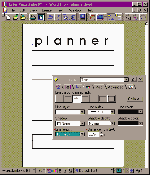
Figure 3a: Create the lines in Word Pro using the Lines tab in the Text Properties box.
In WinWord, select all the days of the week and select Format, Borders and Shading and create a top, middle and bottom 4.5pt thick line for your paragraphs and select Options to set the From Text settings to Top 5pt and Bottom 5pt and click OK twice.
In WordPerfect, position the cursor at the beginning of each line in turn and select Format, Border/Fill, Paragraph, and select a thick bottom border for the paragraph, select the Advanced tab and set the Inside border to 0.2cm and click OK twice. For the first day you will need a thick top and bottom border.
In Word Pro, select the first day of the week, right-click and select Text Properties. Select the Lines tab and select a top and bottom paragraph border, set the line width to 4pt, the Distance From Text to 0.2cm and the Line Length to To Margins. Leave the dialogue box open and select the next day of the week and repeat this step, except this time select only a bottom line. Repeat for the remaining days (see Figure 3a).
Step 6: Save and print your planner.
Top of page |
WEB: |What's New
| Net Guides | Web Workshop | Net Sites | About PC User |
|