Helen Bradley's handy announcement card will provide a myriad of uses -- both business and personal.
In the \INTERACT\
ANNOUNCE\ folder on the CD you will find Announce.doc, Announce.wpd, and announce.lwp for MS Word, Wordperfect and Wordpro formats respectively.

Figure 1b: This month's project is a handy announcement card for business and personal
use.
This project assumes you will use A6 paper or light card (10.5cm by 14.8cm) and that you'll print each announcement separately.
Start with a new document in any word processor and follow these steps.
Step 1: Set up your page size to the size of the A6 paper. In Word 97 you'll use File, Page Setup, Paper Size. In the Paper Size list box select Custom Size, set the Width to 14.8cm and the Height to 10.5cm, set the Orientation to Portrait and select OK.
In WordPerfect use Format, Page, Paper Size, New, call the paper size A6, select Custom Size for its size and enter its Width as 14.8cm and its Height as 10.5cm, select Paper Feed: Long Edge and click OK twice.
In Word Pro select File, Document Properties, Page and the Size and Margin tab. From the Page Size list box select Custom and enter the Width as 14.8cm and the Height as 10.5cm and close the dialogue box.
Step 2: Set up your margins so you can type closer to the edge of the page than you would usually do. In Word use File, Page Setup, Margins and set the Top, Bottom, Left and Right margins to 1cm and select OK.
In WordPerfect use Format, Margins and set the Top, Bottom, Left and Right margins to 1cm and select OK.
In Word Pro select File, Document Properties, Page and the Size and Margin tab. From the Page Size list box change all the margins to 1cm and close the dialogue box.
Step 3: Find a suitable graphic to add to your document. If you have a graphic that you want to place text over the top of, then you may need to edit it to make it more suitable before you begin this step.
In Word include it in the document header and it will lie behind the text on the page. Use View, Header and Footer and add the graphic using Insert, Graphic and position it suitably. With the graphic selected choose Format, Object, select Wrapping, None and OK, then select Close from the Headers and Footers toolbar. If you're using an earlier version of Word, you'll need to place the graphic in the Header but in a text box which you can draw using the button on the Drawing Toolbar, then use Insert, Graphic to add the graphic to the Text Box. Select the Send Behind Text button to ensure the Text Box with its graphic sits behind the text on your page. Select Close on the Toolbar to exit the Header and Footer area.
In WordPerfect select Format, Watermark and select Watermark A and click Create. Click Image and select a file to use. If you need to lighten the image select Shading and adjust the Image Shading down. If your image needs more work then select it, right-click and from the menu select Image Tools to access WordPerfect's own image editing tools.
In Word Pro select File, Document Properties, Page and the Watermark tab. In the Watermark list box select a watermark to use or scroll to the end of the list and select Other and locate a file on disk. Adjust the size and placement of the graphic and close the dialogue box. Because the placement options in WordPro for Watermarks are limited, we had to edit the graphic to add extra space above it so that it would sit correctly on the page.
Step 4: Select the main topic of your message and type it in a large size font across your page and then add the other, longer details in a smaller font. If the text will sit inside your graphic like in Figure 1b, then place it there.
Step 5: Save your file and print as many copies of the slip as you need onto A6 paper.

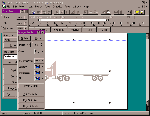
Figure 2b: WordPerfect has its own collection of image editing tools that allow you to create interesting effects without a paint program.

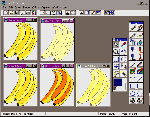
Figure 3b: Using Paint Shop Pro you can alter most graphic images into a format suitable
for use as a watermark in those programs that don't provide image editing options.
- Obtain a supply of A6 paper from your local print shop -- they can cut any A4 paper stock for you to this size. You get four sheets of A6 from one sheet of A4.
- If you don't have a colour printer, use coloured paper or paper with an interesting texture or grain to add interest to your project.
- Use C6 envelopes for your announcement -- you'll find a sheet of A6 fits into this without folding.
- If your printer will handle heavier stock, you can mail the card without an envelope -- just put an address and stamp on the reverse and send it!
Turning a graphic into a watermark
While our instructions here rely on creating a watermark, you'll find that unless you can
type your text within the graphic, most graphics are too dark to put text over the top of
successfully.
If you are using WordPerfect, then you have powerful image editing tools that allow you to alter a graphic to use it as a true watermark (see Figure 2b). However, if you use any other package, it is likely you'll have to do some editing to your graphic before you can use it.
Paint Shop Pro allows you to do this. Open your image in Paint Shop Pro and, using File, Save As give it a new name so you don't damage your original. Now use Colors, Adjust and select Brightness/Contrast and reduce the Brightness to, say, 50 percent. Check your image (you can undo the last change using Edit, Undo) and experiment until you get a good but lighter image to use.
To keep the colour in your image, experiment with Gamma correction before you alter the image's Brightness. To do this use Colors, Adjust, Gamma Correct and set the correction to between 0 and 1. This will accentuate the colours in your picture so that when you reduce the brightness, the colour contrast is stronger. In Figure 3b, the top row shows the original image and then with brightness reduced. The second row has been Gamma corrected first and then the brightness has been reduced.
If you have a laser printer, you can reduce any colour image to grey scale and then reduce its brightness. Use Colors, Grey Scale to change the image and then experiment with Gamma correction and then Brightness as you would any colour image to get a good watermark effect.
Top of page |
WEB: |What's New
| Net Guides | Web Workshop | Net Sites | About PC User |
|