If you think there is nothing more ordinary than page numbers, Helen Bradley shows you how stunning you can make them look.
The sample page numbers are all very different but they have one thing in common -- they stand out. They'll make your documents more interesting because they demand your reader's attention.
Like your choice of document style and font, your numbering style should be appropriate to the document you are producing. But this doesn't mean it has to be plain. With very little effort you can add polish and individuality to your finished product.
In Figure 1b the red semi-circle would be great for a school assignment or a kindergarten newsletter. It's snappy and fun and definitely attention-seeking.
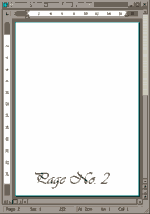
The formal script of the page number in Figure 2b suggests an office report or a more serious document. The size and weight of the numbering underlines the importance of the text.
The page number in Figure 3b is bold and modern. To complete the solid look try it with fully justified text. The overall effect will be strong and dependable and it will win your reader's confidence.
Figure 4b shows an outrageous, colourful and fun-filled waste of space . . . and it's gorgeous! It's perfect if you're not taking yourself or your reader too seriously.
Create your page numbers in the Header or Footer section of your document to ensure that they appear on every page automatically. Also make sure you insert the actual page number in the document using the page number options in your word processor so they are automatically incremented. In Word 97 add a page number using the Insert Page Number button on the Header and Footer toolbar. If you find yourself numbering each page individually then stop! You're doing it the wrong way. Check your word processing manual if you are unsure how to insert page numbers.

This page number is created with your drawing tools and is suitable for a less formal document.
The effect in Figure 1b is created using the drawing tools in your word processor. Draw a filled circle in your footer area and set the outline and fill to the same colour. Place the shape at the foot of the page so the middle of the circle is below where the printer stops printing. Although it looks like the circle will print over the end of the paper, this won't be the case, as most printers won't print to the absolute margins of a page.
If you're using Word 97, before the shape will move off the page, you'll need to set the wrapping by right-clicking on it and using Format, AutoShape, select the Wrapping tab and select Wrapping Style: None and click OK.
The page number goes in the footer area centred over the shape. Format the page number to a large size, say 48 points and white colour. If the number appears behind your shape then use the ordering options to move the shape behind the text.
 Striking and
simple to create, this page number has a more formal look.
Striking and
simple to create, this page number has a more formal look.The page number in Figure 2b couldn't be easier to create. The text and page number are simply centred in the footer area and formatted using Vivaldi 80 point type.
 This page
number is bold and modern and looks great in black and white.
This page
number is bold and modern and looks great in black and white.While you can create the effect in Figure 3b with two shapes -- a large rectangle and a smaller text box -- you will find it difficult to get the text box small enough when you are using large font sizes for your page number. The effect is neater if you use two rectangles and place the page number in a separate text box over the top of the smaller rectangle.
Draw the large rectangle and then place the smaller one in position over the top of it. Each rectangle should have its fill set to white and wrapping set to None. Add the page number in a text box over the smaller rectangle. Set the Text Box Fill to No Fill, so the rectangle shape underneath shows through, and remove the Text Box border if it has one. Format the page number with a large font such as the 200 point Benguiat Frisky ATT font used in Figure 3b.
This page number will look best if you use Justified type and you'll need to juggle the right margin of the first few paragraphs of text on each page to get it to scroll properly around the smaller rectangle.
 If you have a
colour printer this page number is a must for a 'not too serious' document.
If you have a
colour printer this page number is a must for a 'not too serious' document.The effect in Figure 4b is another simple one to create. Select Center alignment, Algerian 100 point type and enter a hash symbol '#', a space and insert your page number. Using the Borders and shading options select a blue shading for the paragraph and a 6 point solid black bottom border. If you make the margins for the header area smaller than the page margins you can make the blue shading appear closer to the page edge.
Top of page |
WEB: |What's New
| Net Guides | Web Workshop | Net Sites | About PC User |
|