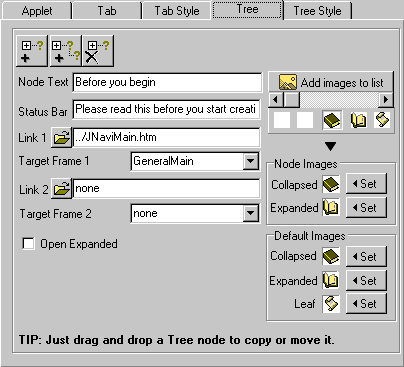
Options set on this page (other than the default icons) relate to the SELECTED node only.

| Tab
Panel - Tree Component
|
| The
Tree Component page of the Commander is used to set the individual
nodes (branches) of the Tree part of the applet.
Options set on this page (other than the default icons) relate to the SELECTED node only. |

|
|
|
| Adding
tree node on same level To add a new node on at the same level as the selected node. A pop up box will then appear asking whether to place the new node directly above or below the selected node. |
|
|
|
|
| Adding
child tree nodes To add a new node as a child branch of the selected node. |
|
|
|
|
|
|
Deleting
tree nodes To delete the selected node. |
|
|
|
|
|
|
|
|
Re-arranging
tree nodes To move or copy nodes within the tree. Simply drag and drop them to the desired position within the tree. ie: Just select, click and drag them with the mouse, releasing them on the node where you wish to shift them to. |
|
|
|
| Options |
From the dialogue box, select one of these options: Move and insert as CHILD: Move and insert on SAME level: Copy and insert as CHILD: Copy and insert on SAME level: |
|
|
|
Note |
The dialogue box requires that the selected option is double-clicked. |
|
|
|
|
|
|
| Node
text The text entered here is the text which is displayed on the currently selected node. |
|
|
|
|
| Status
bar text This text will be shown within the status bar during a Tree node mouse-over event. (The status bar is the text bar at the bottom of the window.) |
|
|
|
|
| Link
URL 1 The first Link URL which will be executed when the selected node is clicked. |
|
|
|
|
|
Target frame 1 The target frame in which the first Link URL will be opened.
|
|
|
|
|
|
Example |
Splitting the window into 2 frames using the following HTML code: This means: |
|
|
|
|
|
If further explanation of the terminology above is required, please refer to the documentation that comes with your HTML editor about frames. |
|
|
|
|
|
|
| Link
URL 2 The second Link URL which will be executed when the selected node is clicked. |
|
|
|
|
| Target
frame 2 The target frame in which the second Link URL will be opened. |
|
|
|
|
| Open
expanded If set (and the node has children) then it will be shown, expanded. |
|
|
|
|
| Adding
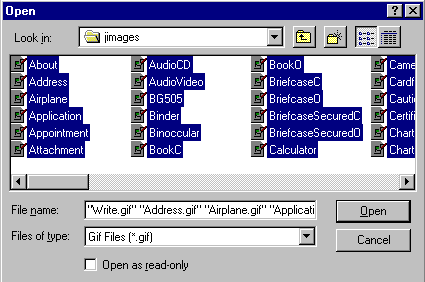
images (tree icons) Additional images (icons) may be added to the image slider. A standard Windows File Open dialog box will open to the "jimages" file. (as shown below) |
|
|
|

|
|
|
|
Tip |
You may add your own icons,
but they must be a valid gif format (16 x 16 pixels).
Add even more great images from Auscomp's FREE 3D Icon Library - compliments of Auscomp - World Wide. |
|
|
|
|
|
|
| Node
images Choose an image (icon) from the image slider in the Node Images section.
|
|
|
|
|

|
Default
images To help speed up the loading process, default icons may be set. These icons are chosen in the same way as the images
for each node. |
|
|
|
Tip |
To help speed up the applet loading time for your users, set the default icons or use no icons. |
|
|