
Chapter Two
Installing PolyForm
Now that you have a sense of what PolyForm can do for you, the next
step is to install the software. Installing PolyForm takes just a few minutes.
You will provide some basic system information and PolyForm will retrieve
some information from your Web server's registry.
You will first need to verify that you have the required hardware
and software as listed in the "Before You Install" section
of this chapter. That section also describes the other information
PolyForm's installation process requests. You should then follow the
step-by-step instructions in the second section. The rest of the
chapter discusses where you can obtain more information about PolyForm
and what to do next.
When you finish this chapter, you will be ready to use PolyForm to
construct your own Web forms and respond to each user's input.
Before You Install
PolyForm has fairly simple requirements, which your system must meet
before you begin to install the software.
Hardware Requirements
The degree of traffic on your Web site will determine whether you
can get by with the minimum requirements or whether you should aim for
the recommended hardware, as listed below. In general, Web servers are
memory-hungry, so more Random Access Memory (RAM) can be a significant
advantage. Here are the recommended hardware standards for running
PolyForm:
- 80486, Pentium, or compatible processor
- 16MB RAM minimum for Windows NT, 32MB recommended; 12MB RAM for Windows
95, 24MB recommended
- 6MB free hard disk space
- VGA video display adapter; SVGA recommended
- 1.44MB, 3.5-inch floppy diskette drive
Operating System Requirements
PolyForm is a full 32-bit Windows application that requires one of the
following operating systems:
- Windows NT 3.51 or higher; PolyForm does not run on Windows NT 3.5
- Windows 95
Web Server Requirements
PolyForm works with any Web server that is fully compliant with the
Windows Common Gateway Interface (Win-CGI) standard, version 1.1.
The following Web servers are known to work with PolyForm at the time
of publication:
- WebSite from O'Reilly & Associates, Inc.
- Alibaba from CSM (Computer Software Manufaktur, Austria)
- Commerce Builder from Internet Factory
- Communications Builder from Internet Factory
- Commerce Server from Netscape
- Communications Server from Netscape
- FolkWeb from Ilar Concepts
- IIS from Microsoft
- Web Commander
- WebStar from Quarterdeck
- ZBServer from ZBSoft
Other Win-CGI 1.1 compliant Web servers will certainly become available.
Check online at http://polyform.ora.com for up-to-date information.
Mail Server Requirements
To take advantage of PolyForm's ability to send email, you need access
to a Simple Mail Transfer Protocol (SMTP) mail server. SMTP is the Internet
standard for sending email messages. Access to an SMTP server generally
means either you are using a mail server that your Internet Service Provider
(ISP) provides, or one that you run yourself on your local network.
Ask your Internet service provider or network administrator if you have
access to an SMTP mail server.
To integrate messaging systems such as MAPI or Microsoft Exchange, you
still need an SMTP/POP server on the local network.
Information You Need During Installation
PolyForm's installation routine will ask you for the following information:
- Fully Qualified Domain Name
- A Fully Qualified Domain Name (FQDN) is the Internet address of your
server. You will recognize it from such examples as: website.ora.com,
www.whitehouse.gov. Either your Internet service provider or network
administrator can provide you with the FQDN for your server.
- Mail server
- The mail server is the SMTP Internet mail server address. Contact your
Internet service provider or network administrator if you do not already
know this address.
- Full path to Windows CGI directory
- Typically this is a subdirectory called cgi-win under your Web
server's directory. If your server does not follow the standard, you may
not have a directory named cgi-win. In this case, install PolyForm
in a directory in which you know you can run Windows CGI programs. During
the install process, enter the full path and URL of this directory. See
your Web server's documentation for more information.
- URL of the Windows CGI directory
- This URL is typically specified by the server software. It must be
the full URL, including the Fully Qualified Domain Name of the server,
for example, http:// your.host.com/cgi-win/. Contact your Web server
administrator if you need help with this.
- PolyForm administrator's email address
- This is the default return email address for email sent by PolyForm.
Installing the Software
Like other Windows software, you install PolyForm by running setup.exe
on the first distribution disk.
Note:
Close all other software, including your Web server, so Setup can
update all the necessary files.
Follow these steps to install PolyForm:
- Start your computer and log in to Windows NT (3.51 or higher) or Windows
95. Exit from any other Windows programs that may be running.
- Insert Disk 1 into the 3.5-inch drive on your system.
- Select setup.exe in the File Manager or Windows Explorer and
press Enter, or double-click. The PolyForm Install Wizard (Setup) runs,
displaying the Welcome to PolyForm screen as shown in Figure 2-1. The Install
Wizard collects required information before installing the software.
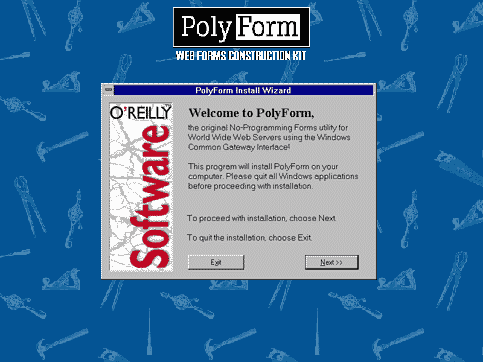
Figure 2-1 PolyForm Install Wizard
- Choose Next. Setup displays the Registration Information screen.
- Enter your name, company name, and the serial number from the label
inside the product diskette envelope. To continue, choose OK. Setup displays
a verification screen.
- Verify that you have entered the correct information. Choose Yes to
continue. Choose No to return to the previous screen to change the information.
When you choose Yes, Setup displays the Server Software screen as shown
in Figure 2-2.
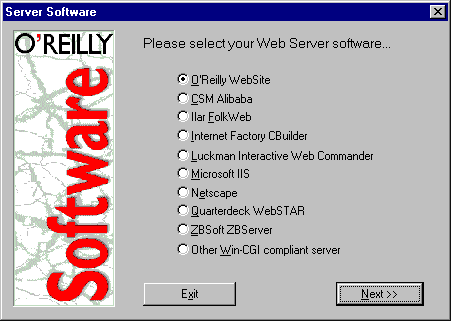
Figure 2-2 PolyForm Install Wizard Server Software screen
- Select the Web server you will use with PolyForm. If your Web server
is not listed, select Other Win-CGI compliant server. Choose Next. Setup
displays the Server Domain Name screen.
- Enter your server's fully qualified domain name and choose Next. Setup
displays the Window CGI Directory screen.
- Select the Windows CGI directory path for your server and choose Next.
PolyForm may be able to identify this directory, depending on which
Web server you are using. If you need to change the directory, type the
path or use the drive and directory boxes to browse. PolyForm must be installed
into a directory configured by your Web server software as a Windows CGI
directory. Consult your server documentation if you are not sure which
directory has been designated as a Windows CGI directory.
Setup displays the CGI Directory URL screen.
- Enter the complete URL of the Windows CGI directory for your
server in the format http://your.domain.name/cgi-win/, where
your.domain.name is the fully qualified domain name of your Web
server, and cgi-win is the directory that has been designated
as a Windows CGI directory. Choose Next. Setup displays the Mail
Settings screen.
- On the Mail Settings page, enter the SMTP server, and the default return
email address for email generated by PolyForm. Choose Next to continue.
Ask your Web administrator, Internet service provider, or network
administrator for this information.
Setup displays the Make Backups screen.
- We recommend that you choose to back up the files that Setup will replace.
This includes files from a previous version of PolyForm, as well as any
files that PolyForm replaces with more current versions. To back up files
that will change, choose Yes. Choose No to skip the backup process.
- If you chose to back up files, select the directory to use for the
backup. Choose Continue. Setup will copy files to your hard disk. Setup
displays the Ready to Install screen. (See Figure 2-3.)
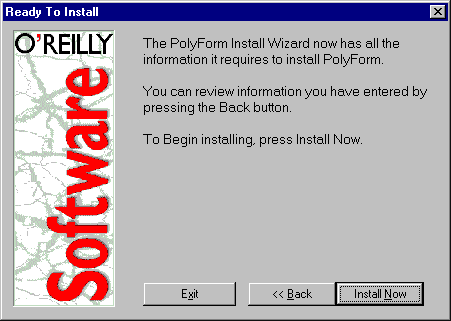
Figure 2-3 Ready to Install screen
- Choose Install Now to install PolyForm according to the information
you entered. Choose Back to review information you entered.
When you choose Install Now, Setup places the polyform.exe
file in the directory that contains your Windows CGI files, and
creates a subdirectory called pftools for various other
PolyForm files.
Subdirectories under pftools are the default locations for
form, template, and other files you create through PolyForm, though
you may place these files in other locations. If you create a file in
one of these directories, but move it later, you should update its
location in the PolyForm Control Panel.
- If you had a previous PolyForm installation on your hard disk, Setup
displays the Import Previous Configuration? dialog. Choose Import to import
the scripts from a previous installation.
- When Setup displays the Insert New Disk dialog, place the second
installation disk in the floppy diskette drive and choose OK. For
Windows NT 3.51 only, Setup then displays the Select Program Manager
Group dialog.
- If you are running Windows NT 3.51, select a Program Manager Group
for the PolyForm icons and choose OK. Setup creates the Program Manager
Group if necessary, and adds the icons. For Windows 95 and Windows NT 4.0,
Setup installs the icons in a program folder called PolyForm 1.0.
Depending on your operating system, the Program Manager Group or Start
menu program folder contains three icons:
- PolyForm Control Panel creates scripts that tell PolyForm how to process
information submitted via a form.
- PolyForm CGI displays on your desktop a count of the number of times
forms are submitted to PolyForm.
- PolyForm ReadMe displays the release notes.
For Windows NT 3.51 the Program Manager Group also contains a PolyForm
Uninstall icon to remove PolyForm files and Registry entries. For Windows
95 and Windows NT 4.0, the PolyForm Uninstall icon is found in the Windows
Control Panel, Add/Remove Software.
Setup displays the PolyForm Release Notes screen.
- Read the Release Notes and follow any instructions. Choose OK. Setup
displays the Install Complete! dialog.
- Choose OK. Setup closes, revealing your desktop.
- Immediately after installing PolyForm, use the access control in your
Web server to restrict access from the Web to the pftools subdirectory
and its subdirectories. The programs and files in these directories must
not be accessible to Web browsers. Refer to your server's documentation
for information on access control.
To update the installation information, choose Settings from the Options
menu on the PolyForm Control Panel.
At this time, please register your copy of PolyForm. You may either
fill out and mail the registration card in the front of this manual, or
register online at: http://polyform.ora.com/register.html. To register
online, you must provide the serial number from the label inside your PolyForm
product diskette envelope.
For More Help
Several sources of help are available to you, including:
- This book, Building Interactive Web Forms with PolyForm
- PolyForm Online Help
- PolyForm OnLine (polyform.ora.com/)
- PolyForm technical support
Getting the Most Out of This Book
This book provides comprehensive instructions for installing and running
PolyForm. Chapter 3, Getting Started with PolyForm, introduces you
to the PolyForm Control Panel's menus, toolbar, and tabs, as well as to
the PolyForm Script Wizard. Chapter 4, PolyForm Tools, discusses
each of the PolyForm tools in detail. Chapter 5, Creating Applications
with PolyForm, shows how to create some common, and some less common,
PolyForm applications. Chapter 6, Form HTML Basics, introduces HTML
for forms and then provides a complete reference. Chapter 7, Advanced
Form HTML, discusses advanced HTML techniques that you can use in your
forms. The Appendix helps you diagnose and correct problems you may have
with your scripts.
Using Online Help
You can start PolyForm's online help through the Help menu, or by
choosing one of two help icons on the toolbar. As with online help for
other Windows-based applications, PolyForm help includes hyperlinks to
associated topics, and topic searching.
Using Web Resources
The most exciting source of help and other information about
PolyForm is the Web site maintained by PolyForm's technical support
group at http://polyform.ora.com.
Technical Support
PolyForm phone technical support is free of charge for the first
90 days for registered users.
Technical support contracts for a full year are also available. Please
contact O'Reilly & Associates Customer Service department for more
details.
What Next
Now that you've installed PolyForm, you're ready to use the
PolyForm Control Panel to build a form and choose what you want to do
with the information users submit. Chapter 3, Getting Started with
PolyForm, introduces you to this process.
 Chapter 3