


To add an appointment using the Daily Appointments window, do the following:
Click and keep depressed the left mouse button in the time slot that you wish the appointment to start.
While keeping the left mouse button depressed, drag the mouse down until the appropriate number of time slots have been selected, representing the appointment's duration. Release the mouse button.
Now start typing the description of the appointment. When you have entered the description press Enter to save your changes or press Esc to discard your changes.
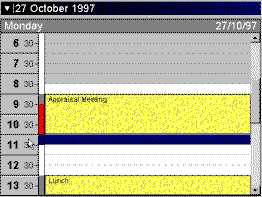
The Daily Appointments window can show several appointments occurring simultaneously. To add an appointment at the same time as an existing appointment, do exactly as above but ensure that you select the appointments duration by clicking and dragging in the time bar to the left of the appointment window. This will ensure that you do not mistakenly drag any existing appointments.
Another way of adding an appointment is by double clicking the left mouse button in the time slot that you wish the appointment to start. The Appointment property sheet is displayed and the duration of the appointment will default to 30 minutes.

Enter a description for the appointment. You may change the start time, the end time or duration. You may also specify the following additional attributes:
| Attribute | Description |
| Remind Time | You can instruct OfficeTalk to remind you a certain length of time prior to an appointment's start time. To do this select the Remind check box and specify the amount of warning required in the Remind Time field. The remind time may be entered as a certain number of days, hours and minutes. For example, you could specify a remind time of two days by entering '2d', or a remind time of 1 hour and 45 minutes by entering '1h45m'. When you set a reminder for an appointment a {bmct help0027.bmp} marker will be shown on the appointment when viewed in the Daily Appointments window. |
| Private | If you do not want other people to be able to see the detail of a particular appointment then you can mark the appointment as private by checking the Private check box. Only you will be able to see the description of the appointment. Even if other users have full access to your appointments they will still only see the word 'Private' in place of the appointment's description and will not be able to edit the appointment. |
| Tentative | Sometimes you may want to pencil in an appointment, meaning that the appointment is not definite. Such an appointment is called a tentative appointment. You can mark an appointment as tentative by selecting this check box. |