Getting Started with NetSwitcher
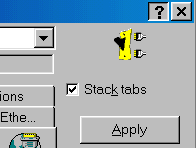
First and foremost, how to figure out what all the different boxes in the NetSwitcher windows mean. NetSwitcher has been designed with a context sensitive help system to assist you. To use this help, click your mouse on the "?" at the top right-hand corner of the NetSwitcher window:
Then drag the "?" cursor to the control you want information about. Click the mouse there and you will get the help window displayed:

Once you understand the function of the various controls on the NetSwitcher window, you can begin saving and restoring your own setups. Jump to the Procedures section to continue.
If you read nothing else about NetSwitcher, please read this short section. It is designed to familiarize you with the most basic features and usage of NetSwitcher and help you get the most benefit from it.
The most common question we get is basically:
"I just had a [cable modem | DSL line] installed at home and I heard that NetSwitcher might help me switch between by work settings and what I need to use at home. What do I do? The techs at [name of your cable or DSL provider] don't have a clue how to use NetSwitcher."
Here is what we recommend that you do:
Before changing anything on your
system, run NetSwitcher and click the ![]() button. This will make a "snapshot" of your current network
settings and will permit you to come back to this later. Let's assume
that this is your typcial OFFICE setup so when NetSwitcher asks for a name
for this setup, give it the name "OFFICE".
button. This will make a "snapshot" of your current network
settings and will permit you to come back to this later. Let's assume
that this is your typcial OFFICE setup so when NetSwitcher asks for a name
for this setup, give it the name "OFFICE".
Now you're ready to configure for your cable
or DSL setup. Use whatever information your cable or DSL provider has
given you. This will undoubtedly involve procedure using the Windows
Network Control Panel (NCP) or perhaps running some setup program they have
provided you. Don't ask them about NetSwitcher as they are not
trained in its use. They basically know only the
"standard" Windows procedures for which they have been
trained. Follow their instructions until your cable or DSL connection
is working.
Now, you can use NetSwitcher again to save
this cable or DSL setup. Run NetSwitcher as before and click the ![]() button again. This will now save the current cable or DSL setup.
Give it a name like "CABLE" or "DSL". Now you can
come back to this setup when you need it.
button again. This will now save the current cable or DSL setup.
Give it a name like "CABLE" or "DSL". Now you can
come back to this setup when you need it.
Now you're all set. You have 2 setups,
OFFICE and CABLE or DSL. Before you go to the office, run NetSwitcher
and select the OFFICE setup from the ![]() selection box. Then click the
selection box. Then click the ![]() button. Then your system is ready for the office network. Before
you go home, again run NetSwitcher and choose the CABLE or DSL setup.
Be sure to click the
button. Then your system is ready for the office network. Before
you go home, again run NetSwitcher and choose the CABLE or DSL setup.
Be sure to click the ![]() button again. Remember, NO CHANGES ARE MADE TO YOUR SYSTEM
UNLESS YOU CLICK
button again. Remember, NO CHANGES ARE MADE TO YOUR SYSTEM
UNLESS YOU CLICK ![]() .
.
That's it, a crash course in using NetSwitcher. As you become more familiar with Netswitcher there are many other features that you might make use of but this will get you going fast. ENJOY!