 |
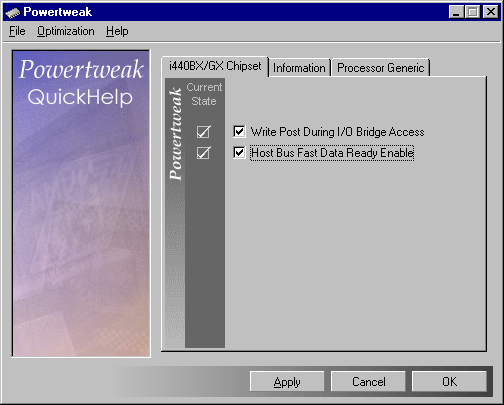
The powertweak main window
This window is composed of a few elements which will be shortly described.
- The property page: Each page corresponds to one of the components that
have been detected in your system. In these page you have several options available, which
are greyed out if you have selected a preset mode (described later).
- The Current State Column: Shows whether the current option is activated
(checked box) or not (empty check box). If the state is not available, then there is
nothing displayed.
- The QuickHelp : Displays information about options. To get information
on a particular element, simply place the cursor over one check box, and the corresponding
text will display, if it is available.
- The Control Bar : at the bottom of the window with a gradent : Apply
configures the system without exiting, OK configures and exits, cancel
exists without configuring.
|
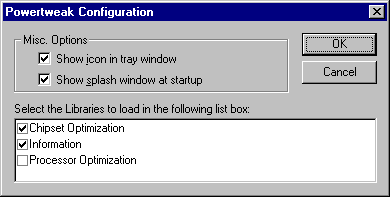 |
The configuration window
This window is displayed by the menu command File -> Options
- Show icon in tray window : determines whether Powertweak displays the
icon in the tray window that will indicate your system has been optimized.
- Show splash window at startup : If not selected, it will not display
the powertweak window at system startup. Do this ONLY if you are sure your system is
properly configured, as this splash screen enables you to abort the configuration of your
system by pressing "escape" when this window is visible.
- Loaded libraries : Enables you to select which libraries to load. This
is useful if you know one of them makes the system crash: for instance, if the
optimization of the chipset causes problems, you just need not to load this library, this
will allow you to use Powertweak for your processor.
|
|